** If you would like to see an image on our blog in a larger format, just click on it to enlarge.
Note: Links to products within this post are either links to our website or affiliate links.
Welcome to Day 4 of the Ellie Inspired Sleepy Bear PJ sew along!
If you do not have your pattern yet you can purchase it from the shop. It is a PDF so you can print today and be ready to start. You can purchase a kit as well from the shop. It has everything you need, other than thread, to make a set of cozy pjs!
Before you begin today's lesson please read all of the pattern directions. During today's lesson we will be sewing the doll matching set to our children's Sleepy Bear pj's. The doll version is much like the children's, except the shirt has hook and loop tape on the back side so it is easy to dress a doll.

1. Just as with the children's shirt, we are going to add fusible interfacing to the shoulders on the front shirt piece.

2. Pin the two back bodice pieces at shoulders, with right sides facing the front shirt. Sew in place. Press the seam to the back of the shirt.

3. We are going to hem the doll shirt in the same manner as the children's version. On the doll we will press it under a ¼", then again ¼". Stitch in place with your twin needle as before.
4. Pin the sleeve in place with the right side of the sleeve facing the the right side of the shirt, matching the center of the sleeve with the shoulder seam. Sew in place.

5. Press the seam towards the sleeve. Repeat with second sleeve.

6. Taking our neck binding, press it in half lengthwise with the wrong sides together.

7. Take the neck binding and fold in so that it makes a V point in the front with the folded edges facing up and the raw edges facing down. Baste the V point together.

8. Cut the center back of the neck binding opening. This will allow the neck binding to fit the open back of the doll shirt.

9. Just as withe the children's version, start by pinning the V point on the wear's right side. Pin the neck binding all the way to the back opening of the right side of the shirt.
**Note, the neck binding will be a bit longer than the shirt, Just trim that off.**

10. Sew the right side of the neck binding in place, then pin the left side of the neck binding in place and sew.

11. At the V point, I like to tuck my serger threads in with a tapestry needle for a clean finish.

12. To finish the sides of our shirt, fold the shirt in half with the right sides facing and matching the under arm seam. Pin in place, then stitch. Repeat with second shirt side.

13. Finish the shirt back side edges.

14. Finish the shirt's bottom edge.

15. To hem the shirt, I like to press up a tad more than a ¼" then stitch this hem in place with my twin needle.
16. Hem the back of the shirt in the same manner as the bottom of the shirt.

17. Now, we are going to add the hook and loop tape to the back side of the shirt. Take your hook and loop and cut to the length needed. Then, cut the hook and loop tape in half, cutting right down the center of the width to create a long skinny piece. The piece to the left is the full size hook and loop tape and the ones to the right are cut to the right width.

18. To sew the hook and loop tape on, place the rough side facing up on the wear's left side and the soft side onto the wear's right side and facing the inside of the shirt. Stitch these both in place.
The shirt is all
done!!

Now, onto the doll pants!! These are quick to sew. I love them!
19. Press the bottom of the pants up ¼" twice. Stitch the hem in place and repeat with second pant leg.

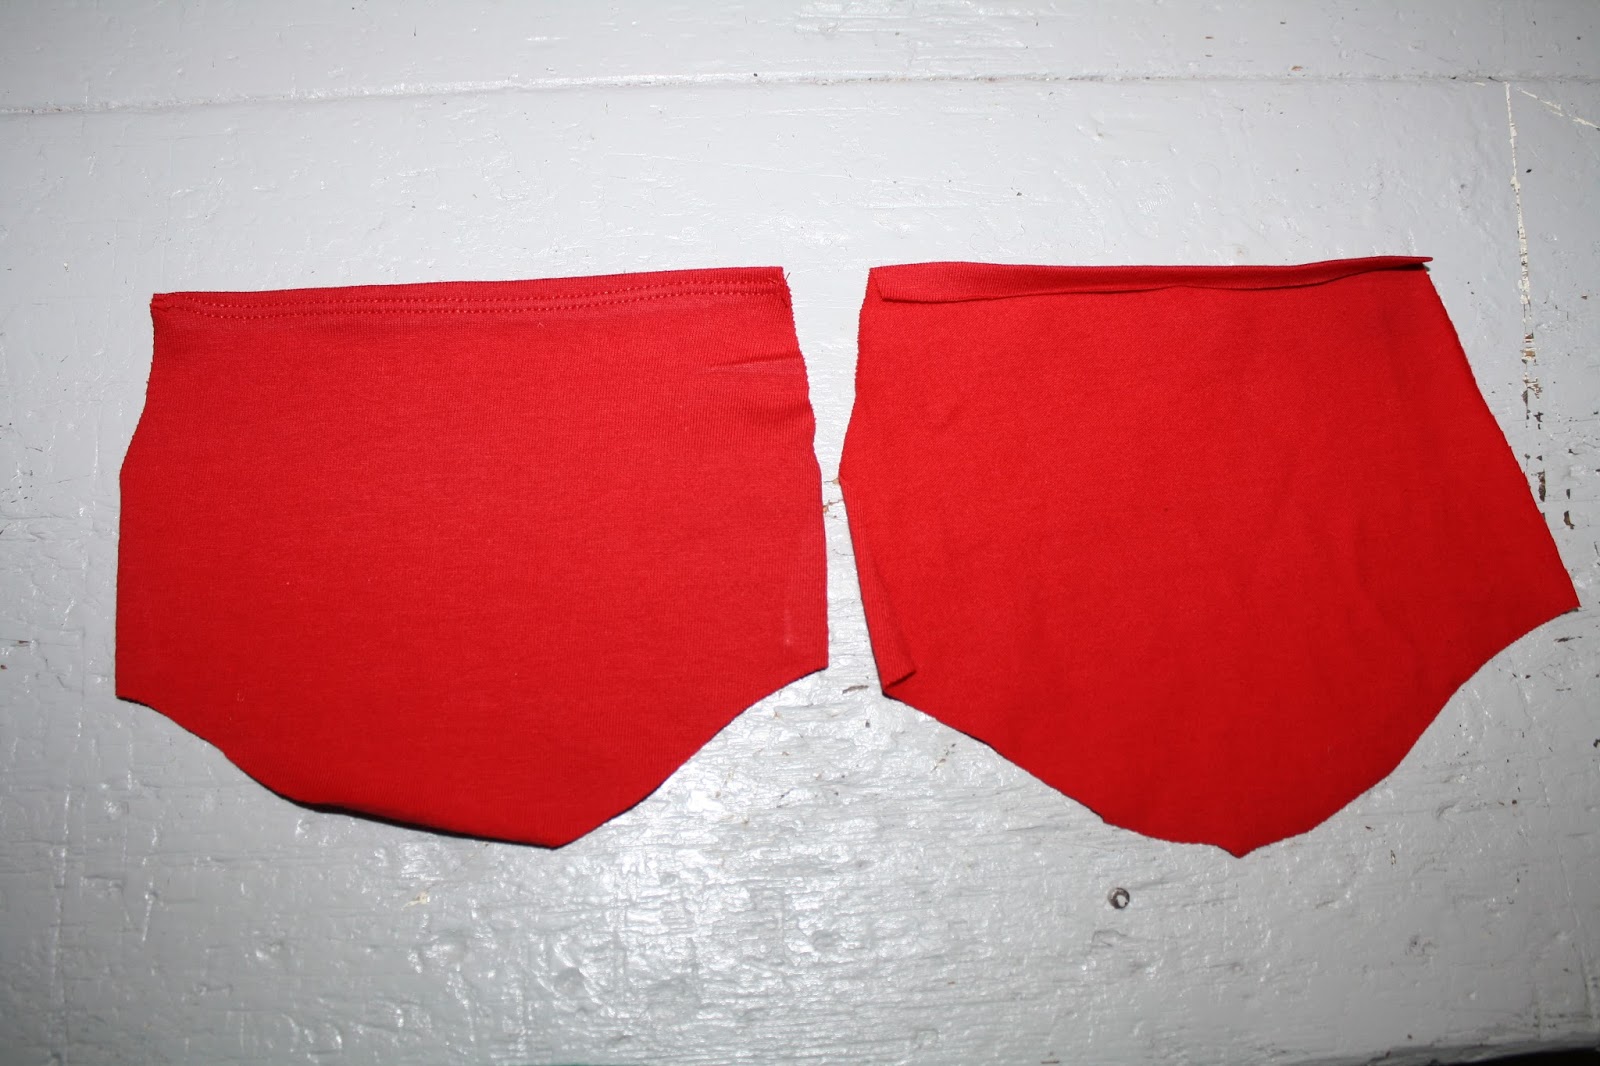
20. Fold one of the pants legs in half, with the right side together and pin the pant leg section leaving the rise portion of the pants unpinned. Stitch in place and press seam. Repeat with second pants leg.

21. Turn one pant leg right side out. Then, slip it into the other pant leg so that the right sides of the pant legs are facing each other.

22. Match the center seam up, pin in place. Then, continue pinning the pants together along the rise.

23. Stitch together and press the seam.

24. Unfold the pants to right side out and press well again.

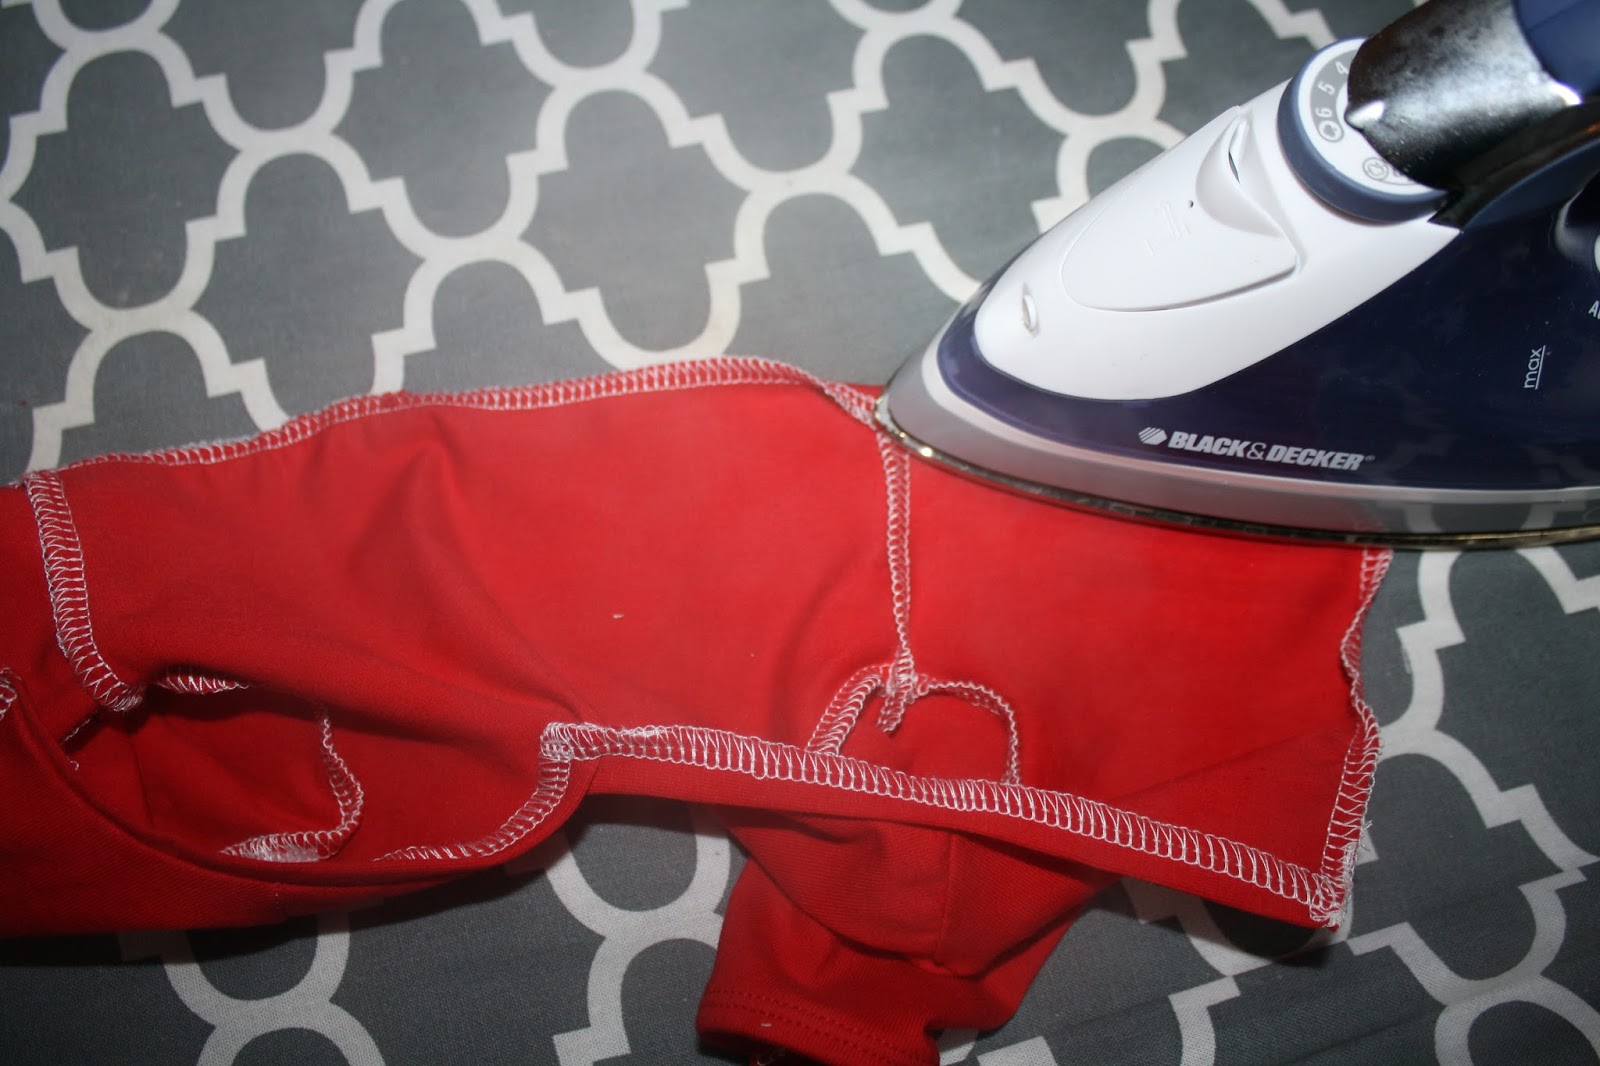
25. Just as before with the children's version, press the top of the pants under a ¼". Than again ½" to create the casing for the elastic. Stitch around the waist band leaving a 1½" opening for inserting the elastic.

26. Cut the elastic according the pattern's chart and add it to the waist band just like that of the children's version. Lastly, stitch your opening closed.

We are completely done!! WooHoo!! Try on all the pj's you just made for your children/grandchildren and enjoy.

Merry Christmas!
Sharon
*If you would
like to earn entries into the prize drawing, please make sure to submit
a photo of your completed Lesson Four to this Facebook Album by 12:00 noon CT, Monday, December 21st. If you
have any questions the Facebook Group is a great place to ask.
Happy Sewing,
Danielle Storm
No comments:
Post a Comment