** If you would like to see an image on our blog in a larger format, just click on it to enlarge.
Note: Links to products within this post are either links to our website or affiliate links.
Welcome to Day 3 of the Ellie Inspired Sleepy Bear PJ sew along!
If you do not have your pattern yet you can purchase it from the shop. It is a PDF so you can print today and be ready to start. You can purchase a kit as well from the shop. It has everything you need, other than thread, to make a set of cozy pjs!
Before you begin today's lesson please read all of the pattern directions. In today's lesson we will be sewing the pj top together. I sew my shirt in a different order to make the neck binding easier. Note: If you would like to know how to create a lettuce edge hem on your shirt, please read those instructions at the very end of this lesson.

1. We will start by pressing under our pockets at the top. First press under a ¼", then again a ½".

2. Now stitch the top in place.

3. Press the sides and bottom in ¼" all the way around as well.

4. Take the pocket and place it on the wears left side and pin in place. Then, stitch it onto the shirt.

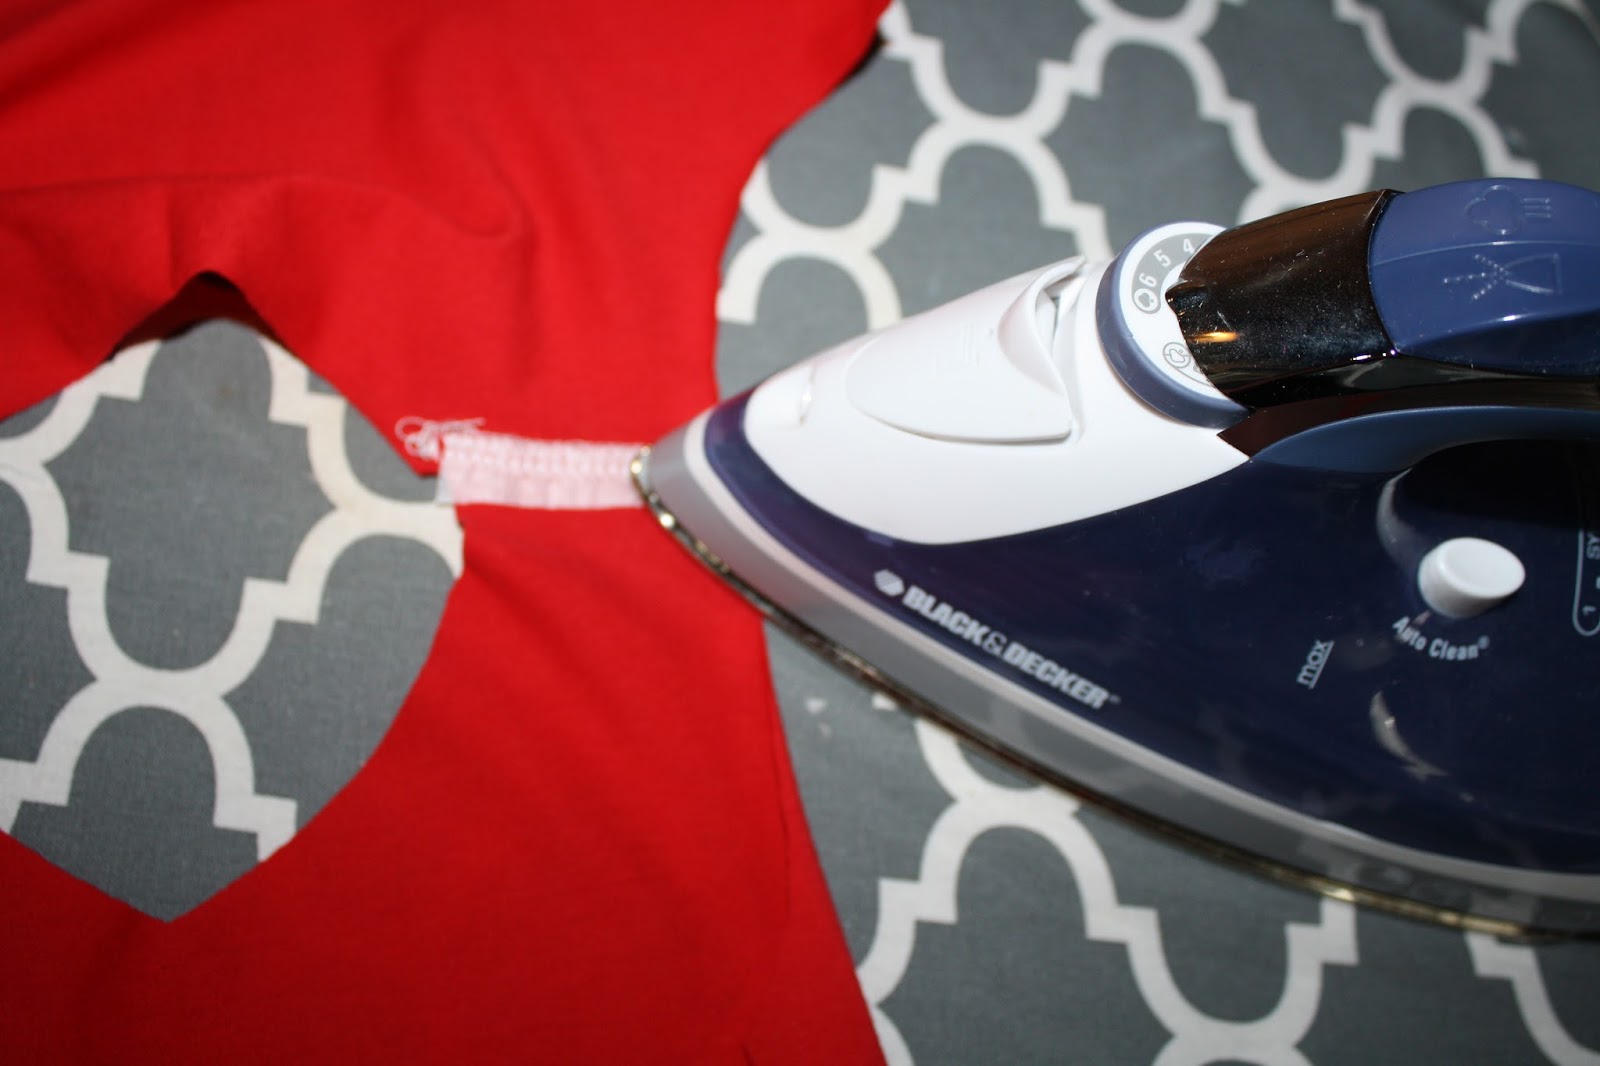
5. Take your shirt front and turn it over to the wrong side. Add stabilizer to the shoulders where the seam will be. I use small bits of interfacing for this. You can also use a piece of ribbon, twill tape, Mobilon elastic, etc. The stabilizer helps keep the shoulders from stretching while sewing and being worn.

6. Place the shirt back over the shirt front, with the right sides facing and pinning at the shoulders. Stitch in place. (I sew mine with my serger, but if you do not have one you can sew it on your sewing machine with a stretch stitch.)

7. Press your seam to the back side of the shoulders.
8. Taking the neck binding, fold it in half lengthwise with wrong sides together and press well.

9. Fold the neck binding into a "circle" with a V point at the front. The top will have the folded edge up and the raw edges should be facing down.

10. The point will have four layers of neck binding placed together. Baste these all together to help hold them in place.
11. Find the center back of the neck binding and mark with a pin.

12. Start pinning your neck binding in place. First take the V point in hand and place it flush with wear's right side. Pin it in place with the right side of the neck binding facing the shirt. (We will be working with the shirt right side out).

13. Then, take the center back of the neck binding and pin in place.

14. Slowly working from the front to the back, fit the neck binding in place by slightly stretching the binding, pinning it as you go.

15. Now we will pin our wear's left side in place. Gently fold the V point of the shirt to fit into the neck binding, being careful not to make a pleat in the shirt at the V point. Pin the neck binding in place. Then, as before, slightly stretch the binding to fit the shirt, pinning in place as you go.

16. This is what you should have at this point. It is now time to sew the binding in place!

17. To sew the neck binding in place, start with the V point on the wear's right side and sew around to the wear's left side.

This is how the second side should look when sewn.

This is the point all sewn. I tuck my serger threads in using a tapestry needle for a clean finish.

18. Press the neck binding up with the seam facing down.

19. We will now take our sleeves and hem them before we sew them onto the shirt. Take one sleeve in hand and press the bottom edge up a ½". Then another ½". Knit fabric can roll here fairly easy so I like to use a hot steam iron to hold my hems in place.

20. To sew the hem in place use a twin needle. Sew the hem on the right side of the fabric. The twin needle will sew the hem in place while making a zig zag pattern on the back side of the stitching to allow the knit to stretch easily. Sew just inside of your hem line. My finger is pointing to where my outer fold is. I use the markings on my metal plate of my sewing machine to know where to sew the hem at

21. This is the sleeve hem all sewn. Repeat with the second sleeve. The sleeve may stretch some during sewing but knit has "recovery" to it, so if this happens, take a steam iron and hold it right above the knit (not touching it) and steam the fabric to help the knit go back into place.

22. Take your sleeve and starting at the center point, pin in place with the shoulder seam. Working your sleeve from the outside edges towards the center, pin in place. Sew..

23. Press your seam towards the shirt. Repeat with the second sleeve.

24. To sew our side, fold the shirt with the right sides together, matching the under arm seams and pin in place. Sew from the bottom edge up through the sleeve hem. Repeat with second side.

25. To finish our shirts we are now going to hem the bottom. First press it under a ½". Then again another ½". Stitch in place just as we did with the sleeve hems.
That's it!! We are all done!!

Lettuce Edge Hem
I would like to show you an alternate way of hemming your sleeves and shirt bottom. I used my serger to create a lettuce edging on my daughter's shirt sleeves and bottom hem.
1. Take your left needle out of your serger and un-thread your left needle as well. Be sure to tighten the needle screw back in place before you start to serge.

2. Disengage your cutting blade on your serger and set your serger from S to R. R is for rolled hem.

3. Now, adjust your dials to the R on the side (rolled hem). The bottom one I set between 1.5 and 1.0.
Note: Each serger varies, just like sewing
machines, so be sure to read your manual first before adjusting
your dials.

4. To sew the rolled hem, serge right on the edge of the fabric all the way around the bottom. As you come back to the front, trim the beginning rolled hem where it comes off the fabric so that it is flush with the shirt bottom.

5. Serge about an inch over where you first started to cover the beginning stitches. (See next two photos below.)


I really love this finish for my little girl's shirts.

We are all finished with our pj's!!

If you would like to make a matching doll set of pjs I will see you back again tomorrow!!
Sharon
*If you would
like to earn entries into the prize drawing, please make sure to submit
a photo of your completed Lesson Three to this Facebook Album by 12:00 noon CT, Friday, December 18th. If you
have any questions the Facebook Group is a great place to ask.
Happy Sewing,
Danielle Storm
No comments:
Post a Comment