Thursday, September 26, 2013

Sew-Along #7 - Penny Dress - Lesson #3

 The Penny Dress by Modkid   

* If you need to see more detail in any of the pictures please click on them to enlarge. 

We finished our shoulder seam in Lesson #2 so let's pick up there.  So, you have your ruffle (optional), empire waist (optional), and right shoulder seam finished.  

Let's get started....

Neck Binding
Now let's work on the neck binding.  I know you are nervous about this step but it is really easy peasy!  

Make a decision about what type of neckband you want on your dress, contrasting or matching.  I'm going with contrasting but I think matching is cute as well.
 

First we are going to fold our neckband piece in half and iron (one more trip across the room!)  I know it seems to not really help much to iron knit, but if you use a little spray starch on your fabric the crease will stay nicely.

Place your fabric with the right side facing up.

The placement of your neck binding is important here and I use a marking method to help me place it correctly.  First, find the center of your neckband piece by folding it in half and marking with a pin.  If you want to mark the halfway point from the pin to the ends that helps as well.


Now we need to find the center of our neck opening.  The center is not on the seam because we only have one seam complete at this point.  Fold the garment in half, matching the neck edges and place your pin to mark the center.  Again, you can mark the halfway point from the center to the edge on both sides of the center if you would like.

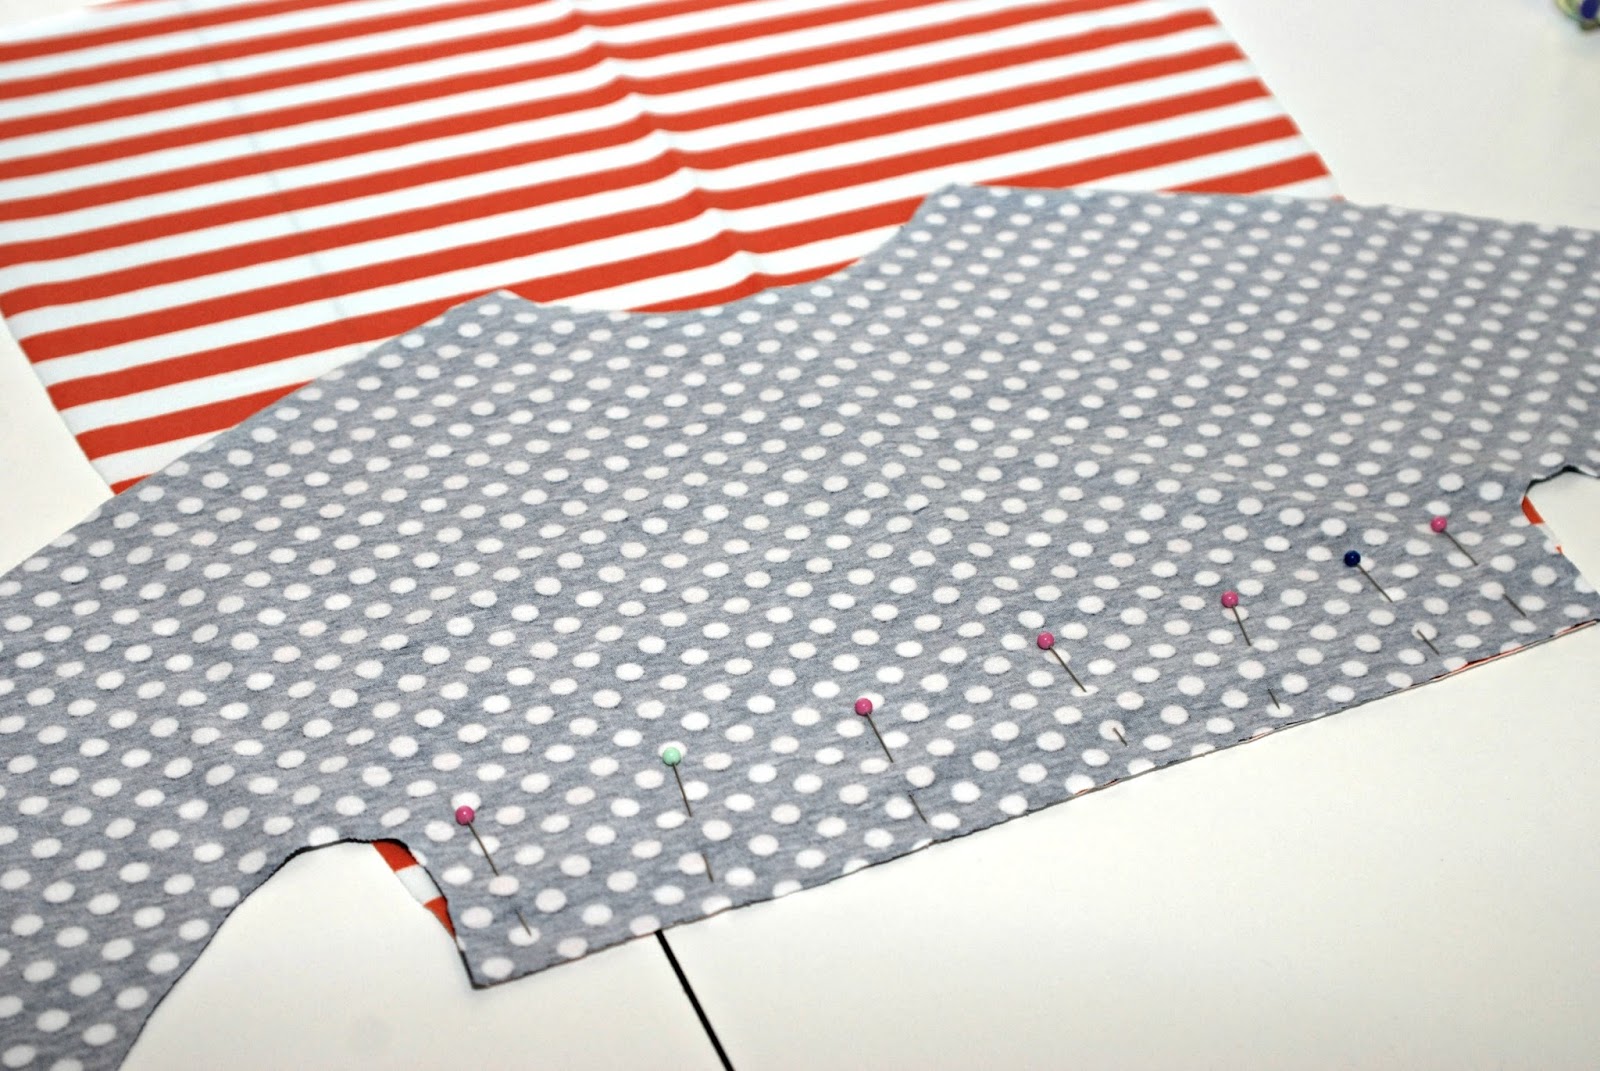
Let's line up our pins to make our placement correct.  You will need to stretch the neckband slightly as you pin around the neck.  Make sure right sides are facing each other.


This is what you should end up with!  Tons of pins!  The pins really help me keep everything in place and help make sure the neckband fits on the neck of the dress.  Take your neck over to the sewing machine and stitch the neckband onto the dress.


I have the neckband stitched in place and serged edges.


Let's stitch in the ditch now for our topstitching.  I am still using my twin needle so it looks like I have only have one stitch line because my second line of stitching is actually in the seam where the neckband and neck of the bodice meet, "stitch in the ditch".


Close up of stitch in the ditch.

Looking good!


Left Shoulder Seam
It's time to sew the other shoulder together in the same manner as before. Remember, you can use seam binding or ribbon in the seam to give more stability. Serge or finish your shoulder seam.  I also placed a little bartack on my serged edge (you may have a zig zag stitch or a trimmed edge instead) at the neckband to tuck the serging (or other finishing) out of the way.


Hemming
This is a good time to decide if you want your sleeve to have a hem or remain a raw edge.  If you want to hem the sleeve, I think this is a good time to hem it while it is still a flat piece and easier to sew.  See below for my tips on hemming the edge.

I made a simple ironing guide out of a left over heavy piece of paper.  I cannot tell you how many times I have used this handy tool in the last 6 months! I marked lines at 1/4, 1/2, 1, 1 1/2 and 2 inches.  When you are ready to press your hem, find the line and fold over your fabric to the desired length.  I typically use 1/4in for hems, so I folded the sleeve over to the 1/4in line and ironed (using starch).  Head over to your machine and topstitch in place.

Here's a better look at my ironing guide.

Here is my sleeve, topstitched.  I trimmed the inside edge as close to my stitching as possible.

Did you add a ruffle to your dress?  Go ahead and skip ahead to your "side seams" then, if not continue reading.  

You can decide now if you want a finished hem or raw edge on your skirt.  I chose to keep my edge raw but if you choose to hem, follow the exact same process as the sleeve hem above but for the bottom hem of the dress.

Side Seams
Now, on to the side seams.  Make sure your garment is right sides together and pin all the way from the under arm to the ruffle edge.  We're almost there!!!!  Head over to your machine and stitch up both side seams.  Serge or finish your edges.  Wait for it, wait for it.....

Are you doing the happy dance???  We're finished!  I hope you enjoyed making your Penny and I hope to see your pics on Facebook!

Let me hear from you!  Do you have questions?  Do you have an easier method? I'd love to know....  It has been an absolute pleasure sewing with you, let's do it again VERY soon.

Happy sewing!
XOXO,
Kara


Tuesday, September 24, 2013

Sew-Along #7 - Penny Dress - Lesson #2

 The Penny Dress by Modkid   

* If you need to see more detail in any of the pictures please click on them to enlarge.
 
We are starting with our pattern pieces that we transferred onto freezer paper and cut out.  You should have something like this or two solid pieces if you aren't doing the empire waist.  

Embellish
Our first step is to embellish the garment.  The only embellishment I am doing is a ruffled hem but there are many options here.  This dress is perfect for embroidery or appliqué, especially if you are making a halloween outfit!  A pumpkin appliqué would be so cute!  But really, go crazy here, whatever you can think of to make it fun.  If you are not ruffling, skip ahead to the "empire waist section".  If you would like to add your ruffle, continue to the next step.

Ruffling
So let's talk ruffling.  First decide if you want your ruffle to have a hem or be left raw(it won't fray so it isn't absolutely necessary to have a hem).  I am leaving my hem with a raw edge.

Make sure you have reviewed my tips on sewing with knits so you are all caught up and ready to sew.  You must set your tension and stitch length to the greatest amount and stitch the top edge of your ruffle piece.  The measurements for your ruffle are found on page 6, figure 11 of your pattern book.  You can see in the picture that I have decreased the amount of pressure in my presser foot and ruffled my fabric.

I like to go ahead and add my ruffle to the main fabric so that the sides can be matched and sewn up easily at the end.  You will need to determine the length of your ruffle by measuring it out to the same length as your front and back pieces.

Let's pin that baby onto our skirt front and back pieces.  Look at all those pins I have used, this makes it much easier in the long run because there will be less slippage of the fabric.  I know you probably hate using pins but it really helps me to be a happier person in the end!


Time to take it over to the sewing table to attach your ruffle (make sure you adjusted your tension and stitch length back to the appropriate settings).  Use your lightening bolt stitch or a twin needle to attach the ruffle (from here on out I will be using a twin needle).  You don't have to finish your seams but I went ahead and serged my edges.  You can also use the serger for construction instead of using the sewing machine, I prefer to sew first then serge....I know, I like to make things hard on myself!  You can also just use a zigzag stitch or take pinking shears to the edges.

Empire Waist
If you are making an empire waist we are ready to talk turkey, if you are not making the empire waist skip ahead to "right shoulder seam".  I mentioned earlier that using tons of pins is essential!  Really, you will save yourself frustration if you use more pins than you would typically use.  It's worth the extra effort so you aren't pulling your hair out!  Pin your bodice front to your skirt front and repeat for the back bodice and skirt pieces.  


Back to that machine to sew your pieces together and serge or finish your edge however you desire.  (Remember, you can just use a zigzag stitch or take pinking shears to the edges instead of serging.)  Iron your edge up toward the bodice so we can topstitch.  Topstitch your dress on both the front and back where your bodice and skirt meet.  I like to topstitch on the bodice since we ironed the edge up toward the bodice.

Right Shoulder Seam
We are now moving on to the right shoulder seam.  We are only sewing the right shoulder at this time, this allows us to attach the neck binding later.  I hope you transferred the markings from the pattern because we need to line those little triangles up just to be sure we get the seam in the right place.

Here are my pins again, use them like there is no tomorrow!  You can also add seam binding, twill tape or skinny ribbon to your shoulder seams to be sure they don't stretch out with wear.  Just add them right where I have my pins, lining up with the edge and sew all together.  Fun tip!

Here is the long sleeve version pinned.

Head back over to your machine and attach the shoulder seams.  You can see my twin stitching below.

Now head over to your serger and serge the seam (or however you prefer to finish).  Are you getting your exercise today or what???  My machines are across the room from each other, maybe I should consider putting them closer together.....

Ok, that's it for today!  Whew!  Take a break and get a nice cold drink.  Let's make sure the rest of our friends have a chance to catch up with us and we'll start back right here in a couple of days.  Please let me know if you have questions or have a different method than mine.  (Our Facebook Sew-Along group can be found here.)  See you again soon!

Happy sewing!

XOXO,
Kara
Here's what you have to look forward to!

Sunday, September 22, 2013

Sew-Along #7 - Penny Dress - Lesson #1

The Penny Dress by Modkid  

* If you need to see more detail in any of the pictures please click on them to enlarge.
 
Using Freezer Paper  Never used freezer paper?  Don't worry, read on!

We are going to be using knit fabric for this pattern so you will need to consider transferring your pattern to freezer paper.  Knit can be a little tricky, don't worry I have more info than you wish you knew on sewing with knit fabrics that we will discuss later, it can be a little rolley (I know it's not a word but can you think of a better word???) and of course stretchy. 

But first, look at this beautiful stack of perfectly folded fabric!  I just love this!  I was so excited when I opened my box, that I had to take a pic and show you this gorgeous stack!

Now grab your lovely patterns, I love fresh out of the package patterns.  We are using the Modkid Penny which can be made into a dress or top in sizes 2-10.  I also made the flare pants from Sweet Polly's Playclothes to go with the dress and I love them!  If you don't have your patterns you can purchase them here.

Okay, let's get started on the really fun part!  Stick with me here because this will take some time but is well worth the trouble in the end, promise!  You are going to need some freezer paper.  I panicked a bit because when I got to the store I didn't see it at first, but it's there, just keep looking.  You will also need your paper scissors (don't use your fabric scissors until we cut out all of the pieces), a ruler, a marker, some weights and your pattern.

Cut a piece of freezer paper to the size of your pattern.  I used my weights to help hold down the freezer paper so it wouldn't shift around or curl up on the ends.  I'm making an empire waist here so I have a top piece and bottom piece.

Be sure your freezer paper has the wax side (shiny) down and the paper side up. Let's begin tracing our pattern onto the paper side with a marker and ruler.  Be sure to transfer all markings onto the paper and use your ruler for straight edges. I also add the pattern name, piece name and size on each piece so that I don't get confused about what I'm doing (and let's face it, it doesn't take much to confuse me these days).

Be sure that you add your 1/2" seam allowance to the bottom of the bodice and the top of the skirt if you are making the empire waist version of the dress. Also, if you are making the contrasting sleeve add the seam allowance to both the top and bottom of the sleeve (I'm not making the contrasting sleeve version).  If you are making View A or B without the empire waist, just trace the entire length of the dress.   Below is the empire version with the 1/2" seam allowance added.

When you finish tracing and cutting, you will end up with something like this. Again, this is the empire version so if you are choosing a solid dress you will not have as many pieces.  For the dress without the empire waist you will end up with your dress front, dress back and neckband piece. 

We are going to now place our pieces onto our fabric.  There are several important things to remember here.  
  1. We put the wax side down to make our cutting easier.  The wax will temporarily stick to the fabric (we will iron it on) so that we don't have to use pins.
  2. I used the pins to line up my fabric so my stripes would match, they are not there for the pattern pieces at all.
  3. Be sure to transfer the markings for lining up the shoulder and side seams onto the fabric.

We want to be sure our grainline is going in the correct direction. The importance of grainline is that this is the direction of the most stretch. (Want to read more about grainline and knit fabric?  Check out this great blog!) Once your pattern pieces are placed correctly, it's time to iron them onto the fabric.  Use your iron without steam and on the cotton setting to quickly press the freezer paper onto the fabric, this allows you to cut your fabric without it rolling up on you.  The paper will temporarily stick to your fabric so that you don't need pins! AH-MAZ-ING!!!
  
After you iron, you are ready to cut out the pattern pieces.  Cut as smoothly and close to the edge of the pattern as possible.  You may or may not hem the sleeves and bottom edge so you want a nice smooth cut on the edges. Perfection! Look at that flat knit!  This is the most amazing process!!!  We'll start sewing day after tomorrow so make sure you have all pieces cut and ready to go.

Please let me know if you have any questions.  I love feedback so let me know you are out there and with me!  (Our Facebook Sew-Along group can be found here.) I hope you learned something today.

Happy Sewing!
XOXO,
Kara

PS:  I am aware that I use WAY too many exclamation points!  I can't help it, I just get so excited and I want you to hear that excitement!!!  Please don't judge me!  lol!  Now I'm just trying to annoy you!
 

Wednesday, September 18, 2013

Sew-Along #7 - Penny Dress - Sewing with Knits

The Penny Dress by Modkid  

* If you need to see more detail in any of the pictures please click on them to enlarge.

Knits Aren't Scary!  Really, Promise!

There are a few things you need to know when sewing with knits, but if you follow those rules there are no problems.  Before we get to the "rules", there are few background things you should know.

Perfect is boring!  I live by this statement.  All of our end products don't have to look exactly the same or be from the hand of perfection.  I like a little "character" in my garments.

Grainline is important in knits so pay attention to the grainline.  The grainline is the direction of the greatest amount of stretch in your fabric.  Your pattern will show you the direction of the grainline, so be sure to pay attention to what direction your fabric is placed.

You don't have to finish your seams or hems with knit fabric because it doesn't fray.  You can certainly finish your seams with serging and hem as normal, it just isn't necessary.

When you are sewing with knit, do not pull or stretch the fabric through your machine.  If you continually pull on the fabric, it will stretch out.  Instead, let your machine pull the fabric through the machine as you just gently guide it to be sure you are sewing in a straight line.

Ok, on to the "Rules".

1.  Use a ballpoint needle.  A regular needle will rip the fine fibers of your knit and a ballpoint needle just moves the fibers out of the way.

2.  The stitch type you use is important!  My picture below is pointing to one of the stitches you want to use.  Number 6 is the zig zag stitch and number 12 is the stretch stitch (which I call lightening bolt stitch).  Either of these stitches allows your knit to stretch as the garment is worn.  If you use a regular straight stitch, your stitches will break as they are worn.

3.  I will be using a ballpoint twin needle with a regular straight stitch(stitch tension and length will be addressed in #6).  It has two needles that sew simultaneously and gives your hem the desired amount of stretch.  It is not typical to use a twin needle for construction but it really is the method I prefer. So, not only will I use the twin needle for construction but for the outside hem as well.
Above is the example of the lightening bolt stitch and below I am using a twin needle (the twin needle is a ball point needle also).

4.  A triple stitch can be used on areas such as armholes that need a bit more strength.  The triple stitch is #6 on my machine in the picture above.

5.  The presser foot is important when sewing with knits.  If the presser foot is too high, the machine pulls on the fabric too much and stretches out your knit.  You will need to play around with the amount of pressure by turning your dial to a reduced amount of pressure.  I was able to reduce mine by two or three clicks.
 

6.  Thread tension and stitch length are very important.  If you have an automatic machine, the adjustments may be made automatically.  Since I am using a straight stitch and a twin needle with my machine, I need to increase the tension and stitch length a bit, but sewing with knit calls for increased tension and stitch length.  You will have to play with these settings and see what works for your machine but I set my tension to about 5 and my stitch length to about 3.  

7.  Use lots of pins!  I know, I know.... some people HATE pins.  When sewing with knit using tons of pins helps keep the fabric in place so there is not as much slippage.  I typically use twice as many pins when sewing with knit as opposed to sewing with wovens.

WHEW!  That was tedious!  I hope you learned something you didn't know before.  Please let me know if you have any questions or have other suggestions.  

What is your favorite method when sewing with knits?  Did you learn something new?  Let me hear from you!!!!

Please post your comments or questions on the Whimsical Fabric Sew-Along Facebook Group.

XOXO,
Kara
Blog   
Facebook

#navbar-iframe{ display:none !important;}