If you would like to see any of the images larger just click on them.
Day 3 - Sewing Center Front Panels and Finishing the Dress
1. If you haven't already, you first need to add some applique or embroidery to your two (or four) center panels. Keep in mind that you need to leave room on the edge and hem for a ¼" seam allowance. You will also need to leave room on the sides for the button holes. I like to mark off the seam allowance on the panels.

This just gives me a visual reference for how much room I have to work with.

I also will sometimes print out the designs so that I can move them around to see exactly where I want them.

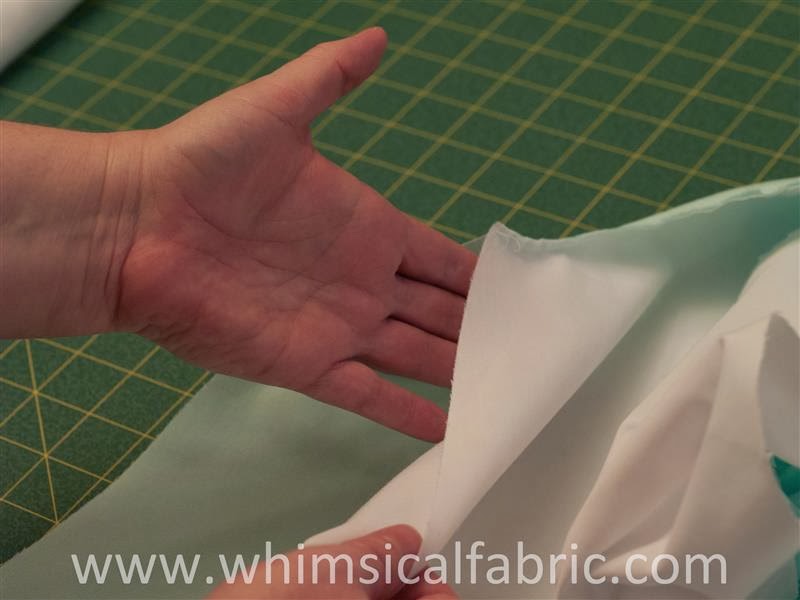
2. Once you have your panels embellished it's time to move on to creating our piping. To do this we first need to make bias trim. Grab
your piece of coordinate fabric. Fold the fabric so that you
are lining up a selvage edge with a cut edge. This will create an edge
with a 45 degree angle. You will want to lightly press this folded
edge.

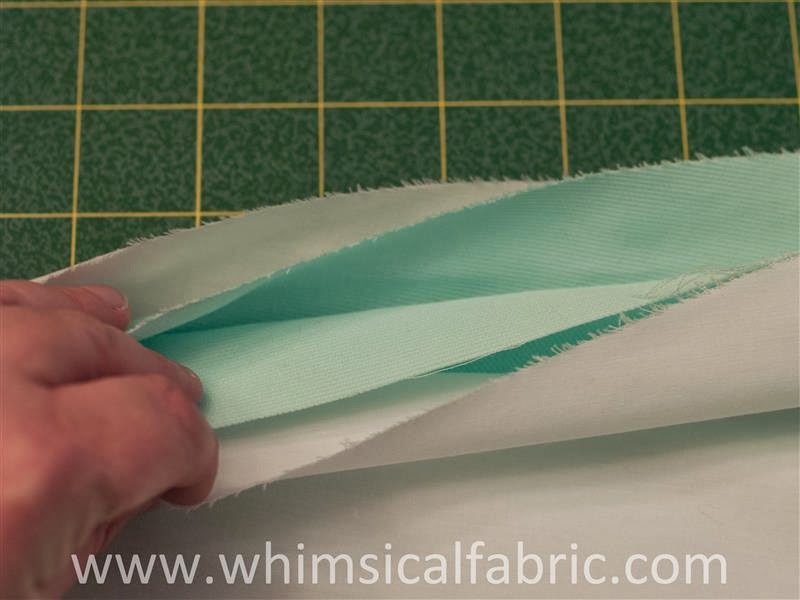
3. Next,
with your straight edge, measure and cut a ½" strip of fabric along the
folded edge. *We need 1" strips for the bias trim, but since this
first one is folded, cut it at ½". When you unfold it you will have a 1" wide strip.

4. Unfold
(or really just take a part) your fabric and continue to cut 1" strips
of fabric along this bias edge you created. You will need about 2
yards total.

Once
you have 2 yards of bias strips, splice them together. Ignore the fact that I am now using a different fabric in the picture.
5. Lay your bias strips right sides together like this.

6. I
like to use my ruler and a fabric marker to draw my stitch line. You
don't have to do this, but sometimes I forget where to sew when I'm at
my machine.

7. Stitch down your stitch line.

8. It should look like this when you are done.

9. Trim the excess seam.

10. Press the seam open.

11. Next you need to fold the trim in half and iron it.

12. Take your bias tape and your cording to your machine. Attach your zipper foot, and set your stitch length to the longest setting.
13. Fold
your bias tape in half, then carefully hold your cording in between the
top and bottom piece of the strip. Please ignore the fact that the fabric has changed again in my pictures.


15. You
now have a beautiful length of piping.

16. Next, using some basting spray, attach your interlining (center front panel piece you cut from your lining fabric) to the back side of one of your panels.

17. It should look like this when you are done. Make sure to match up all edges well.

18. Take your other embellished panel, matching raw edge to raw edge, pin your piping to the front side of it.

19. Do this on both long sides. It's okay to have it hang off the edges a bit. We'll trim that later.

20. Still using your zipper foot, attach the piping to both sides of the front center panel.


21. With right sides together, matching up raw edges, and the panel with piping on top, pin your two center fronts together.

22. Sew together right along the stitch line created from when you attached your piping. Make sure to leave an opening in one of the sides for turning. I did mine where you see the missing pin above.
23. Trim seams, clip corners and curves. Turn your panel right side out through opening. Press out corners. Iron well. Handstitch your opening closed. I used a ladder stitch for mine and hid the knot and thread ends inside the layers.


24. It's now time for buttonholes. You first want to determine your spacing. I made a size 4 here and spaced my buttons 3" apart. The instructions give some good information about placing buttonholes. Make sure to read that on page 7.
25. Using a tape measure I marked out where I wanted the center of each button. Remember, in order for this panel to be reversible the buttonholes must mirror each other from side to side. Otherwise, when you flip the panel over the buttons and buttonholes will not match up.

26. Next I did a test buttonhole so that I knew exactly how large my buttonhole would be.
Note: Your buttonhole setting might work differently. Follow your manufactures directions. If you are not well versed in making buttonholes, practice, practice, and practice some more. I can't stress enough how important it is for you to know exactly where your buttonhole is going to be stitched when you push that button.

27. Then, I marked exactly where the I needed to start my buttonholes. Those are the blue marks you see below. This told me exactly where to place my needle.

28. Once all of your buttonholes have been stitched go ahead and rip them open. One trick to keep from ripping to far is to place a pin in the end of the buttonhole. Wouldn't you be crushed if you ripped right through the bar tacks and ruined your panel. Use that pin!

29. Now you should have an adorable, reversible, panel like this!


30. Our final step is to attach the button on the front of the dress. To do this I first mark a line 1" from each of the sides. Remember, we extended the front sides by 1½". Our seam took up ½". That leaves 1" for our buttons.
31. Then, using the same spacing as I did for my buttonholes, I marked off where the center of each of the buttons should be.

32. It's time to sew on those buttons. I really don't like hand stitching buttons and there are so many to do on this dress. So, I'm going to show you a little trick. You might already be doing this, if not, I think you're going to be excited about how much time it will save you. We are going to sew our buttons on with our machine. Please promise me though that you will be VERY CAREFUL and not sew your fingers or catch a piece of needle in your eye!
33. The first thing you will need to do is snap off your foot and set it aside. The one on your machine silly!

34. Next you need to set up your machine so it does a zigzag stitch with a stitch length of zero. The width of your zigzag will vary depending on your machine and on the buttons you will be using. These are my settings.

35. Place the button exactly where you want it.

36. Now, center the button under the needle and slowly lower the presser foot. The shank will rest on your button like so.

37. Slowly lower the needle by turning the hand wheel, making sure it is centered on the hole.

36. Keep turning the hand wheel until the needle is lowered into the second hole. If your spacing is off, adjust the width of your zigzag.

37. Keep hand turning the wheel slowly until you make sure you have it set just right.

38. When it's right and you have a few stitches in, go ahead and sew that button on.

39. Don't you just love how quick that was!! Now your dress is done.

40. Clip all those loose threads and button on your center panel. Isn't is adorable!!

Congrats! You just finished The Exchange Dress. Great job. I hope you enjoyed this Sew-Along. I sure enjoyed putting it together for you.

If you would like to enter the prize drawing, please make sure you submit a picture of your completed lesson to the Facebook Album by 8:00 AM CT, Wednesday, January 29th. Also, if you have any questions the Facebook Group is a great place to ask.
Thanks for sewing with me,
Danielle Storm
www.whimsicalfabric.com