Welcome to day 4! Our big dress is all sewn so now our little girl's dolly will need a matching dress too! Today we will sew the matching doll dress so that they can both match on Easter morning. It is my daughter's favorite part of this dress.
NOTE: Please be sure to read through today's lesson in the pattern book before beginning. The doll dress is a 1/4" seam allowance and not a 1/2" as the girls is. Also, the doll dress does sew up a bit differently than the girls dress.
If you have any questions, suggestions, or tips to share; please make sure to post them on our Facebook group. Also, if you would like to see any of the images larger that are posted in this blog, just click on them to enlarge.
Sewing the Bodice:
1.
Take front bodice pattern piece (main fabric). We are going to be
creating a mock button placket with the doll size dress. See the two
lines on the bodice below? We are going to take the one on the wearer's
right side and fold at the chalk line.

2. Press this well.

3. Edge stitch this fold. (I stitched an 1/8" away from the edge.)

4.
Take the edge which you just stitched and bring it over to the second
chalk line, the one on the wearer's left side. Pin in place, then baste the
top and the bottom of the placket so it stays in place when stitching
the rest of the bodice pieces. Be careful not to stitch past 1/4" as it
will then be seen after the bodice is sewn together, stitch with a 1/8"
seam.


5. Now place the waist band over the front bodice matching up the top of the waist band edge to the bottom of the front bodice, with right sides together. Pin then stitch. Press seam down towards the waist band.

6. Top stitch the top of the waist band being sure to stitch the seam in place as well.

7.
Pin the front bodice piece to the two back bodice pieces at the
shoulders with the right sides together. Stitch.
*Repeat step 6 with the lining bodice pieces*

8.
Place the main bodice and lining bodice together, with the right sides
facing together. Pin only the neck line with the shoulder seams
matching. Stitch. Clip curve, then turn and press.


10. Baste the main bodice to the lining bodice at raw edges so the lining does not shift during the next sewing steps.

Sewing the ties:
1.
Take the tie pieces and fold in half length wise. Pin and stitch the
long edge and the angle edge, leaving the short straight end open for
turning.

2. Trim the corner, turn and press. Edge stitch around the tie's long edges and angles edge. Repeat with second tie.

3.
Take the two ties, pin and baste to the waist band matching the top of
the ties to the top of the waist band. This will make a 1/4" gap at the
bottom for a seam allowance for sewing on the skirt.

Sewing the sleeves:
1. Run a gathering stitch across the top and bottom of the sleeve.

2. Take the arm band piece and press it in half length wise with wrong sides together to create a long skinny band.

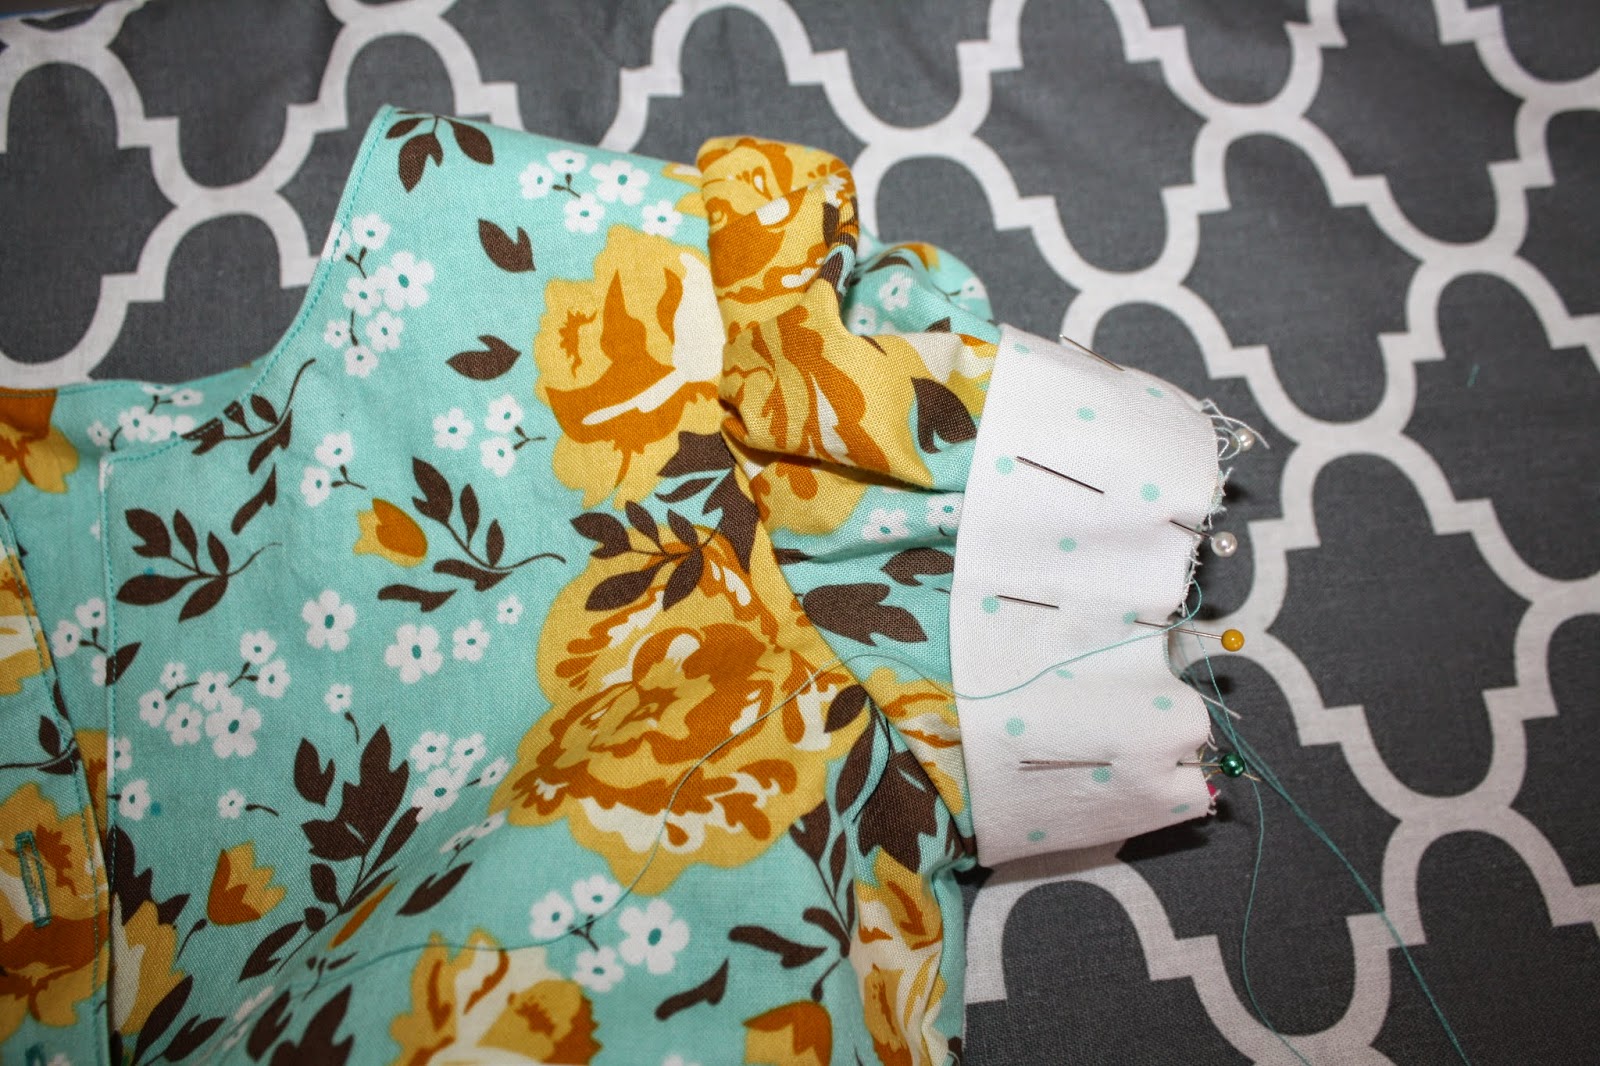
3.
Take the bottom of the sleeve and gather to fit the sleeve cuff. Pin
the sleeve cuff with the raw edge of the sleeve cuff matching the raw
bottom edge of the sleeve. Stitch in place.

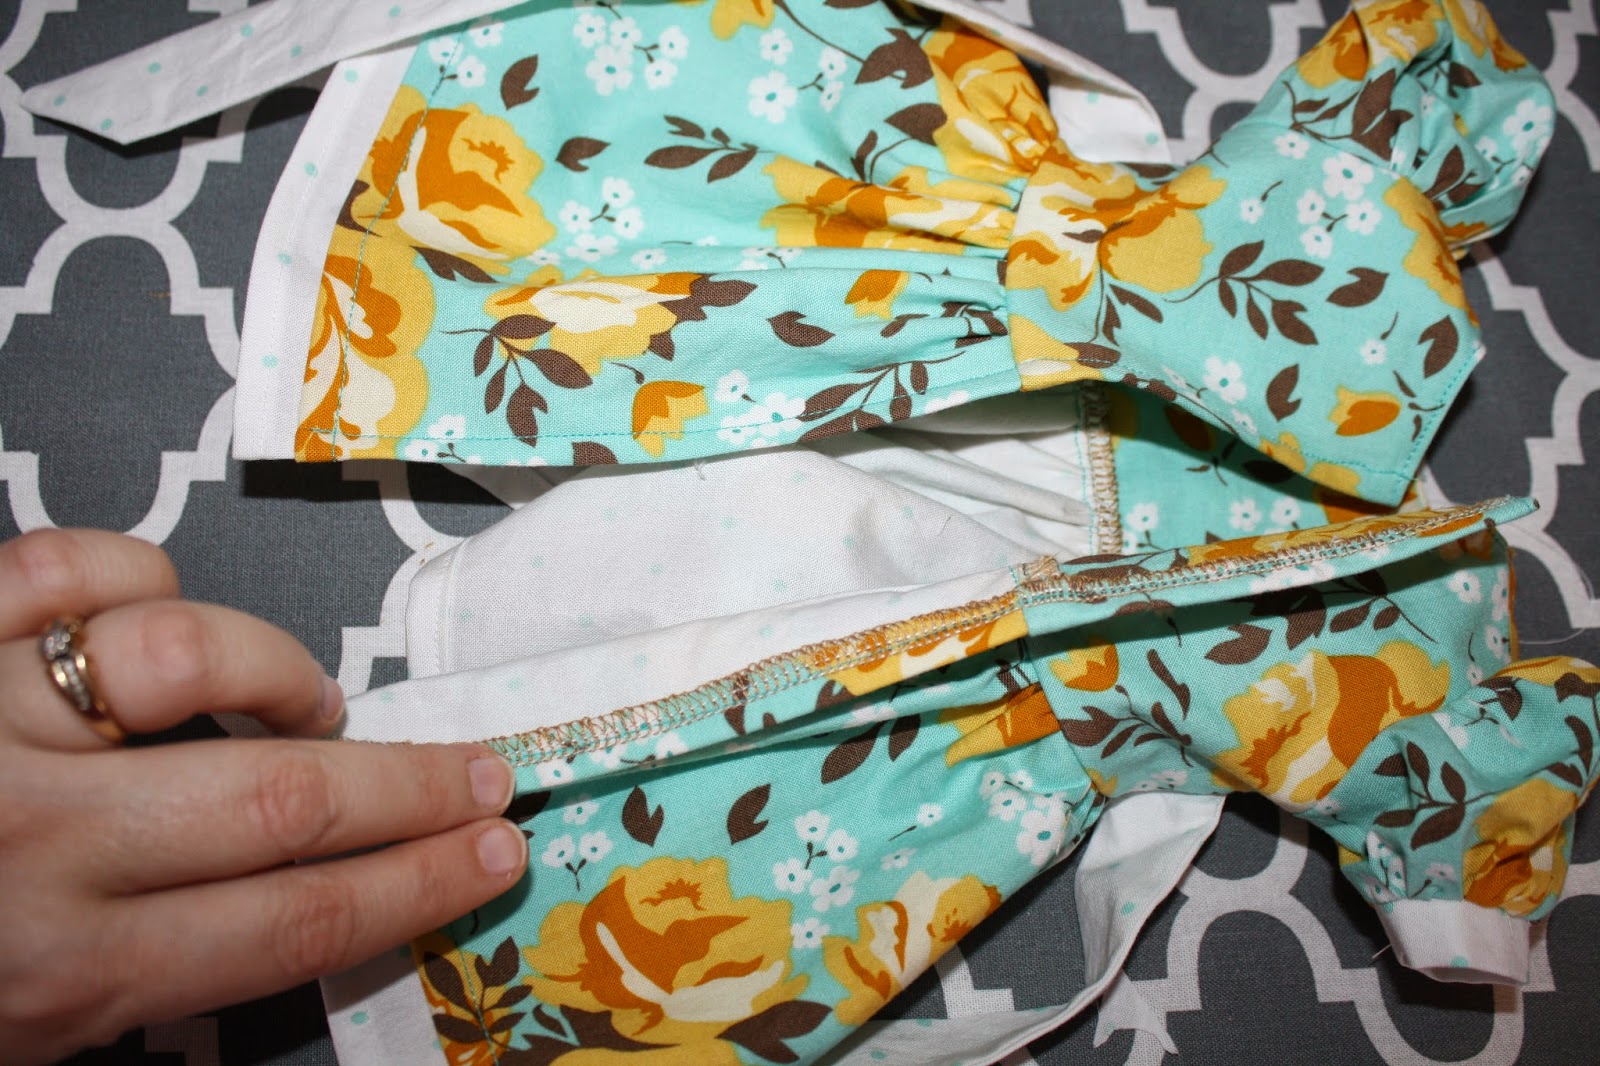
4. Finish the raw edge then press the seam up towards the sleeve.

5.
Now take the sleeve and match the center top sleeve to the shoulder
seam on the bodice. Pin in place. Now gather the sleeve top to fit the armscye. Pin in place, stitch. Finish seam, then press it towards the
sleeve.

*repeat with second sleeve*

6. Fold the bodice in half with the right sides together, matching up the sleeve seams, pin in place, then stitch. Finish seams.

7. Now,
I finish all my seams with my serger so I leave a longer end and do not
cut it off. I then take a tapestry needle and thread the serge chain
back through the finished seam for a clean finish.

See? Lovely inside and lovely outside!

Hemming Skirts:
1. Take over skirt and press up a 1/4", then again another 1/4", then stitch the outer fold in place. Repeat with lining skirt.

Sewing the Tabs:
1. Turn one side of the tab up a 1/4" and press. Then fold the tab in half with wrong sides together and press.


3. Now topstitch the three sides of the tab (leaving the raw edge unstitched) Repeat with second tab.

4.
Place sewn tabs with the finished top facing the top edge of the skirt.
Pin in place and then stitch with a 1/4" seam. Turn the tabs facing
down, press, than stitch again with a 1/4" seam.

Sewing the skirt:
1.
Pin the top skirt to the under skirt at the top raw edge and run a
gathering stitch across the top. (I have my tab turned to the front and
pinned here but you can wait till the dress is sewn for that. I
couldn't wait to see the scalloped edge of the skirts!)

2. Take the skirt and gather to same size as bodice bottom edge. Pin in place and stitch. Finish seam and press the seam up towards the waist band.

3.
Top stitch the waist band on the right side bottom. Be sure the seam is
still facing towards the waist band as this will hold the seam in
place.

Finishing up the dress:
1. Finish both back edges of the dress either by serging or sewing a zig zag stitch. Be sure to finish the serged edges to give it a clean finish like that of the sleeves.
2.
Press both back edges under a 1/4" and stitch in place. If you look
closely at mine I only stitched from over skirt up due to the matching
thread of the over skirt would be very noticeable on the white under
skirt. It has stayed in place very nicely too with no problems.
3.
Take a long strip of Velcro (about the length of the bodice and half
way down the dress) and cut in half to make two long skinny pieces. Be
sure not to throw away the other half of the Velcro so you can use it
for another doll sewing project.

4.
Take Velcro apart and sew the rough side of the Velcro to the wearer's
right side placing the Velcro onto the right side of the dress. (This
way the rough Velcro will not be touching the doll's body at all) Take
the soft side of the Velcro and place it on the wearer's left size on
the inside of the dress, stitch in place. Turn dress right side out and
stitch buttons on and you are all done!!

The best part of sewing both of these dresses is trying them on your little girl and her doll! My daughter loves hers!!

The
other great part of the doll pattern is that the very same pattern that
fits the 18" doll also fits the 15" baby doll too! I love that they can
"share" this dress.

Be sure to share you dresses in the group and have a Happy Easter!!
* If you would like to enter the prize drawing, please make sure you submit a picture of your completed lesson four to the Facebook Album by 12:00 noon CT, Wednesday, April 1st. Also, if you have any questions the Facebook Group is a great place to ask.


