Macy Giggles Skinny Hem Dress
Today we will finish off our dress. Please read the booklet instructions before beginning. If you have any questions, suggestions, or tips, please make sure to share them on the Facebook group.
H - Putting It All Together
1. If you are going to attach a label to the inside of the dress, now is the time to do it. This step it optional, but the Macy Giggles pattern does come with an Izzy and Ivy label that you can use. I used my own label. Decide where you want your label to go and stitch it in place. We put our label on the inside of the back bodice, attaching it only to the bodice lining so that our stitches did not show on the outside of the dress.

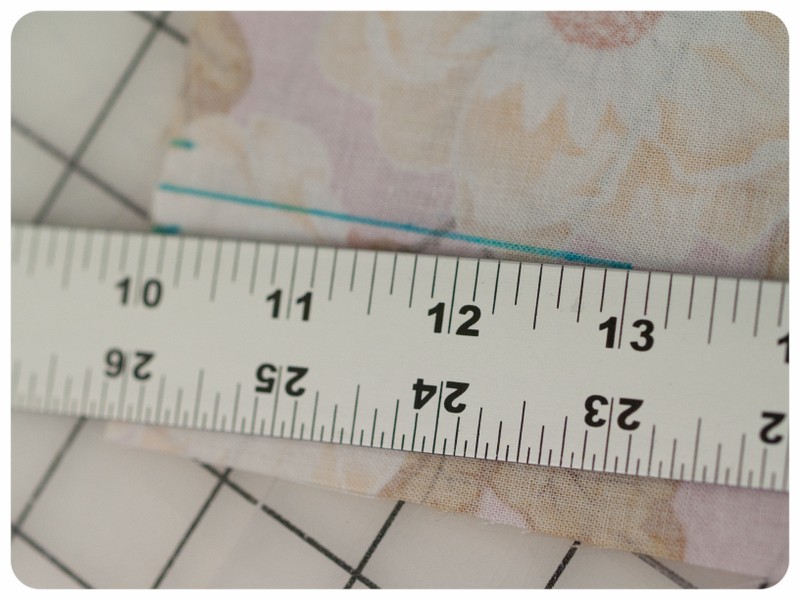
2. We are going to skip ahead to step #4 in the booklet. Using a tape measure, or a folding guide if you have one, fold under the bottom edge of the bodice lining 1/2" and press well. A few good shots of steam while pressing will help.


3. Find the front center of your skirt and mark it with a marking pen at the top of the skirt. Also find the sides of the skirt and mark them with a marking pen at the top. The sides will be the side seams in the 2 panel dress (sizes 2-4). For the 3 panel dress (sizes 5-14) you will need to match up the front and back center to find the sides. Finally, find the front center of the bodice and mark it at the bottom edge with a marking pen.
4. With right sides together match up the bodice sides, back, and center front with the skirt sides, back and center front. Pin in place making sure you do not pin through the bodice lining, just the bodice front and the skirt. Your skirt will be inside the circle your bodice forms. The bodice lining will be on the very outside.


5. Carefully pull on the bobbin thread of your gathering stitches on your skirt to pull up the extra fabric. Work the gathers evenly around the skirt until the skirt edge is flush with the bodice. By pulling both the top and bottom row of gathering stitches it will help to keep your skirt edge from twisting under.
6. Once you have your skirt gathered evenly around the bodice, pin the raw edges of your skirt to the raw edges of your bodice. Make sure those gathers are all evenly spread out around the skirt. Also, do not pin the bodice lining to the skirt, that should remain free and will hang down.

7. We are now going to sew our skirt and bodice together. I find it easiest to sew with the gathered skirt fabric on top (directly under my presser foot) and the bodice fabric on the bottom (directly on top of the feed dogs). This allows me to keep an eye on the gathers, making sure none of them turn under and get caught in the seam. To do this, turn your whole skirt/bodice inside out so that the bodice is now on the inside and the skirt is on the outside.
8. Using a basting stitch, carefully sew around the skirt with a 1/2" allowance, attaching the skirt to the bodice. Make sure as you sew that the bodice remains flat and that you are not catching any folds in the seam. Also make sure that the raw edges of your skirt gathers remain flush with the raw edge of your bodice. If the gathers turn under they may get caught in the seam and show on the outside of the skirt.
9. When you are finished basting the skirt to the bodice, turn the dress right side out and check to make sure everything looks right. If you have any weird tucks or skirt gathers poking though the seam, rip that part of the seam out, re-adjust, re-pin, and re-baste.
10. Using either your sewing machine and a regular stitch or a serger and an overlock stitch, go back and stitch over the seam, securing it. I prefer to use my serger because it trims off all the threads and catches everything in the overlock stitches. This seam will not show, so if you prefer just to use your sewing machine and a straight stitch, that is fine. Either way, just make sure you keep everything smooth and flat as you sew. You don't want to accidentally create any unwanted tucks in the fabric.

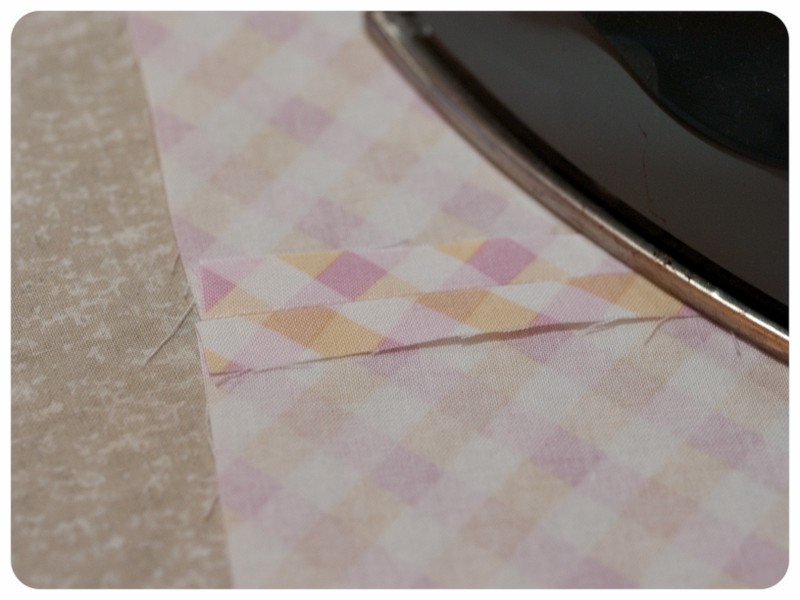
11. Pull out any loose threads or gathering threads and discard. Using your iron, press this seam up towards the bodice, being careful not to disturb the fold you pressed in the bodice lining earlier.
12. We are now going to tuck this seam in between the bodice and bodice lining. Since you have already pressed a 1/2" fold, it's just a matter of securing the lining down over the seam. You can do this in a number of ways.
13. If you have secured your seam inside your bodice and bodice lining by handstitching or using hem tape, the topstitching will be a piece of cake. I went ahead and ironed my bodice to make sure everything was were it should be and neat. I also secured the bodice and lining to the seam with pins just in case some of the hem tape were to come undone.


Now, starting in the underarm area, topstitch around the bodice. Stitch a scant 1/4" from edge and make sure you lengthen your stitches like we did when we topstitched before. You will go all the way around the top, sides, and bottom, finishing where you started.


14. We are now going to make our covered buttons. If you are not using covered buttons, skip this step. Whimsical Fabric Rocks!


15. If possible, try the dress on the new owner. Position the buttons where they need to be sewn and mark the location with a marking pen. Hand sew the buttons onto the dress. Make sure you start on the outside and finish on the outside so that your knots will be hidden under the buttons and will not be visible on the inside of the dress.

16. One last thing you might want to do is to tack down the facing on the back of the skirt. You won't really have a spot to tack it down on the 2 panel skirts (sizes 2-4), but if you made a 3 panel skirt (size 5-14) you can just tack it to the back seam. I don't believe the instructions mention this, but I recommend doing it if possible. I didn't at first, but the facing kept poking out of the key hole opening and it was bothering me. Just hand sew a few stitches, securing the bottom of the facing to the back seam.
That's it. You are all done. Now step back and admire the beautiful dress you have created. You did a fantastic job. Way to go! Some little girl is going to be very happy.
Thanks for sewing with me,
Today we will finish off our dress. Please read the booklet instructions before beginning. If you have any questions, suggestions, or tips, please make sure to share them on the Facebook group.
H - Putting It All Together
1. If you are going to attach a label to the inside of the dress, now is the time to do it. This step it optional, but the Macy Giggles pattern does come with an Izzy and Ivy label that you can use. I used my own label. Decide where you want your label to go and stitch it in place. We put our label on the inside of the back bodice, attaching it only to the bodice lining so that our stitches did not show on the outside of the dress.

2. We are going to skip ahead to step #4 in the booklet. Using a tape measure, or a folding guide if you have one, fold under the bottom edge of the bodice lining 1/2" and press well. A few good shots of steam while pressing will help.


3. Find the front center of your skirt and mark it with a marking pen at the top of the skirt. Also find the sides of the skirt and mark them with a marking pen at the top. The sides will be the side seams in the 2 panel dress (sizes 2-4). For the 3 panel dress (sizes 5-14) you will need to match up the front and back center to find the sides. Finally, find the front center of the bodice and mark it at the bottom edge with a marking pen.
4. With right sides together match up the bodice sides, back, and center front with the skirt sides, back and center front. Pin in place making sure you do not pin through the bodice lining, just the bodice front and the skirt. Your skirt will be inside the circle your bodice forms. The bodice lining will be on the very outside.


5. Carefully pull on the bobbin thread of your gathering stitches on your skirt to pull up the extra fabric. Work the gathers evenly around the skirt until the skirt edge is flush with the bodice. By pulling both the top and bottom row of gathering stitches it will help to keep your skirt edge from twisting under.
6. Once you have your skirt gathered evenly around the bodice, pin the raw edges of your skirt to the raw edges of your bodice. Make sure those gathers are all evenly spread out around the skirt. Also, do not pin the bodice lining to the skirt, that should remain free and will hang down.

7. We are now going to sew our skirt and bodice together. I find it easiest to sew with the gathered skirt fabric on top (directly under my presser foot) and the bodice fabric on the bottom (directly on top of the feed dogs). This allows me to keep an eye on the gathers, making sure none of them turn under and get caught in the seam. To do this, turn your whole skirt/bodice inside out so that the bodice is now on the inside and the skirt is on the outside.
8. Using a basting stitch, carefully sew around the skirt with a 1/2" allowance, attaching the skirt to the bodice. Make sure as you sew that the bodice remains flat and that you are not catching any folds in the seam. Also make sure that the raw edges of your skirt gathers remain flush with the raw edge of your bodice. If the gathers turn under they may get caught in the seam and show on the outside of the skirt.
9. When you are finished basting the skirt to the bodice, turn the dress right side out and check to make sure everything looks right. If you have any weird tucks or skirt gathers poking though the seam, rip that part of the seam out, re-adjust, re-pin, and re-baste.
10. Using either your sewing machine and a regular stitch or a serger and an overlock stitch, go back and stitch over the seam, securing it. I prefer to use my serger because it trims off all the threads and catches everything in the overlock stitches. This seam will not show, so if you prefer just to use your sewing machine and a straight stitch, that is fine. Either way, just make sure you keep everything smooth and flat as you sew. You don't want to accidentally create any unwanted tucks in the fabric.

11. Pull out any loose threads or gathering threads and discard. Using your iron, press this seam up towards the bodice, being careful not to disturb the fold you pressed in the bodice lining earlier.
12. We are now going to tuck this seam in between the bodice and bodice lining. Since you have already pressed a 1/2" fold, it's just a matter of securing the lining down over the seam. You can do this in a number of ways.
a. You can pin the lining in place over the seam and then sew it down when you topstitch the bodice. This is how the booklet tells you to do it. It's a good method, but I find I have a hard time catching the edge of the lining as I am sewing because it naturally wants to slip out of place when I remove my pins. I don't sew over my pins for fear of breaking a needle. So, inevitably, my bodice lining pulls up and away from the seam and ends up not being secured in place.
b. You can pin the lining in place over the seam and then hand stitch the lining down. This is a great method if you like to hand sew and have the time. I usually don't. Maybe someday I will feel like I have more time, but it's doubtful.
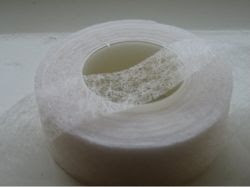
c. Or, you can cheat and use hem tape to secure the lining to the seam. This is the method I used. It's not really cheating, but it is so easy it feels like I am. Just cut small (4-6 inch) strips of the hem tape, place it on the seam, lay the bodice lining in place over the top, and carefully press to secure. Ta da! It is so easy. Hem tape comes in all different sizes and types. You can use whatever type you like best. The only thing you will want to make sure is that your hem tape is not wider than your seam. I had to trim my hem tape down a bit because it was too wide. You don't want to be gluing the bodice front to the bodice lining with it, just the seam to the bodice lining.

13. If you have secured your seam inside your bodice and bodice lining by handstitching or using hem tape, the topstitching will be a piece of cake. I went ahead and ironed my bodice to make sure everything was were it should be and neat. I also secured the bodice and lining to the seam with pins just in case some of the hem tape were to come undone.


Now, starting in the underarm area, topstitch around the bodice. Stitch a scant 1/4" from edge and make sure you lengthen your stitches like we did when we topstitched before. You will go all the way around the top, sides, and bottom, finishing where you started.


14. We are now going to make our covered buttons. If you are not using covered buttons, skip this step. Whimsical Fabric Rocks!
a. I have a little template I use when making my covered buttons. I think most of the packages come with a template for you to cut out. If not, you can make your own. For the 7/8" buttons we included in the Macy Giggles kits, you will need a circle of fabric with a 1.5" diameter.

b. Decide which fabric you want to use, what part of that fabric you want on your buttons, and then using a marking pen, trace out your cutting lines.

c. You will want to trace out a second set of circles so you can line your buttons. We just used our same fabric and traced the button lining where the fabric had no print. If you don't line your buttons you will be able to see the silver through the fabric. Cut out your circles of button fabric.

d. Layer your button fabric with the lining fabric underneath.

e. Center the button making base on top of fabric circles.

f. Carefully flip the whole thing over.

g. Push your button front down into the button making base, being careful not to shift your fabric.

h. Fold the edges of your fabric circles in and place the button back, shank side out, on top of the button.

i. Using the button pusher, press the button back onto the button front, making sure all of the fabric raw edges are caught between the two.

Note: I use a pistol grip clamp to snap my backs on. I must have wimpy fingers because I seriously can't do it without the clamp. If you are like me, a clamp might help.


j. Pop your buttons out of the base and admire the beautiful buttons you just created.
15. If possible, try the dress on the new owner. Position the buttons where they need to be sewn and mark the location with a marking pen. Hand sew the buttons onto the dress. Make sure you start on the outside and finish on the outside so that your knots will be hidden under the buttons and will not be visible on the inside of the dress.

16. One last thing you might want to do is to tack down the facing on the back of the skirt. You won't really have a spot to tack it down on the 2 panel skirts (sizes 2-4), but if you made a 3 panel skirt (size 5-14) you can just tack it to the back seam. I don't believe the instructions mention this, but I recommend doing it if possible. I didn't at first, but the facing kept poking out of the key hole opening and it was bothering me. Just hand sew a few stitches, securing the bottom of the facing to the back seam.
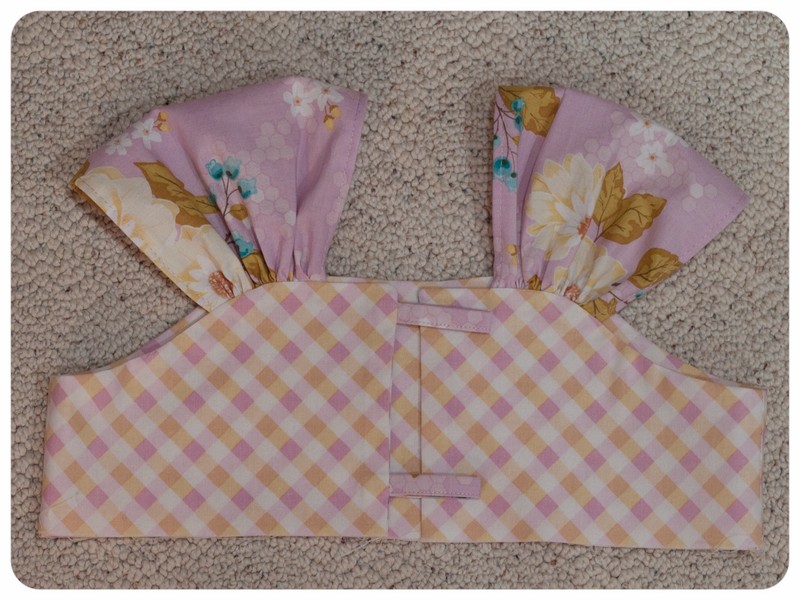
That's it. You are all done. Now step back and admire the beautiful dress you have created. You did a fantastic job. Way to go! Some little girl is going to be very happy.
Thanks for sewing with me,
Danielle Storm
www.whimsicalfabric.com


