The Luscious Layers Apron
Welcome to our Luscious Layers Apron sew-along. I want to remind everyone that I am not a "professional" seamstress, nor was I formally taught. I'm just a girl who loves fabric, sewing, and pretty much everything related to those two things. If you have any questions, suggestions, or tips to share; please make sure to post them on our Facebook group.
Please note that I will not be following the exact order of the pattern booklet. I do however encourage you to read the directions in your booklet all the way through before you begin.
I also want to remind everyone that if you would like to see any of the images posted in this blog bigger, just click on them to enlarge. It might be helpful on some steps. Are we ready to begin? I am!! Here we go.
1. Tracing your pattern pieces.
If you know much about me and how I sew, you probably know about my love affair with freezer paper. I adore freezer paper! I trace all of my patterns out on freezer paper any time I sew.
If you haven't already done so, print off page 26-37 of your Luscious Layers Apron PDF pattern. Do not resize these pages. These are your pattern pieces. Now, using page 25 as a guide, tape your pattern pieces together.
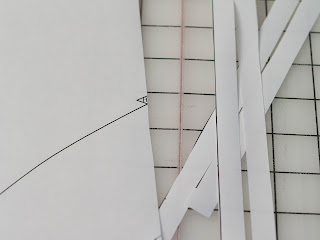
You will need to probably trim off edges of some of the pages to get them to line up.
The first thing you will need to do is decide if you want to make the squared bib or the sweetheart bib. We chose the sweetheart bid for our apron, but you can do the squared if you prefer. Whichever you choose, make sure to use the correct cutting line on the bib and the correct bib band piece.
Next, place the pattern sheet on a flat surface, lay the freezer paper on top with the glossy side down, and trace around the pattern pieces. I use a sharpie marker to trace. The sharpie will not bleed through the freezer paper so you do not have to worry about lines being transferred to the pattern sheet below.

You should be able to see the pattern lines through the freezer paper pretty easily. If you are having trouble, you can always use a sharpie to darken the lines on the original pattern. Make sure you have some scrap paper under your pattern sheet before you write on it with the sharpie, otherwise the sharpie might bleed through and be transferred to the surface below.
Cut out your freezer paper pattern pieces as you go. On the bottom skirt piece, your freezer paper will most likely not be large enough. Just use some masking tape to tape two piece of freezer paper together. Don't use any other type of tape as it could melt onto your iron.
Welcome to our Luscious Layers Apron sew-along. I want to remind everyone that I am not a "professional" seamstress, nor was I formally taught. I'm just a girl who loves fabric, sewing, and pretty much everything related to those two things. If you have any questions, suggestions, or tips to share; please make sure to post them on our Facebook group.
Please note that I will not be following the exact order of the pattern booklet. I do however encourage you to read the directions in your booklet all the way through before you begin.
I also want to remind everyone that if you would like to see any of the images posted in this blog bigger, just click on them to enlarge. It might be helpful on some steps. Are we ready to begin? I am!! Here we go.
1. Tracing your pattern pieces.
If you know much about me and how I sew, you probably know about my love affair with freezer paper. I adore freezer paper! I trace all of my patterns out on freezer paper any time I sew.
If you haven't already done so, print off page 26-37 of your Luscious Layers Apron PDF pattern. Do not resize these pages. These are your pattern pieces. Now, using page 25 as a guide, tape your pattern pieces together.
You will need to probably trim off edges of some of the pages to get them to line up.

The first thing you will need to do is decide if you want to make the squared bib or the sweetheart bib. We chose the sweetheart bid for our apron, but you can do the squared if you prefer. Whichever you choose, make sure to use the correct cutting line on the bib and the correct bib band piece.
Next, place the pattern sheet on a flat surface, lay the freezer paper on top with the glossy side down, and trace around the pattern pieces. I use a sharpie marker to trace. The sharpie will not bleed through the freezer paper so you do not have to worry about lines being transferred to the pattern sheet below.

(We won't be adding a pocket, but I traced it just for my own future use.)
You should be able to see the pattern lines through the freezer paper pretty easily. If you are having trouble, you can always use a sharpie to darken the lines on the original pattern. Make sure you have some scrap paper under your pattern sheet before you write on it with the sharpie, otherwise the sharpie might bleed through and be transferred to the surface below.
Make
sure you transfer all markings to the freezer paper. I also write all
of the information I need on the freezer paper, such as pattern name,
size, how many to cut, etc.

Now you should have a nice stack of freezer paper patterns. Fold up and set aside your large master pattern sheet.

2. Cutting Out Your Fabric
You should have
already washed, dried, and pressed your fabric. Or, if you are like me, just pressed. I know, always prewash, right?!? Press your fabric again if you have any creases from it
being folded.
Once
you have
finished pressing, it is time to iron on your freezer paper pattern pieces onto your fabric. Below is a list of what you will need to cut from your fabric.
| Main Fabric | Coordinate Fabric | ||
| 2 Bib Pieces (1 bib front and 1 bib lining) 1 Top Skirt | 1 Neck Tie 2 Waist Ties |
||
| 1 Middle Skirt | 2 Waistbands | ||
| 1 Bottom Skirt | 1 Neck Band | ||
If
you are using a print with a direction, you want to make sure you line up the pattern pieces along the
print. Make sure it is straight and not upside down or sideways. Also note that because of the size of the bottom skirt piece you can not use any fabrics with a selvage to selvage print. Your bottom skirt piece will be cut from the length of your fabric, not the width.
Look at page 5 of the pattern. It should say Style 2 at the very top. This page will direct you on how to lay out your pattern pieces.
Cutting Out the Main Fabric Pieces {page 5}
If you bought a kit you will have extra fabric. (3 yards instead of 2.75) since I only sell fabric in half yard increments. I cut out my fabric just a tad differently. You can do it either way. Below is what I did.
- I folded my 26" side first (like in the instructions), ironed on my bottom skirt layer, and cut it out. NOTE: Do not iron over the masking tape. If you touch it with the iron it won't instantly melt, but you don't want to be ironing over it either.
- I refolded that same side so it was a bit smaller (not 26" anymore) and so it would fit the top skirt layer perfectly. Ironed on the top skirt pattern piece and proceeded to cut it out. *I did the refold thing so I ended up with 1 larger chunk of unused fabric instead of 2 smaller pieces.
- Next, I folded the right side of the fabric in 20", ironed the middle skirt pattern down, and cut it out.
- Finally, I cut my two bib pieces (one front and one lining), each on the fold. I did rotate them differently then the instructions showed because I wanted them the same direction as my skirt pieces. Whatever works with your fabric is fine.
DO NOT touch the iron to the glossy side of your freezer paper! It will melt and make a mess of your iron.

Cutting the Coordinate Fabric Pieces {page 5}
You need to cut out the ties and bands from your coordinate fabric. Using a straight edge, follow the directions on page 5.

After you cut the neck tie and the two waist ties, cut another 6" strip of fabric. This will be used to cut the two waist bands and the neck band. If you purchased a kit you will have fabric left. Set this aside as we will be using it later to create the bias trim.

3. Marking {page 7}
Following the directions on page 7, mark your three skirt pieces, both bodice pieces, and your two waistband pieces.
If you purchased premade bias trim you can skip this part of the lesson.
Grab your left over piece of coordinate fabric. Fold the fabric so that you are lining up a selvage edge with a cut edge. This will create an edge with a 45 degree angle. You will want to lightly press this folded edge.

Next, with your straight edge, measure and cut a 1" strip of fabric along the folded edge. *We need 2" strips for the bias trim, but since this first one is folded, cut it at 1". When you unfold it you will have a 2" wide strip.

Unfold (or really just take a part) your fabric and continue to cut 2" strips of fabric along this bias edge you created. You will need a total of 7 yards or about 250 inches total.

Once you have 250 inches of bias strips, splice them together. Since Modern Vintage Designs has a great explanation on how to do this on page 10 of the pattern instructions I won't go over that here.
Next you are going to need to crease your bias trim. You can either:
A. Do it by hand with your iron.
1. Folding the trim in half and iron it.

2. Unfold the trim and fold each side to the center and iron. You will want to give it some good shots of steam if you have them to get this to hold.

3. Finally, with the folded sides in, fold the trim in half again and press.

B. Use a simple bias tape maker like the one shown below. It will come with instructions. You need the 1" size for this trim.

C. Use a fancy bias trim maker like the Simplicity one I use. I almost always make my own bias trim, so it was a good investment for me. But, if you don't see yourself making your own bias trim often, I wouldn't spend the money. It's a very handy little gadget.

You should now have a beautiful pile of bias trim that is perfectly coordinated for your project.

5. Sewing the Ties {page 8, step 1 & 2}
Grab your waist ties. These are the long, wide strips you cut earlier. Fold each in half lengthwise with right sides together. I gave mine a good press with the iron. Next you will need to mark the end with a 45 degree angle like the picture below.

Sew along the long edge of the waist tie with right sides together using a 1/2" seam allowance. When you get to the 45 degree line near the end, stop, leave the needle in the fabric, raise your presser foot, and pivot your fabric. Continue to sew down the length of the 45 degree line.

Repeat with the second waistband piece.
You will be doing the exact same thing with the neck ties. First, you will need to cut your neck tie piece into two pieces. Then, proceed just as we did with the waist ties.
6. Attaching the Bias Trim to the Skirts {page 9, step 4}
There are many ways to attach bias trim. I do it differently then the author of the pattern. My way takes a bit more time, but I think it makes the perfect bias edge and is pretty much foolproof. You may choose which way you would like to use to attach your trim. Below is how I do mine.
Let's start with our top skirt layer. Open up (unfold) your bias trim. With right sides together and lining up the edges, pin the trim to the bottom edge of the skirt. You can leave a little bit of trim hanging from both ends as we'll take care of those later. Use lots of pins and pin carefully, making sure to stretch the trim around the curves.

Next you will be stitching in the first ditch of the trim. If you like, you can increase your stitch length just a bit. Carefully stitch right inside that fold.

This is what it should look like when you are finished.

Now, fold the trim over the edge, making sure the back side of the trim is turned under. You want to just cover the stitches on the back with the edge of the trim. Use the stitch line as your guide for where your trim should be pinned.

Even though you are looking at the back side as you pin, make sure you are sticking your pins in the front side since the front is the side you will be stitching on.

Now, sewing on the front side, carefully stitch as close as you can to the edge without going off. Stitch slowly.

When you are done, this is what your edge should look like. By stitching in the ditch first and using that stitch to line up your back edge, you have perfectly placed bias trim on the edge of your skirt.

Repeat this process attaching the bias trim to all three skirt pieces.
Congratulations. You have finished lesson #1. Hope you had fun. Please make sure to share any questions, suggestions, or thoughts with us on the Facebook group. I would also love to see progress pictures!
Thanks for sewing with me,
Danielle Storm
www.whimsicalfabric.com
No comments:
Post a Comment