Welcome to day two of the Sarah Swing Top and Tess Twirl Skirt sew along!

** If you would like to see any of the images larger on blog, just click on them to enlarge.
Today we are making ruched strips needed for both the skirt and top. I find it easier to make all my strips at once while my machine is set up for making them. I am showing how to make these ruching strips on my serger but you can also make them with a rolled presser foot on your sewing machine or even by making a narrow zig zag stitch on your sewing machine if you do not have a rolled presser foot.
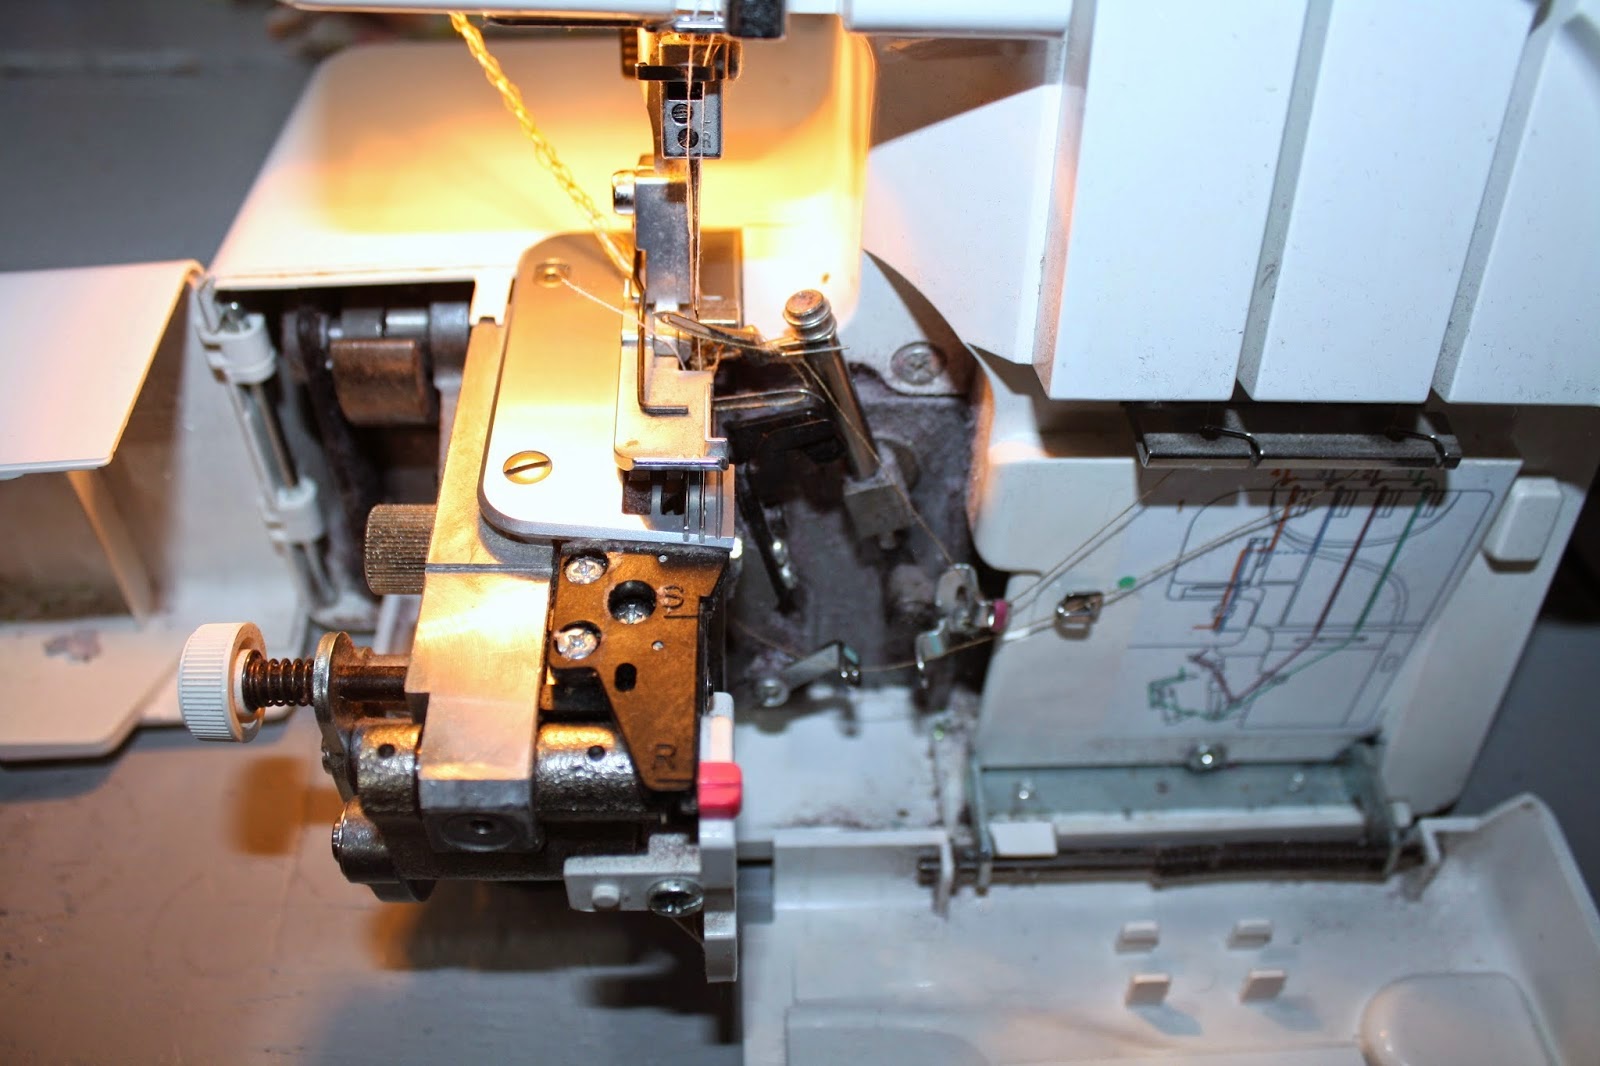
First we will set our serger up for making a rolled hem. If you have not done this before it really is easy. It just takes some time.
Note: Your serger might not set up exactly in this way. If not, check your owner's manual. Most manufactures allow you to download a PDF of the owner's manual online if you can not locate yours.
- First, turn your machine off. (Mine is on so you can see better.)
- Remove the left top needle and re-tighten the screw so it does not fall out.
- Next, disengage the cutter.
- Then, set your machine from the S to the R (the front black plate with the red slide knob) by pushing in the white spring button. Yes these are not the right terms for all the parts ;)
- Then, set your side tensions, the top to R (for rolled hem) and the bottom to 0.
Time to start making your rolled hems. Place your fabric with raw edge against the plate guild (see both photos) so the fabric goes in just the right place. Then serge away! It's that easy.


For the skirts I joined two and three strips together so I only had to fold over the begging ruched and the end ruched pieces. For the size 5/6 skirt I used 1 and 1/2 strips of fabric for the top tier, two for the center tier and 2 and 1/2 for the third tier.

I joined them with a rolled hem and trimed the serger threads flush with the raw edge of the fabric. I then rolled hemmed the outer edges.

Before you begin you might want to grab you coffee, tea or water to sip on. It does take a little bit of time to make these. They are really easy though and are fun to make.

Now we will gather these all up! I do not own a gathering presser foot but these are easily done with a regular sewing machine. Set your top tension to the loosest (largest number) setting and the stitch length to the longest stitch.

Place your strip centered on your presser foot (be sure needle is in the center for sewing) and just sew down the entire strip, it will gather itself. Yep, it is that easy. It sure does save lots of time compared to gathering this all by hand. If you want your ruching strips fuller you can leave a long tail of thread on both ends of your strip and gather it further when you sew it to your skirt/top.

Now we have a pretty pile of ruched strips for your skirt and top! The pattern calls for these to be pressed but I like the look of them as they are so I left mine unpressed.

That is where we will leave off for today. Tomorrow we will start on our skirts.
Sharon
* If you would like to earn entries into the prize drawing, please make sure to submit a photo of your completed lesson two to this Facebook Album by 12:00 noon CST, Friday, May 29th. If you have any questions the Facebook Group is a great place to ask.
Happy Sewing,
Danielle Storm
www.whimsicalfabric.com
No comments:
Post a Comment