Today we are going to start the Riley Dress. Please read the Riley pattern directions all the way through before you begin. It's probably a good idea to read through this lesson before you begin also.
If you would like to see any of the images larger that are posted in this blog, just click on them. It might be helpful in some steps. Let's begin now.
A. Tracing the Pattern
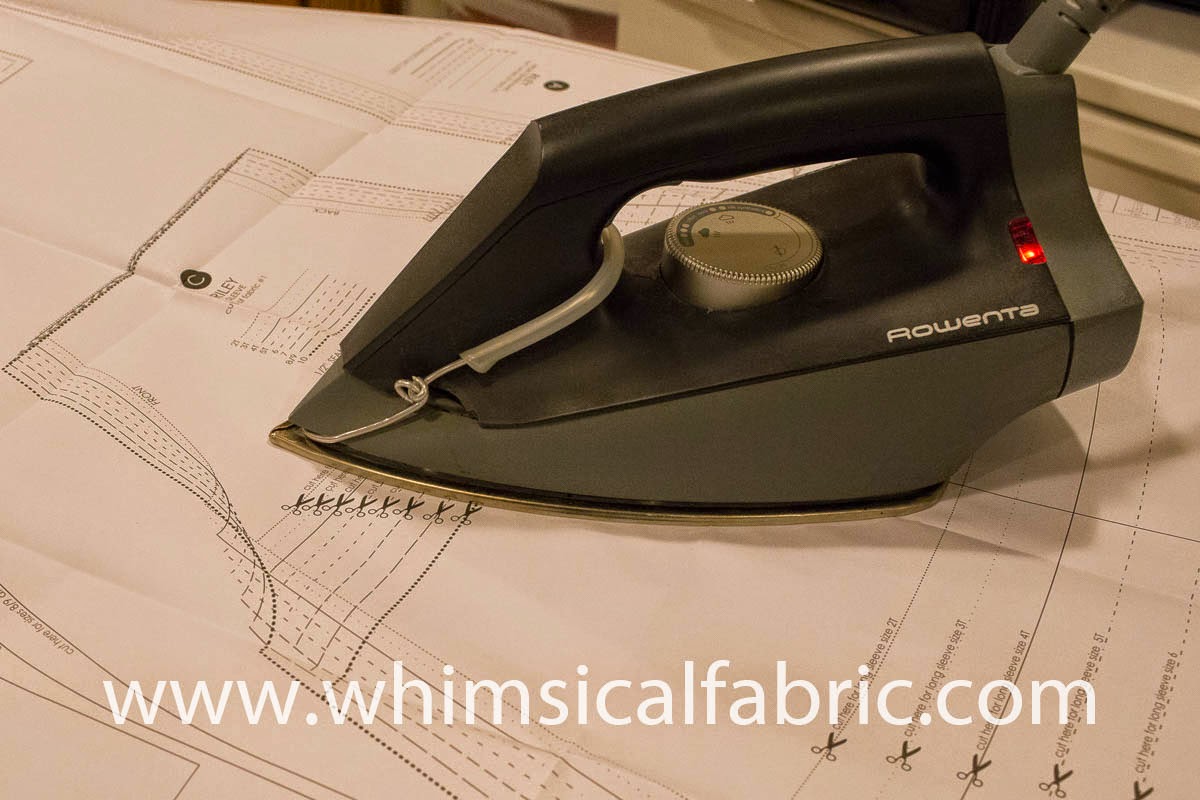
1. Let's start by pulling out our Riley pattern sheets. I like to iron mine before I begin to make sure they are smooth and flat.
2. Pull out your freezer paper and tear off a length. Lay it on top of your pattern piece sheet. I like to use pattern weights to help hold it in place. Using a Sharpie, trace around the pattern lines. For straight lines it might help to use a ruler. Make sure to transfer all your markings and pattern information.

3. Continue to trace all of your pattern pieces onto the freezer paper. When you have finished tracing your pattern pieces, fussy cut around each one.

4. You should end up with a nice stack of freezer paper pattern pieces. I've got two stacks because I made two different sizes.

3. For size 8/9 and size 10 you will need to stager your pattern pieces like this to be able to fit them on our fabric. The fabric will most likely be too narrow to fit them side by side.


5. To use your freezer paper pattern pieces you simply lay the
paper, shiny side down onto your fabric. Take your
iron and iron over the
pattern piece. DO NOT touch the iron to the glossy side of your freezer paper! It will melt and make a mess of your iron. The freezer paper will temporarily stick to your fabric making it super easy to cut your pieces out.


8. Now, you can either peel off the freezer pattern pieces or leave them on until tomorrow, when we sew. The beautify of the freezer patterns is that you can use them over and over. Next time you are ready to make another Riley dress just pull out your pattern pieces, iron them on your fabric, cut, and go! How awesome is that? Don't you just love it?

* If you would like to enter the prize drawing, please make sure you submit a picture of your completed lesson two to the Facebook Album by 12:00 noon CT, Thursday, December 4th. Also, if you have any questions the Facebook Group is a great place to ask.
Thanks for sewing with me,
1. Let's start by pulling out our Riley pattern sheets. I like to iron mine before I begin to make sure they are smooth and flat.
2. Pull out your freezer paper and tear off a length. Lay it on top of your pattern piece sheet. I like to use pattern weights to help hold it in place. Using a Sharpie, trace around the pattern lines. For straight lines it might help to use a ruler. Make sure to transfer all your markings and pattern information.
3. Continue to trace all of your pattern pieces onto the freezer paper. When you have finished tracing your pattern pieces, fussy cut around each one.
4. You should end up with a nice stack of freezer paper pattern pieces. I've got two stacks because I made two different sizes.
B. Cutting Your Fabric
1. Turn to page 3 of pattern directions and begin to lay out your freezer paper pattern pieces according to the layout diagram.
Note: If you are making a size size 8/9 or size 10 and are using prewashed 44" wide fabric, your pattern pieces will most likely not fit according to the pattern layout shown in the instruction booklet. If you purchased a kit I have included enough fabric to accommodate for this. If you did not purchase a kit, hopefully you followed my suggestion and purchased extra fabric. I will show you how to lay out your pattern pieces for size 8/9 and size 10.
2. If you purchased a kit, follow the chart below for layout.
| Kit Name | Fabric #1 Side Panels & Dress Back |
Fabric #2 Center Front Panel |
Fabric #3
Ties, Collar, &
Hem/Sleeve Ruffles
|
| Nutcracker Kit |  |
 |
 |
| Snowman Kit |  |
 |
 |
| Gingerbread |  |
 |
 |
| Rosecliff Manor |  |
|
 |
Navy Damask |
 |
|
 |
3. For size 8/9 and size 10 you will need to stager your pattern pieces like this to be able to fit them on our fabric. The fabric will most likely be too narrow to fit them side by side.
4. For all other sizes you should be able to fit them side by side like the layout diagram shows in the instruction booklet.
6. Make sure your pattern piece grainlines are aligned with the grain of the fabric. This is very important for proper drape of your dress.
7. Once you have ironed on your pattern pieces onto your fabric go
ahead and carefully cut them out with shears or a rotary cutter.
8. Now, you can either peel off the freezer pattern pieces or leave them on until tomorrow, when we sew. The beautify of the freezer patterns is that you can use them over and over. Next time you are ready to make another Riley dress just pull out your pattern pieces, iron them on your fabric, cut, and go! How awesome is that? Don't you just love it?
You are all done with the first lesson of the Riley. Great job! Please come back here tomorrow for Lesson #3, the second part of the Riley Dress.
Thanks for sewing with me,
Danielle Storm
www.whimsicalfabric.com
No comments:
Post a Comment