** If you would like to see an image on our blog in a larger format, just click on it to enlarge.
Note: Links to products within this post are either links to our website or affiliate links.
Welcome to Day Two of the Mamie Dress Sew-Along!! Today we will be sewing the sleeves, the side seams of the skirts with French seams, and prepping the back button placket on the skirts. Be sure to read the pattern first before starting today's lesson. So lets get started!!

Flutter Sleeves
1. First take the main sleeve piece and mark the 1/4" seam allowance on the sides and bottom of the sleeve. These marks will help in placement and sewing of the rick rack onto the bottom of the sleeves.

2. Now, place the rick rack over the bottom seam allowance with the rick rack's "valleys" just over the 1/4" seam line. To help the rick rack lay nicely when sewn, also line the rick rack ends up (the short side of the sleeve) so that a "valley" or the inner curve lays right on the 1/4" side seam allowance. Either glue in place with fabric glue or pin in place. (I just pinned mine in place). Be sure to leave a little extra of the rick rack on both ends.

3. Now stitch your rick rack down right over the 1/4" seam allowance.

4. Place the lining over the main sleeve with the right sides together. (Remember that there is a front and back to the sleeves so be sure to get the lining on on right.)

5. Sew the sleeve with the wrong side of the main sleeve facing up. Stitch right over the previous stitching line that you made while sewing the rick rack onto the sleeve. Trim the seam slightly.

6. Turn the sleeve and press. See how nicely the rick rack looks?! Repeat with second sleeve.

7. Take the sleeve and pin the front of the sleeve to the front of the dress arm opening with the right sides together. (The front of the sleeve has more of an angle than the back side.) Stitch in place using a 1/4" seam allowance.

8. Now, take the back of the sleeve and pin it to the back of the dress top arm opening with right sides together, pin in place then stitch. Repeat with other sleeve.

Sewing the Side Seams
We are now going to sew the sides of the skirts using a French seam. If you have not done this before, no worries, I will show you how. This is my preferred method of sewing seams for any holiday wear or dress clothes for all my children and I.
1. First take the skirts on one side of the dress and lay them with the wrong sides facing. Be sure that the raw edges are lined up very well and pin in place.

2. Stitch the side of the dress with a 1/8" seam. Be sure to take great care in keeping this seam at 1/8". Trim seam slightly. (Take you time on this one!)

3. Press the seam to one side of the dress.
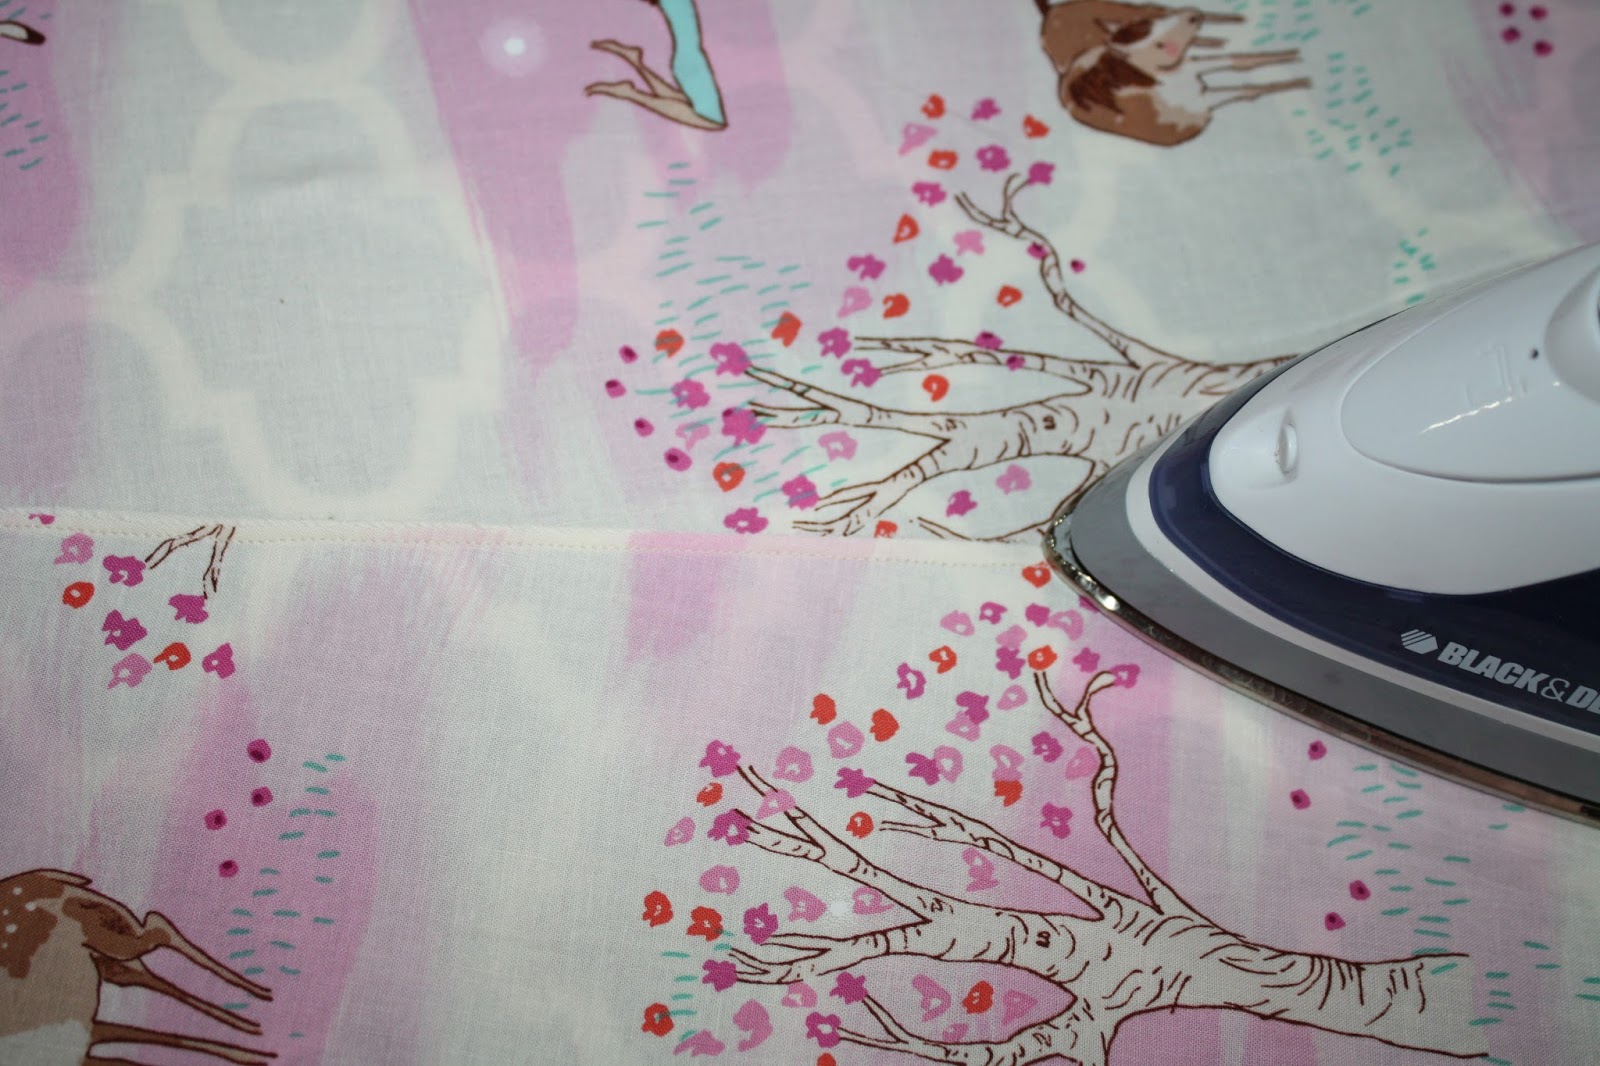
4. Now fold the skirts with right sides together. Press the seam again well. This will make sewing the seam easier.

5. Sew the seam again with a 1/8" seam allowance. This will enclose the raw edges of the skirts from the front side and leave a beautiful finish on the inside as well.

6. Press seam to the back side of the dress. Repeat with second side of the skirts. Now sit back and admire your work! I love this part myself. Did I tell you ladies that I LOVE French seam?!?

Binding the Arm Openings
1. Now take the bias strip you cut for the arm opening and press this in half with wrong sides together. Be careful not to stretch the bias stripe at all.

2. With the dress inside out, pin the bias strip to the right side of the arm hole starting at the top of the sleeve/dress seam. Trim off any extra bias that extends past the dress.

3. Sew the bias strip in place with the dress still inside out, using a 1/4" seam allowance.

4. Trim the seam allowance to a 1/8".

5. Press the bias stripe to the inside of the dress so that it encloses the raw edge. Pin in place and stitch. The pattern calls for this to be sewn by hand (which is really easier than sewing it with the sewing machine) but I chose to sew mine with the sewing machine because I like the finish of it.

6. If sewing it by machine be sure to take your time and sew along the outer fold of the bias stripe.

7. I like to give mine another good press when the seam is sewn. Repeat with second arm opening.

Preparing the Button Plackets
1. I first serge the back raw edge. If you don't have a serger, you can just stitch over the raw edges with a zig-zag stitch. This will help keep the fabric from unraveling. This is personal preference and will help with the wash and wear of the dress. Press the edge (1/4") to the wrong side, then stitch the fold in place.

2. Fold the back again 1½" and press well.

3. This step is not in the pattern but I always interface my button plackets. Cut two strips of interfacing 1½" wide by the length of the back of the skirts. Open up the button placket and place the interfacing between the pressed fold lines. Refold and press the interfacing into place. Repeat with second back skirt.

4. I also pin the button placket into place while I finish sewing the rest of the dress.

We are done for today! Come back tomorrow as we will sew the yoke and make our own piping! -Sharon
* If you would like to earn entries into the prize drawing, please make sure to submit a photo of your completed lesson two to this Facebook Album by 12:00 noon CST, Thursday, August 20th. If you have any questions the Facebook Group is a great place to ask.
Danielle Storm
www.whimsicalfabric.com
Great description of how to make French seams. My grandmother made them on all my flannel nightgowns. It is really a great way to finish the seams. I notice that the seam is 1/8" plus 1/4" even though the pattern calls for 1/4" seam. I don't think the extra 1/8" would make much of a difference in the side seam.
ReplyDeleteI noticed this too! I think next time I do this pattern I'll make the allowances 1/2" and then cut them down. The 1/8" is hard to sew accurately.
DeleteThanks for pointing that out. It was a typo. You're right, won't really make a difference, but I've fixed it now.
Delete