The Class Picnic Blouse + Shorts by Oliver+S
Are you getting excited??? Think of me as your handy-dandy trail guide, leading you on the adventure through the wonderful world of the Oliver & S Class Picnic Outfit. If you are a first timer to Oliver & S patters and you are reading through the instructions, you may at this point be excited AND scared. But never fear, I'll help you through every possible twist and turn along the way. But FIRST, we need to make sure we have all our gear in order!
Are you getting excited??? Think of me as your handy-dandy trail guide, leading you on the adventure through the wonderful world of the Oliver & S Class Picnic Outfit. If you are a first timer to Oliver & S patters and you are reading through the instructions, you may at this point be excited AND scared. But never fear, I'll help you through every possible twist and turn along the way. But FIRST, we need to make sure we have all our gear in order!
Items to Collect
- If you have not purchased the pattern yet, please do so ASAP. You may purchase it from our shoppe by clicking here.
- If you do not have fabric for the project you will want to purchase that ASAP also. At the time of this writing we do have a few fabric kits for this project left. Click here to see the project kits. We also have lots of fun fabric selections on our website. On the pattern link listed above you are able to click on the picture of the back of the pattern to enlarge it so you can view how much fabric you need for the project. We are making both the top and shorts in this sew along, but you can chose to do either or both. I will also be showing you how to do the shorts with a matching or contrasting leg facing.
- You will need two sizes of elastic; 1/2 inch and 1/4 inch and fusible interfacing. If you purchased a kit it did come with all of these items.
- You will also need coordinating thread to complete this project. The project kits did not come with thread, so please make sure you have some. There is quite a bit of top/edge stitching in this project so you will need to consider if you want your stitching to disappear (pick a thread that matches your fabric) or if you want to make it POP (chose a contrasting thread).
- You will want some sort of fabric marking instrument. You can use chalk, a marking pencil, washable fabric pen; even a bar of soap will work. *I'm a fan of the disappearing ink pen.
- And you will need tape for putting your pattern pieces together.
Optional Items to Collect - The following items are totally optional. These are items I use because I feel they make sewing easier for me. You will see me using them in the sew-along, but by no means do you need these items to complete the project.
- A seam presser (or chopstick or dull butter knife) - this will help you turn and press crisp corners and seam edges. It is particularly handy when doing the curved leg facings of the shorts!
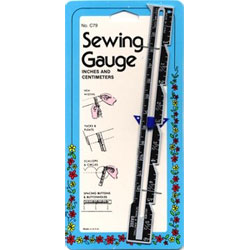
- A slide rule/sewing gauge. These little gadgets are so handy for marking hems and any other area that require a steady measure... and believe me, there are quite a few in this pattern!
- Ric-rac, ribbon, or trim for decorating the tunic and or shorts.
- Highlighter or colored pencil.
Things to Do
- Make sure to prewash and preshrink all of your fabrics. I always wash my quilting cottons in hot (or just warm if the colors are very deep and I fear color fade) and then I dry my fabric in the dryer with no softeners. I always preshrink this way when I am using fabric for clothing construction. I would hate to work hard on something only to have it shrink and not fit when I was done.
Note: Please make sure to ALWAYS preshrink your fusible interfacing. If you don't, it may shrink up when you wash your creation. This will make your fabric look wrinkled and wavy. It can also become wrinkled and wavy due to shrinkage just by using steam when you press. To preshrink your interfacing you will need to soak it for 5 minutes or so in very warm water. You don't want the water too hot to avoid removing the iron on finish, but you do want it warm enough to shrink the interfacing. After soaking, just pat it with a clean towel and hang it to dry.
- Press your fabrics well. I try to do this straight out of the dryer so that the wrinkles come out easier. Fold up your fabric and set it aside for Monday's lesson.
- If you haven't already, join our Facebook Sew-Along Group so you can post your progress pictures and be entered for a chance to win the fabulous prizes listed below!
Prizes
We are giving away over $200 worth of prizes during this Sew-Along. To enter join our Facebook Sew-Along Group. Then, complete each lesson on time and post a photo of your project in the appropriate folder on the Facebook group. We will give more details at the end of each lesson on where to post your photos and when they are due.
Happy Sewing,
www.whimsicalfabric.com


No comments:
Post a Comment