Wednesday, August 19, 2015

Sew-Along #27 - Mamie Dress - Lesson #4

The Mamie Dress by Children's Corner

 ** If you would like to see an image on our blog in a larger format, just click on it to enlarge.

Note: Links to products within this post are either links to our website or affiliate links.

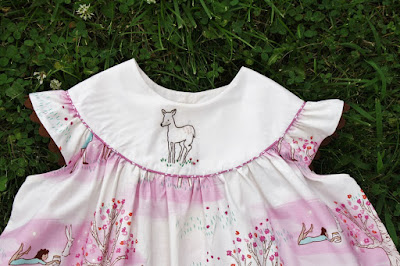
Welcome to Day 4 of the Mamie Dress Sew-Along!! I hope you have been enjoying the sew along as much as I have. Today is the most exciting day as we finish up our dresses! So let us get started.

Hemming the Dress
1. First we will press the bottom hem up a 1/4" all the way around the bottom of the skirt.

2. The next hem fold is up 3". So, to help the fabric leave a lovely finish on the front side, we are going to sew two rows of gathering stitches. The first one,  2" from the bottom of the dress.

3. The next line of gathering stitches is sewn 5/8" from the bottom of the dress.

4. Now, press the bottom fold of the hem first, being sure to keep the curve of the hem line.

5. Next, line up and pin the back button placket in place. Then, gently pull the gathering threads in so the hem of the dress fits the bottom shape of the dress. You will creating small tucks as you go around the dress.

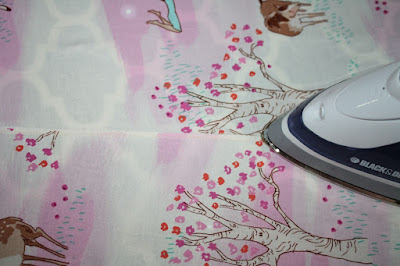
6. Press well and pin in place.

7. This is what the front will look like, a nice, smooth finish for stitching. Continue working around the dress until you have all the hem pressed and pinned. Stitch the hem in place with either hand stitching or machine stitching.

Adding Buttons and Buttonholes
We are almost done! 

Stitch the button holes onto the back of the dress on the wearers right side and sew the buttons onto the wears left side. 

Note from Danielle: Once all of your buttonholes have been stitched go ahead and rip them open.  One trick to keep from ripping too far is to place a pin in the end of the buttonhole.  Wouldn't you be crushed if you ripped right through the bar tacks and ruined your placket.  Use that pin!

Another Note from Danielle: I really don't like hand stitching buttons.  If you have a button foot and like to use it, great.  I dislike my button foot with a passion.  I don't know why, we just don't get along. I'm going to show you my little trick.  You might already be doing this, if not, I think you're going to be excited about how much time it will save you. Please promise me though that you will be VERY CAREFUL and not sew your fingers or catch a piece of needle in your eye!

1. The first thing you will need to do is snap off your current foot and set it aside. 
 

2. Next you need to set up your machine so it does a zigzag stitch with a stitch length of zero.  The width of your zigzag will vary depending on your machine and on the buttons you will be using, though most have a standard hole spacing.  These are my settings.
 

3. Place the button exactly where you want it.

4. Now, center the button under the needle and slowly lower the presser foot.  The shank will rest on your button like so.

5. Slowly lower the needle by turning the hand wheel, making sure it is centered on the hole.

6. Keep turning the hand wheel until the needle is lowered into the second hole.  If your spacing is off, adjust the width of your zigzag.


7. Keep hand turning the wheel slowly until you make sure you have it set just right.

8. When it's right and you have a few stitches in, go ahead and sew that button on.

9. Continue with the rest of your buttons. Don't you just love how quick that was!!  Now your dress is done.


The final step? Enjoy all your hard work!!


Please share you finished garments on the Whimsical Fabric & Me Facebook Group!!
Sharon

* If you would like to earn entries into the prize drawing, please make sure to submit a photo of your completed lesson four to this Facebook Album by 12:00 noon CST, Monday, August 24th. If you have any questions the Facebook Group is a great place to ask.

Happy Sewing,
Danielle Storm
www.whimsicalfabric.com

Sew-Along #27 - Mamie Dress - Lesson #3

The Mamie Dress by Children's Corner

 ** If you would like to see an image on our blog in a larger format, just click on it to enlarge.

Note: Links to products within this post are either links to our website or affiliate links.

Welcome to Day 3 of the Mamie Dress Sew-Along! Today we will sew the yoke of the dress. It will really start looking like a dress today. Be sure to read today's lesson on your pattern first before starting sewing. 

1. Sew a gathering stitch across the top neck line of the front dress, back dress and sleeve ruffles starting and stopping at the X's on the back side of the dress skirts. (Do not lock your gathering stitches.) I do this in two sections on either side starting and stopping at the center front. I find this easier for me to gather my dress.

2. Take your main yoke and pin it at the shoulders on both sides and stitch . Press the seam allowance open. Repeat with yoke lining.

3. If you are using store bought piping, trim the seam allowance to a 1/4".  If you are making yours lets get started! Take you fabric and fold the bottom edge up to the side edge. The "angle edge" is where we are going to be cutting to make our bias.

4. Place your quilting ruler over the folded angled edge 3/8" and cut the full length. This will give us a 1/4" seam piping when sewn.

5. Cut a straight edge on the ends of the both bias strips. Take your bias strips and lay them with right sides together in a 90 degree angle as shown. Mark the top bias strip on it's wrong side from the under bias strips top left corner edge to the top bias strips bottom right corner edge.

6. Stitch right on this marking you made. 

7. Trim the seam down to a 1/4" then press open.

8. Press the bias strip in half with wrong sides together.

9. Place your cording presser foot or zipper presser foot onto your sewing machine. Place the cording into the center inside fold of your bias strip.

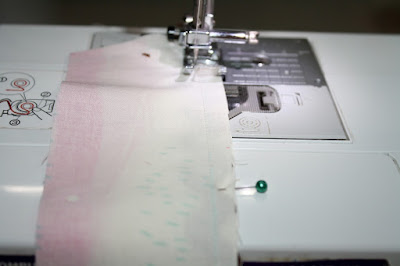
10. Sew a row of basting stitching alongside the cording. (I used my regular zipper presser foot.)


11. Take your piping and steam press it into a circle, this will make it easier to apply the piping onto your yoke.

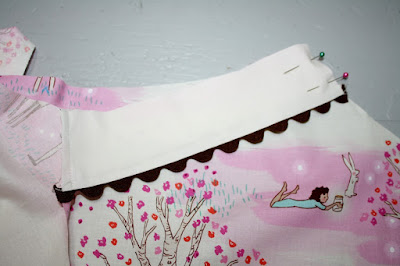
12. Pin your piping along the bottom of the main yoke with the raw edges of the piping and yoke even with each other, leaving a bit of the piping over hanging on the back yoke edges. Stitch in place as close as you can to piping.


13. Take the yoke and the skirts and place them right sides together. Match up the dots from the dress to the dots on the yoke and the center front of the yoke to the center front of the dress. Leave a 1/2" area un-gathered at the seam of the sleeve ruffle to reduce bulk in this area. (There is a dot marking this area on the pattern.)

14. Next, pin the back of the skirt to the yoke with the back yoke extending the skirt button placket edge by a 1/4".

15. Working around the entire yoke, gather the skirts evenly and pin as you go. (Yes I do use a lot of pins in this step!)

16. Sew on the yoke's wrong side, right over the stitching from where the piping was sewn on.

17. Trim the seam allowance to a 1/8" all the way around the yoke. 

18. Now, press seam up towards the yoke.

19. Take your lining yoke and sew a row of basting stitches a 1/4" from the edge. Press up from the basting stitches to the wrong side. 

20. Place the lining yoke over the main yoke with right sides together. Pin the yokes together at the back yoke edge and around the neck line. Stitch with a 1/4" seam allowance. Trim edges and corners, turn and press well.

21. Carefully pin the yoke lining to the inside of the dress all the way around with the raw edges tucked in between the main yoke and yoke lining.

22. Hand stitch the yoke in place.

We will leave off here today. Come back tomorrow for the final lesson so we can finish up our dresses!! I am excited and hope you are too!!
Sharon

* If you would like to earn entries into the prize drawing, please make sure to submit a photo of your completed lesson three to this Facebook Album by 12:00 noon CST, Friday, August 21st. If you have any questions the Facebook Group is a great place to ask.

Happy Sewing,
Danielle Storm
www.whimsicalfabric.com  

Monday, August 17, 2015

Sew-Along #27 - Mamie Dress - Lesson #2

The Mamie Dress by Children's Corner

 ** If you would like to see an image on our blog in a larger format, just click on it to enlarge.

Note: Links to products within this post are either links to our website or affiliate links.  

Welcome to Day Two of the Mamie Dress Sew-Along!! Today we will be sewing the sleeves, the side seams of the skirts with French seams, and prepping the back button placket on the skirts. Be sure to read the pattern first before starting today's lesson. So lets get started!!


Flutter Sleeves
1. First take the main sleeve piece and mark the 1/4" seam allowance on the sides and bottom of the sleeve. These marks will help in placement and sewing of the rick rack onto the bottom of the sleeves.


2. Now, place the rick rack over the bottom seam allowance with the rick rack's  "valleys" just over the 1/4" seam line. To help the rick rack lay nicely when sewn, also line the rick rack ends up (the short side of the sleeve) so that a "valley" or the inner curve lays right on the 1/4" side seam allowance. Either glue in place with fabric glue or pin in place. (I just pinned mine in place). Be sure to leave a little extra of the rick rack on both ends.

3. Now stitch your rick rack down right over the 1/4" seam allowance.

4. Place the lining over the main sleeve with the right sides together. (Remember that there is a front and back to the sleeves so be sure to get the lining on on right.)

5. Sew the sleeve with the wrong side of the main sleeve facing up. Stitch right over the previous stitching line that you made while sewing the rick rack onto the sleeve. Trim the seam slightly.

6. Turn the sleeve and press. See how nicely the rick rack looks?! Repeat with second sleeve.

7. Take the sleeve and pin the front of the sleeve to the front of the dress arm opening with the right sides together. (The front of the sleeve has more of an angle than the back side.) Stitch in place using a 1/4" seam allowance.

8. Now, take the back of the sleeve and pin it to the back of the dress top arm opening with right sides together, pin in place then stitch. Repeat with other sleeve.


Sewing the Side Seams
We are now going to sew the sides of the skirts using a French seam. If you have not done this before, no worries, I will show you how. This is my preferred method of sewing seams for any holiday wear or dress clothes for all my children and I.

1. First take the skirts on one side of the dress and lay them with the wrong sides facing. Be sure that the raw edges are lined up very well and pin in place.

2. Stitch the side of the dress with a 1/8" seam. Be sure to take great care in keeping this seam at 1/8". Trim seam slightly. (Take you time on this one!)

3. Press the seam to one side of the dress.

4. Now fold the skirts with right sides together. Press the seam again well. This will make sewing the seam easier.

5. Sew the seam again with a 1/8" seam allowance. This will enclose the raw edges of the skirts from the front side and leave a beautiful finish on the inside as well.

6. Press seam to the back side of the dress. Repeat with second side of the skirts. Now sit back and admire your work! I love this part myself. Did I tell you ladies that I LOVE French seam?!?


Binding the Arm Openings
1. Now take the bias strip you cut for the arm opening and press this in half with wrong sides together. Be careful not to stretch the bias stripe at all.

2. With the dress inside out, pin the bias strip to the right side of the arm hole starting at the top of the sleeve/dress seam. Trim off any extra bias that extends past the dress.

3. Sew the bias strip in place with the dress still inside out, using a 1/4" seam allowance.

4. Trim the seam allowance to a 1/8".

5. Press the bias stripe to the inside of the dress so that it encloses the raw edge. Pin in place and stitch. The pattern calls for this to be sewn by hand (which is really easier than sewing it with the sewing machine) but I chose to sew mine with the sewing machine because I like the finish of it.

6. If sewing it by machine be sure to take your time and sew along the outer fold of the bias stripe.

7. I like to give mine another good press when the seam is sewn. Repeat with second arm opening.


Preparing the Button Plackets
1. I first serge the back raw edge. If you don't have a serger, you can just stitch over the raw edges with a zig-zag stitch.  This will help keep the fabric from unraveling. This is personal preference and will help with the wash and wear of the dress.  Press the edge (1/4") to the wrong side, then stitch the fold in place.

2. Fold the back again 1½" and press well.

3. This step is not in the pattern but I always interface my button plackets. Cut two strips of interfacing 1½" wide by the length of the back of the skirts. Open up the button placket and place the interfacing between the pressed fold lines. Refold and press the interfacing into place. Repeat with second back skirt.

4. I also pin the button placket into place while I finish sewing the rest of the dress.

We are done for today! Come back tomorrow as we will sew the yoke and make our own piping!  -Sharon

* If you would like to earn entries into the prize drawing, please make sure to submit a photo of your completed lesson two to this Facebook Album by 12:00 noon CST, Thursday, August 20th. If you have any questions the Facebook Group is a great place to ask.

Happy Sewing,
Danielle Storm
www.whimsicalfabric.com  
#navbar-iframe{ display:none !important;}