Thursday, December 11, 2014

Sew-Along #20 - Sleepover Pajamas - Lesson #3

The Sleepover Pajamas by Oliver+S

Welcome to the Sleepover Pajama sew-along.  If you have any questions, suggestions, or tips to share; please make sure to post them on our Facebook group.  Also, if you would like to see any of the images larger that are posted in this blog, just click on them.  It might be helpful in some steps.  
NOTE: Please make sure you read over the Oliver+S instructions prior to starting this lesson.  We will be working on page 6-7 today.  You will need to keep these O+S instructions open and where you can read them as you go through the lesson.  The O+S instructions give a more thorough and detailed description of each step and will be necessary to complete these pajamas.
Today we will:
  1. Prepare Neck Ruffle (View B)
  2. Attach Facing
  3. Buttons and Buttonholes
A. Prepare Neck Ruffle (Skip this section if you are not adding the ruffle.)

1. Attach the two short sides of the ruffle together.  Press seam open.

2. Fold in and press the short edge of the ruffle.

3. Fold the ruffle wrong sides together and press.  Run two gathering stitches along the curved edge side.

4. Gather the ruffle to measure the same size as the facing from the bottom of the right side to the curved neckline of the left side.  Pin and attach the ruffle to the facing matching the raw edges.
Note: Basting the ruffle to the facing will help to keep everything together and from slipping while attaching to the pajama top.

B. Attaching the Facing

1. Pin the right side of the facing to the wrong side of the pajama top all the way around.  The raw edges of the facing and top should be lined up.  Be sure the facing hangs off the pajama top front at the hemline.  Stitch the facing onto the pj top.


2. Clip the curved edge of the facing, right up to the stitch line.  Be sure not to clip through the stitching.  I like to use pinking shears on all curved hems first and then clip.

3. Press the facing flat and prepare for topstitching.  Press the bottom edge of the facing up toward the top and even with the hem.

4. Topstitch all the way around the facing.
Topstitched

C. Buttons and Buttonholes 

1. Transfer markings onto the facing pieces.  I use the button as a guide to be sure that my button holes are big enough.  I mark on either side of the button and am sure to stitch all the way from marking to marking.  Buttonholes for girls go on the right and for boys on the left.  Sew buttonholes.

2. Cutting the buttonholes can be scary.  I have a little trick to help me not cut all the way through the other side of the buttonhole.  Insert the seam ripper into one end of the buttonhole but make it come out right in the center of the buttonhole.

3. I started on the right side, so I now insert the seam ripper into the left side and come out through the hole.  This helps me not cut through the buttonhole.  Another trick is to put a safety pin at the bottom of the buttonhole to prevent ripping all the way through.

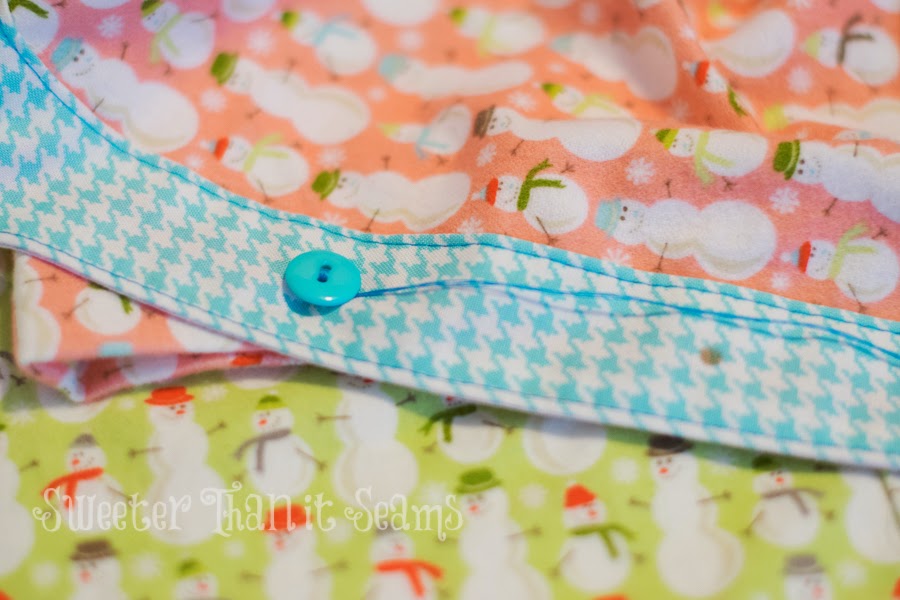
4. Sew on the buttons.  I like to use a large needle as a spacer between my button and fabric.  If you sew the button on with the needle in place, it gives a little more space for the button to go through the buttonhole.

5. When you are ready to tie off, wrap the thread around the button several times.

6. Insert the needle under the thread.
7. Pull tight.

8. Repeat the tying process at least one more time.
We did some serious sewing today!  I hope to see you back here on Monday to work on the pants.

* If you would like to enter the prize drawing, please make sure you submit a picture of your completed lesson one to the Facebook Album by 12:00 noon CT, Tuesday, December 16th.  Also, if you have any questions the Facebook Group is a great place to ask.

Sew-Along #20 - Sleepover Pajamas - Lesson #2

The Sleepover Pajamas by Oliver+S

Welcome to the Sleepover Pajama sew-along.  If you have any questions, suggestions, or tips to share; please make sure to post them on our Facebook group.  Also, if you would like to see any of the images larger that are posted in this blog, just click on them.  It might be helpful in some steps.  
NOTE: Please make sure you read over the Oliver+S instructions prior to starting this lesson.  We will be working through page 6 today.  You will need to keep these O+S instructions open and where you can read them as you go through the lesson.  The O+S instructions give a more thorough and detailed description of each step and will be necessary to complete these pajamas.
Today we will:
  1. Prepare the facing
  2. Prepare the pockets
  3. Assemble front and back bodice
  4. Attach sleeves
  5. Assemble and hem the top

A. Prepare the Facing

1. Fuse interfacing to front facing pieces.

2. Attach facing fronts to the facing back at the shoulder seams.  Press shoulder seams open.  Sew a basting stitch on the outside curved edge.  This will help create the hem later.
Note: Your back facing was most likely cut from the coordinate fabric, not flannel and will match your facing fronts.

3. Press the seam allowance along the outside of the facing.  Use the basting stitch as a guide to iron the hem.

 
B. Prepare the Pockets

1. Sew a basting stitch along the outside curved edge of the pockets.  Make sure to sew in that second row of basting stitches according to the pattern instructions.


2. Attach the pocket yoke to the top of the pocket with right sides together.

3. Press the seam allowance toward the pocket yoke.

4. Press the top edge of the pocket yoke to the wrong side.

5. Fold again to the right side.  Stitch the folded edge together.

6. Turn the pocket yoke right side out and press.

7. Pull up the second row of basting stitches to curve in the pocket according to the pattern instructions.

8. Edgestitch the seam to finish the front of the pocket yoke.

9. Pin the pockets to the pajama front pieces using the pocket placement guide.  (Here is one of those areas where you need to take your time to be sure the pockets line up with each other on both front pieces.  It will be very obvious if they don't line up.)

 
C. Assemble the Fronts and Backs

1. Attach fronts and back at the shoulder seams.


2. Either press seam open or finish seam.
  

D. Prepare and Attach the Sleeves

1. Sew a gathering stitch along the curved edge of the sleeve.


2. Attach the sleeve to the shoulder.  Pull the gathering stitch if necessary so the sleeve will fit properly.

3. Finish the seam.

4. Fold and press the bottom of the sleeve toward the wrong side 1/2 in and then again 2 in.  Do not sew in place.
  

E. Assemble and Hem the Top

1. Line up the side seams and stitch.  Make sure you have unfolded the sleeve hem.


2. Finish the seams.

3. Fold the bottom hem of the Pajama Top toward the wrong side 1/2 in and then again 1 in and iron.  Edgestitch the inner most fold.

4. Refold the sleeve hem and iron.

5. I like to turn the garment inside out and topstitch on the inside of the sleeve.  My sleeve does not fit over the arm of my sewing machine so I have to use this technique.

6. Turn up the sleeve to make the cuff and stitch in the ditch to secure it.

Come back tomorrow to work on the Ruffle, Facing, Buttons, and Buttonholes.

* If you would like to enter the prize drawing, please make sure you submit a picture of your completed lesson one to the Facebook Album by 12:00 noon CT, Monday, December 15th.  Also, if you have any questions the Facebook Group is a great place to ask.

Wednesday, December 10, 2014

Sew-Along #20 - Sleepover Pajamas - Lesson #1

The Sleepover Pajamas by Oliver+S

Welcome to the Sleepover Pajama sew-along.  If you have any questions, suggestions, or tips to share; please make sure to post them on our Facebook group.  Also, if you would like to see any of the images larger that are posted in this blog, just click on them.  It might be helpful in some steps. 

Hi y'all!  I'm Kara and I blog over at Sweeter Than it Seams.  I hope you are ready to start sewing with me!  This pattern is a bit of a challenge but if you stick with me, you will have an awesome set of PJ's for your little one.

There is some prep work we need to do before we can start sewing:
1. I have one really important rule while sewing.  Perfect is boring.  I like some character in my garments so I am not a perfectionist when it comes to sewing.  I am sure some of you would think my seams are horrendous!

2. Wash - Always wash and iron your fabric before you sew.  I know some people think this step is a waste of time but before you sew is the best time for fabric to shrink.

3. Print the pattern. The pattern pieces are located on pages 15-51 for size 6m-4 and pages 15-67 for size 5-12.
Note: For further instructions on how to print off your pattern properly you may check out the sew-along lesson posted here.

4. Tape the pattern together.  Nothing fancy here.  I always cut the bottom and right edges off to line all of my patterns up.
 Note: For a detailed writeup of how to piece Oliver+S patterns together you can check out our blog post here.
5. If you are making multiple sizes, trace the pattern on freezer paper.  Place the paper shiny side down with the pattern on the bottom.  Trace away and be sure to transfer all markings. 
Note: Again, if you would like further instructions on this step you may check out the sew-along lesson located here.
6. Place the pattern pieces onto the fabric and cut the fabric.  Warning - be careful here!  I was a little too relaxed while cutting and ended up messing up on the facing.  The facing piece will be on the outside of the garment so be sure to use the contrasting fabric for these pieces.  I accidentally cut the facings in the wrong fabric and didn't even realize I had made a mistake until it was time to sew it on to the pajama top.
Note: The Cutting Layouts are located on page 14 for both of the patterns.
7. Cut the fabric.  You will end up with a pile similar to what you see below.  

Let me know if you have any questions, I'm here for you!

* If you would like to enter the prize drawing, please make sure you submit a picture of your completed lesson one to the Facebook Album by 12:00 noon CT, Friday, December 12th.  Also, if you have any questions the Facebook Group is a great place to ask.

Monday, December 8, 2014

Sew-Along #20 - Sleepover Pajamas - Preparations

The Sleepover Pajamas by Oliver+S

Before we begin the sew-along on Wednesday, December 10th, you'll want to gather a few items and do a few things to prepare.


Items to Collect
  1. You must have the the pattern to complete the pajamas.  If you have not yet purchased these, please do so here. 
    http://www.whimsicaldesignsclothing.com/index.php?main_page=index&cPath=99_367_468

  2. If you do not have fabric for the project you will want to purchase that also.  At the time of this writing we do have a fabric kits available.  We also have lots of fun fabric selections on our website. 
    Please note that this pattern assumes you are using two fabrics.  One for the main part of the PJs and one for the placket and trim.  Flannel is a great fabric for the main part of the PJs, but it is too thick really for the ruffled placket and trim.  Therefore, when choosing a coordinate, please make sure to choose a quilting cotton or something of similar weight.
    http://www.whimsicaldesignsclothing.com/index.php?main_page=index&cPath=99_367_468

  3. The pattern is a PDF pattern.  You will either need a printer, paper, and tape to print and put your pattern pieces together at home.  Or, you can have the last page of the pattern printed on large paper at your print shop.  If you prefer to have your print shop print one large pattern sheet, make sure to put your order in ASAP.  Sometimes they take a couple of days to process your request.
  4. The pajama top requires fusible lightweight interfacing for the placket.  Our kits came with interfacing, but if you didn't purchase a kit you will need to make sure you have some.
  5. The top also uses buttons.  Depending on your size, you will need 4-6 buttons that are about ½" in diameter.  Our kits come with all the buttons you need.  If you did not purchase a kit, please gather some buttons for the top.
  6. The pajama bottoms require ¾" wide elastic for the waistband.  Again, if you purchased a kit, you will have received the elastic you need.  If not, please make sure to have some on hand.
  7. You will need coordinating thread to complete this project.  The project kits did not come with thread, so please make sure you have some. 
  8. And finally, you will need pins, a sewing machine, a good iron (a steam iron is preferable for sewing), a pair of fabric shears or a rotary cutter and mat, a ruler, and a fabric pen or chalk. 

Optional Items to Collect - The following items are totally optional.

  1. During the sew-along we will not be showing how to trace the pattern pieces onto freezer paper.  If you desire to do this though (I always do!), have some freezer paper on hand.  You can find freezer paper at most grocery stores where the wax paper and aluminum foil. 
  2. A sharpie or other permanent marker for tracing your pattern pieces onto the freezer paper is helpful if you choose to do this step.  I recommend a black sharpie as the colored ones, though more fun, can tend to transfer onto your fabrics when you iron over them.
Things to Do
  1. Make sure to prewash and preshrink all of your fabrics.  I wash my fabrics on warm/hot and then I dry my fabrics in the dryer with no softeners.  I always preshrink this way when I am using fabric for clothing construction.  I would hate to work hard on something only to have it shrink and not fit when I was done.  If you are not concerned about bleed and don't plan on ever needing to wash your bow tie or suspenders, those fabrics don't need to be prewashed.
  2.  Prewash your fusible interfacing to preshrink it.  This will prevent any wrinkles or waves that might arise when you iron or launder your garment.  To prewash your interfacing simply soak it in a sink for about 5 minutes in very warm water.  You don't want the water too hot to avoid removing the iron-on finish, but you do want it warm enough to shrink the interfacing.  After soaking, just pat it with a clean towel and hang it to dry.
  3. Press all of your fabrics well.  I try to do this straight out of the dryer so that the wrinkles come out easier.  
  4. Don't forget to join our Facebook Sew-Along Group so you can post your progress pictures. Everyone who posts completed lesson pictures, on time, to the Facebook Group, will be entered into drawings to win some awesome prizes!
Happy Sewing,
Danielle Storm
www.whimsicalfabric.com

Friday, December 5, 2014

Sew-Along #19 - Riley Dress and Dapper Bow Tie + Suspenders - Lesson 5

The Dapper and Riley by Modkid

Today is the day we finish our Riley dress.  Woot!  Are you excited??

Please read the Riley pattern directions all the way through if you haven't already.  It's probably a good idea to read through this lesson before you begin also.

If you would like to see any of the images larger that are posted in this blog, just click on them.  It might be helpful in some steps.  Let's begin now.

A. Attaching the Collar to the Dress

1.  Sew gathering stitches at the top of your center front panel. 

2. With right sides together pin the center front notch of the collar onto the center front notch of the dress.

3. Repeat for the back center notch.

4. Pull up the gathering stitches on the center front panel. 

5. Finish pinning the collar to to the dress all the way around, adjusting the gathers to make the dress and collar fit.

6. Stitch together using a ½" seam allowance, being very careful to not catch up the rest of your dress in the stitching.  Finish the seam with a zig-zag or overlock stitch.

7. Flip the collar up and press well.  Be very careful with a hot iron and your elastic button loop.  It can melt.

8. Top stitch around the collar.  

9. I decided to add my labels at this point.  My secret to applying labels quickly and perfectly positioned?  Washaway Wonder Tape to the rescue, again.  Have I told you lately how much I love this stuff?  I put a small piece on the front of the size tag.  Stick it to the main tag.  Then, add a longer strip on the back of the main tag and stick it where I want on my garment.  It stays in place with no pins.  Perfect!


B. Adding Sleeve and Hem Ruffles (or Bands).
Note: If you are simply hemming your sleeves or dress hem, just follow the instructions in the booklet and you are done.  :)
1. Ruffles     (If you are doing a banded hem or sleeve, skip down to step 2.)

a.) Place your two hem ruffle pieces right sides together and stitch both short ends to form a long circular band.   Press seams open.  Then, fold your long band in half lenghtwise with wrong sides.  Press well.

b.) I then mark my two sides seams, match them up to each other and mark my center front and center back.  I then also mark between each of these marks for a total of 8 marks.  It might be the world worst ruffler and having so many marks helps me space the ruffles more evenly. 

c.) I also find the center front and center back of the dress and mark them.  Then, using those two marks I find the true sides of the dress and mark them.  Finally, I find and mark the center point between each of those four marks.

d.) Next, make a long gathering stitch withing the seam allowance of the ruffle.

e.) Pull up your gathers and pin your ruffle onto your hem, matching up all those marks.  I didn't take a picture of that, but here is a very blurry picture of the sleeve.  You hopefully get the idea  :)
     
f.) Stitch the ruffle onto the hem of the dress using a ½" seam allowance.

g.) Finish your seam with a zig-zag or overlock stitch.

h.) Press your seam up towards the dress.  Again, picture is of the sleeve, but it's the same method.
 

i.) Top stitch.

 j.) Repeat all of these steps for the sleeves, except you only have one strip of fabric for each sleeve, not two.

2. Hem and Sleeve Bands

I didn't want to put a ruffle on one of my dresses, but I still wanted a pop of color at the hem and sleeve ends.  So, I decided to add bands.  I like to do this often.  It's more simple than a ruffle and just fits the personality of my older daughter better.

a.) The first thing you will need to do is measure the circumference of your hem.  Mine was 54 inches.  I knew I needed two pieces of fabric for the hem band to cover that large of a circumference, so I added 2 inches to that for a total of 56 inches.  Thus, needed two strips of fabric 28 inches long each. If your circumference is smaller and/or your width of fabric is wider and you can get by using just one strip of fabric, just add 1 inch to your hem circumference. 

I knew I wanted my hem band 2 inches wide, so my hem band needed to be a total of 5 inches wide to accommodate a ½" seam allowance.

Thus, I tore two pieces of fabric 28" long by 5" wide.

b.) Place your hem band pieces right sides together and stitch both short ends with a ½" seam allowance.

c.) Press upon your seams.

d.) With wrong sides together, fold your hem band in half lengthwise and press.

e.) Mark your dress center front and dress center back.  Then, using those marks, find the true sides of your dress and mark them.  I also mark my hem band sides and center front and center back.

f.) Pin your hem band onto your hem making sure to match up these marks.

g.) Stitch with a ½" seam allowance.  Press the seam up towards the dress and then top stitch.

h.) Repeat this same method for the sleeve ends if desired.  For my sleeve ends I wanted a nice narrow ½" band so I used a 2" width for my fabric.


You are all done!  Congratulations!!  Now slip this cute dress on that little girl and snap some pictures to share with us.

* If you would like to enter the prize drawing, please make sure you submit a picture of your completed lesson five to the Facebook Album by 12:00 noon CT, Tuesday, December 9th.  Also, if you have any questions the Facebook Group is a great place to ask.

Thanks for sewing with me,
Danielle Storm
www.whimsicalfabric.com
#navbar-iframe{ display:none !important;}