Welcome to day two of the Children's Pants Pattern No.2 sew-along. I want to remind everyone that I am not a "professional" seamstress, nor was I formally taught. I'm just a girl who loves fabric, sewing, and pretty much everything related to those two things. If you have any questions, suggestions, or tips to share; please make sure to post them on our Facebook group.
Please read the Children's Pants Pattern No.2 Tutorial all the way through before you begin. It's probably a good idea to read through this lesson once before you begin also.
If you would like to see any of the images posted in this blog larger, just click on them. It might be helpful in some steps. Let's start, shall we?
A. Creating The Back Pockets
Gathered Pockets
Note: If you are making the gathered back pockets follow along. If you are making the pleated back pockets skip down to that section.1. Pull out your two gathered pocket pieces.

2. Using your longest stitch length, stitch two lines of gathering threads on the top arched edge. Make sure the gathering threads are within the ½" seam allowance.

3. Pull up your gathering threads to gather your pocket.

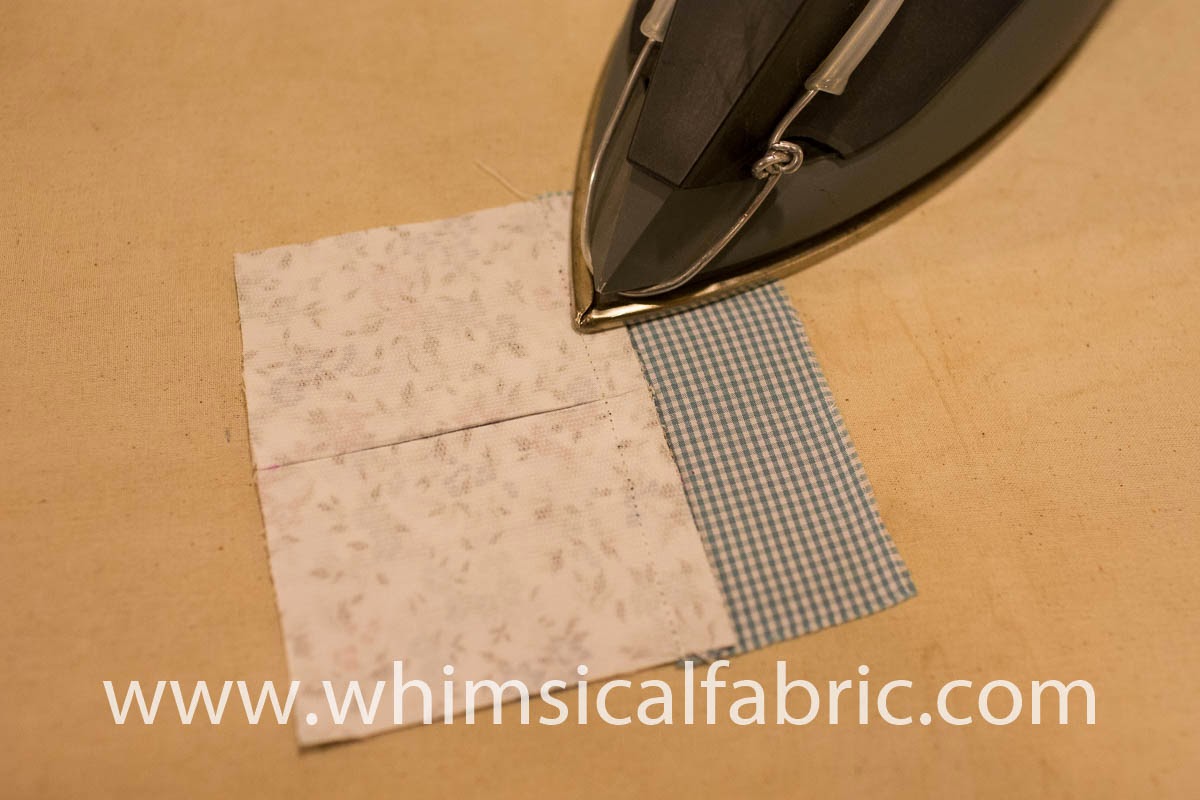
4. With right sides together pin the pocket band to the top of the pocket. Spread out the gathers evenly to make the two edges the same length.

5. Stitch together using a ½" seam allowance.

6. Press the seam up towards the pocket band.


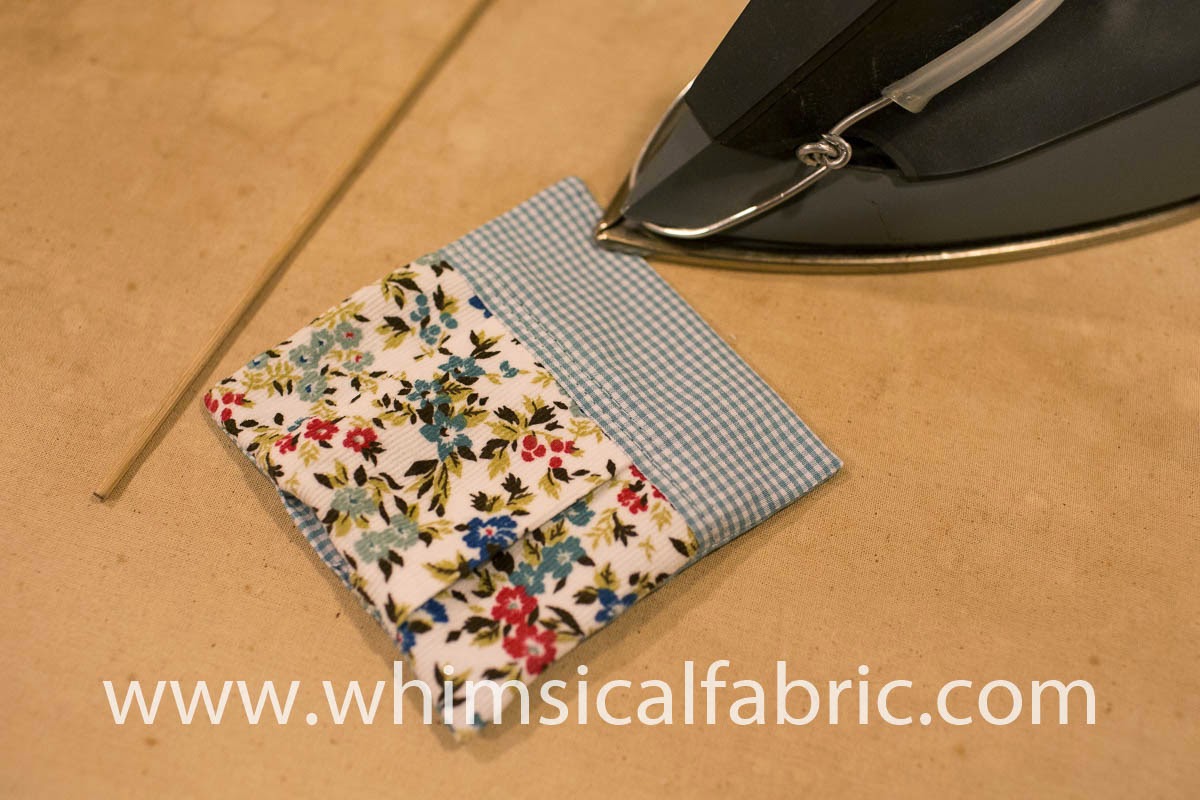
8. With right sides together pin the pocket and the pocket lining together.

9. Stitch on the pocket side using a ½" seam allowance. Make sure to leave an opening at the bottom of the pocket for turning. Trim seam allowances.

10. Turn your pocket right side out. Press your pocket well. I like to use a chop stick to poke out the corners.

11. Repeat with the second back pocket. Set aside.

Pleated Pocket
1. Grab one of your pleated pocket pieces.

2. With right sides together fold your pocket piece in half. Iron to create a crease down the center.

3. Using a ruler and a fabric pen or chalk, mark two inches on either side of the center fold on the wrong side of the fabric. Mark within the seam allowance on both the top and the bottom of each pocket piece.


4. Now, fold your pocket in on both sides matching up your marks with the center crease.

5. Iron these folds in place. If using corduroy remember to iron on the backside of your fabric only.


6. With right sides together, pin the pocket band on top of your pocket. Stitch using a ½" seam allowance.

7. Press the seam up towards the pocket band.
8. Top stitch the pocket band. Remember to lengthen your stitches for a more professional look. I like to lengthen from a 2.5 to a 3.5 stitch length.

9. With right sides together pin the pocket and the pocket lining together.


11. Turn the pocket right side out. Press your pocket well. I like to use a chop stick to poke out the corners.
12. Repeat with the second back pocket. Set aside.
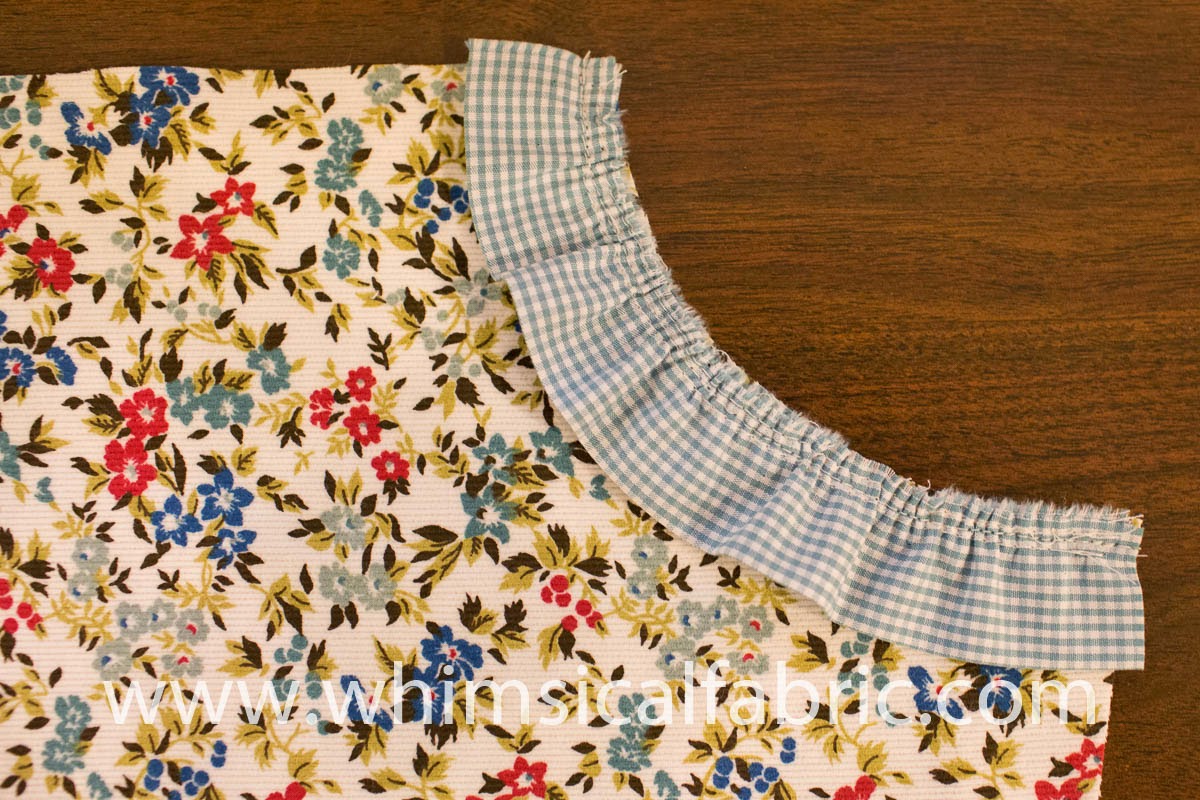
1. With wrong sides together fold the hip pocket ruffles in half lengthwise. Press well.

2. Using your
longest stitch length, stitch two lines of gathering threads on the raw edge of each hip ruffle. Make sure the gathering threads are within the ½" seam
allowance.

3. Pull up the gathering threads.

4. Grab your front leg pieces.

5. Pin your hip ruffles onto the curve of the hip pocket on each front leg piece. Make sure to evenly spread out the gathers.

6. Stitch in place using a ½" seam allowance.
C. Creating the Hip Pockets
1. Grab both your Hip Pocket A and Hip Pocket B pieces.

2. With wrong sides together layer the A piece on top of the B piece.

3. Using a ¼" seam allowance (note the change in seam allowance width) stitch the long side and bottom of Pocket A to Pocket B.

4. Trim seam allowances to half their width and notch the corner. If you own pinking shears you can easily do both in one step.


7. Repeat to create the second hip pocket.

That is all for today's lesson. You did great! Come back tomorrow for Lesson #3.
* If you would like to enter the prize drawing, please make sure you submit a picture of your completed lesson one to the Facebook Album by 12:00 noon CT, Thursday, October 2nd. Also, if you have any questions the Facebook Group is a great place to ask.
Thanks for sewing with me,
Danielle Storm
www.whimsicalfabric.com
No comments:
Post a Comment