Welcome to the Stella Dress sew-along. If you have any questions, suggestions, or tips to share; please make sure to post them on our Facebook group.
Please read the instructions in your Stella Dress pattern all the way through before you begin sewing. It's probably a good idea to read through this lesson once too before you begin.
*All seams for the Stella are ½" unless otherwise stated.
I also want to remind everyone that if you would like to see any of the images posted in this blog larger, just click on them. Let's begin now.
Day 1 - Tracing Your Pattern and Cutting Your Fabrics
Hello Everyone! This is Sarah and I am
so happy to be here to guide you through the sew along for the Izzy
& Ivy Stella dress. This is a really cute dress! I made one for my
older daughter which ended in my younger daughter having a fit because
she didn't have one. So I might be sewing along as well to remedy that
:)
This
dress is a simple peasant design, but with some added flair. While it
is pretty simple to sew up, the details it has add a bit more work than
a plain peasant dress. No worries though! We will go through it
together and before you know it, you'll be done! So lets get started...
With
all of my paper patterns (and many of my pdf ones too!) I trace the
pattern out with freezer paper. I do this for a couple of reasons. For
one, I don't want to cut them up so I can reuse them later. Another
reason I trace is because I have 2 different sized kiddos and want to be
able to use the patterns for both of them. The third benefit to
tracing is that I can iron on my freezer paper tracings and that makes
cutting a breeze!
To trace the pattern, I start with freezer paper that I bought in the food storage section at my local grocery store. I
also use a sharpie and a ruler, because I am not always good about
tracing my lines straight.
To trace the pieces, I simply lay the
freezer paper (shiny side down) over the pattern. It is transparent
enough that you can see the lines through it.
Then,
using the sharpie, and the ruler if I need it, I trace along the lines
for the size I am making. In this case I am making the size 7.
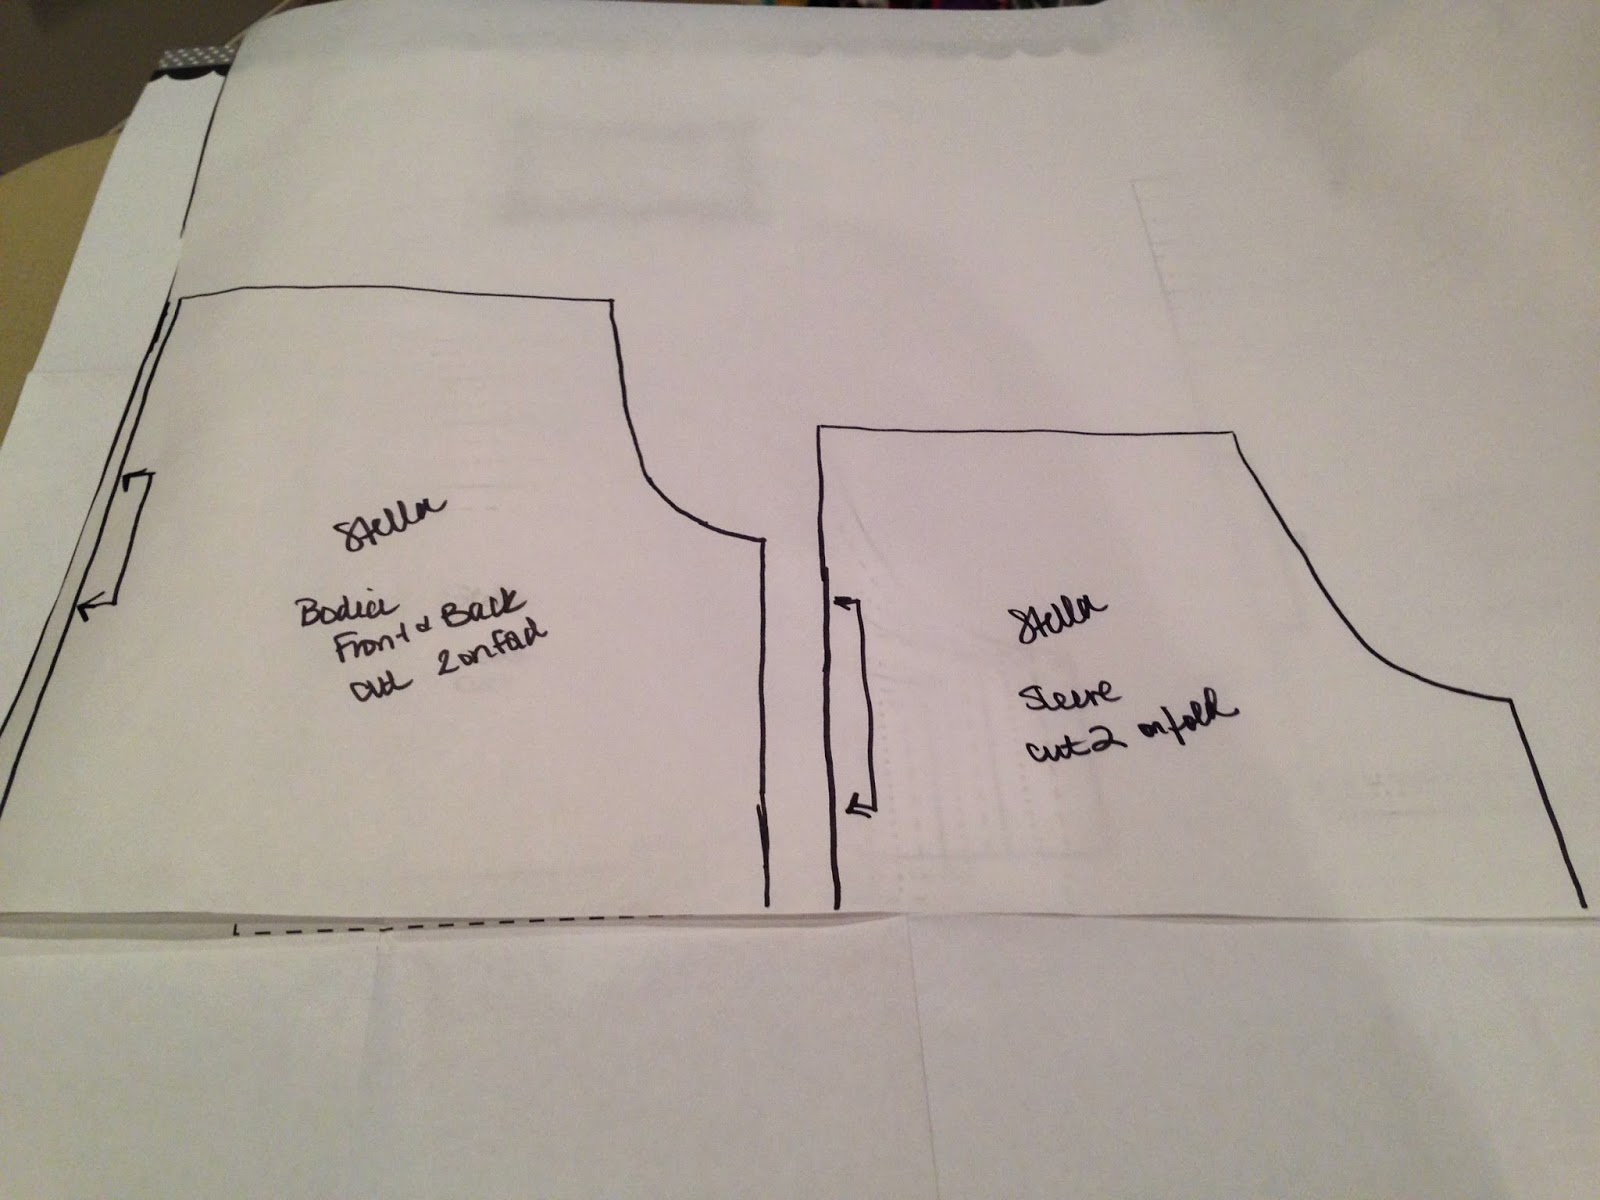
I also transfer any markings, like the "cut on fold" indicators, and the pattern name and piece.
There
are only two pattern pieces for this pattern, so the tracing is easy!
Once they are both traced, I just cut out the piece along my markings.
The
next step is to iron the freezer paper pieces onto the fabric and cut
out your pieces. I like to iron my fabric before I cut, just to make
sure it is nice and smooth. Then I fold the fabric along one side to
start laying out my pieces.
***NOTE: I used a directional print. If you are using one too, make sure you are cutting the pieces in the correct direction.
I place the piece, shiny side down, onto the edge of the fold.
Then, using the iron, I iron the freezer paper onto the fabric. It adheres slightly to the fabric.
***This is an especially useful process for cutting out knits too!
Once
the freezer paper is ironed on, I simply cut around the piece as I
normally would. I did one bodice and one shoulder sleeve together, cut
them out, then did a second round. The freezer paper can be reused
several times and still adhere to the fabric.
You will have 2 bodice pieces and 2 sleeve pieces.
Now
we are going to get the rest cut. The additional pieces are all strips
and squares. The requirements are listed in the pattern instruction
booklet according to size. Locate your size and the measurements. I
like to highlight the measurements I am going to be using. You can
also see I made a little note on mine. That is because my size 7
daughter is tall, so I wanted to do the size 8 length. I just jotted
down the revised length measurement so I wouldn't forget and didn't have
to keep looking at the other measurements.
I like to tear my fabric whenever possible if I am making straight
cuts. You could also use a rotary cutter and mat, or just use scissors
if you prefer. The first thing I always do is snip close to the edge
and tear a straight edge to make sure I am on the straight of grain.
As you can see from this piece, one edge was a lot wider than the other when I ripped off along the grain line.
I will sometimes clip the other selvedge edge if it doesn't tear easily.
Working
through each fabric, I clip and tear all of the required pieces; the
skirt strips, the ruffle strips and the sash and hem pieces. After I am
done tearing all of my pieces, I give it all a quick iron again to make
sure it is ready to sew.
That's a lot of pieces (24 strips/rectangles and 4 bodice/sleeve pieces!) BUT we are done and ready to sew tomorrow!
* If you would like to enter the prize drawing, please make sure you submit a picture of your completed lesson to the Facebook Album by 8:00 AM CT, Tuesday, March 25th. Also, if you have any questions the Facebook Group is a great place to ask.
Sarah
My Blog


No comments:
Post a Comment