Please note that I am not following the exact order and directions on the pattern. I do however encourage you to read the directions all the way through before starting to familiarize yourself with the steps. I also want to remind everyone that if you would like to enlarge any of the images posted in this blog, just click on them. Finally; if you have any questions, suggestions, or tips to share; please make sure to post them on our Facebook group.
1. Sew the Bib and Bib Lining {page 9, step 3}
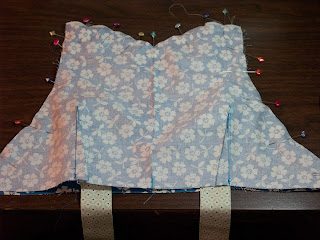
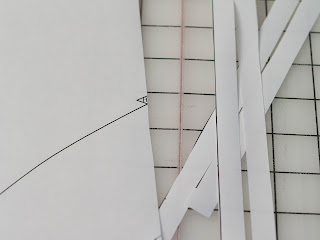
You should have already marked your bib and bib lining darts. If not, do that now using a straight edge.
Next, fold your darts along the center dart line, lining up the side lines. Pin in place.
Sew according the pattern instructions. The pattern has a very good tip on how to keep your dart points sharp!
2. Stay Stitch the Bib Band {page 11, step 5}
You need to stay stitch the bib band to prevent it from stretching when you sew. You will be stitching 1/2" from the bottom of the band. Start on one edge and stitch to the center fold line. Stop at the center fold and remove the fabric from your machine. DO NOT back stitch here. Rotate your fabric so you are now stitching from the opposite direction. Stitch towards the center again and stop. Remove your fabric from your machine. DO NOT back stitch here either. Also DO NOT stitch over previous stitches. The purpose of the stay stitch is to stitch from each side to the middle, making sure not to overlap and not to back stitch.
3. Stay Stitch the Skirt Waistline {page 11, step 6}
Lay out your skirt pieces matching centers.
Carefully pin the layers together along the waistline.
Now, stay stitch the waistline just like we did the bib band above.
4. Press Bib Darts {page 12, step 9}
Just follow the pattern instructions, pressing them towards the center.
5. Press and Turn Ties {page 12, step 10}
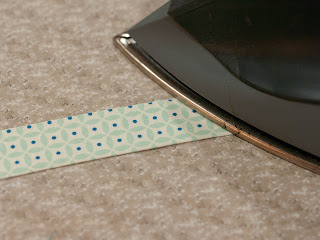
Again, just follow the instructions for this step. I would recommend that you clip your corners on the ties, being careful to not get too close to the stitches. This will keep the points from having too much bulky fabric in them. I also used just my fingers and the iron to carefully press open the seams. I didn't use any steam while pressing the seams open, since I didn't want to create permanent creases. Then, when I did my final press on the ties, I used a chopstick to push out the seams so the fabric was not folded in on itself and also used a good amount of steam to set the creases well.
6. Clip and Press Bib Band {page 13, step 11}
Just follow the pattern instructions.
Stitch the bib band onto the bib front according to the instructions. Your just stitching the lower edge of the bib band here.
8. Top Stitch the Ties {optional}
The instructions do not tell you to top stitch your ties (neck and waist ties), but I went ahead and did that anyway since I like the look and feel. If you choose to top stitch, remember to lengthen your stitches for a more professional look.
8. Attaching the Ties and Sewing the Bib Together {page 14, step 14}
A.Place the bib front/bib band piece down in front of you with right side up.
B. Place the neck ties right side down on top of the bib front\bib band lining up the top edges. The neck ties need to be 1/2" from the edge so they do not get caught in the seam allowance when you sew up the sides.
Also, you may want to pay attention to how the ties are oriented. Do you want the points on the inside? Outside. I chose to do mine like this.
C. Lastly, place the bib lining right side down on top of everything lining up the center front and the sides. Pin together well.
Now, using a 1/2" seam allowance, sew this all together along the sides and top. Be very careful to not catch the ties in the side seams while sewing.
9. Clip and Press Bib {page 15, step 16}
Clip corners,
notch the rest. Do this carefully without clipping any stitches.
Now, press according to the instructions.
10. Top Stitch the Bib {page 15, step 17}
I did this a little differently than the instructions. You can do it either way as it doesn't matter. I just liked the look of the way I chose to do it. I top stitched 1/8" all the way around the bib. Also, when I went form the darker bib fabric to the lighter bib band fabric, I switched my thread color to match.
11 . Stitch the Bib to the Waistbands {page 16, step 18}
Layer the bib and waistband pieces according to the instructions. I added a tag to the inside of the waistband at this point. If you decide to add a tag here, sew it onto the waistband piece before you layer all the pieces. Also, make sure the orientation is correct so when you flip the waist band down your tag is not upside down.
Once you have your bib and waistband pieces layered and pined, stitch along the bottom to secure them all together. Continue to use a 1/2" seam allowance.
12. Clip the Skirt Waistline {page 16, step 19}
Clip through all three layers of the waistline of your skirt as instructed.
13. Pin and Sew the Waistband to the Skirt {page 17, step 20 & 21}
Just follow along in the instructions here. It's explained pretty well in the PDF.
14. Press Waistband Pieces {page 17, step 22}
It helps to pull the fabric a bit as you are pressing to open up the seams. Be careful to get everything good and smooth during this step.
16. Stitch Waist Ties to Waistband {page 18, step 23}
I found this part just a tad confusing at first. But really, it's pretty simple. After you pleat your ties, just follow the instructions and place your tie like so on the front waistband.
Then, carefully pull the inside waistband down over the tie matching up the side seams of both waistbands.
Pin in place.
Stitch down the length of the side. Repeat to secure the tie well. I also trimmed my seam and clipped the corners so it would turn better.
Repeat for the other side.
17. Pin Inside Waistband {page 18, step 24}
Follow the instructions turning under and pinning the inside waistband.
18. Sew the Waistband {page 19, step 25}
Finally, top stitch along the waistband from the inside. Be very careful to keep everything flat and smooth and to not catch anything on the front as you are sewing this.
You did it! Congratulations!! You have created an adorable Luscious Layers apron. Give that baby a good pressing, put it on, and get ready to outshine all that fancy crystal in your china cabinet.
Thanks for sewing with me,
Danielle Storm
www.whimsicalfabric.com


