Tuesday, January 27, 2015

Sew-Along #21 - Dress No.17 & Leggings No.8 - Lesson #2

The Dress No.17 and Leggings No.8 by E+M Patterns

Welcome to Day 2 of the Dress No.17 & Leggings No.8 sew-along. 

If you have any questions, suggestions, or tips to share; please make sure to post them on our Facebook group.  Also, if you would like to see any of the images larger that are posted in this blog, just click on them to enlarge. 
NOTE: Please make sure you read over the E+M Patterns Dress Tutorial prior to starting this lesson.  You should keep this tutorial open and where you can read it as you go through this lesson. 
All right, who is ready to make a Dress!?!?!?  Don't be afraid if this is your first time working with knits.... I'm going to tell you a little secret - knits are the EASIEST thing in the world to sew.  Did that blow your mind???  How many times have you been told how difficult they are - well throw that nonsense out the window, we are talking easy as pie and you are about to fall in love.  Now there are certainly tricks, and there is some learning involved, but stick with me through these two patterns and you may just have a new addiction on your hands!

Start by reading page 9 of the instructions, there are specific details for zig zag stitches, straight stitches, stretch guides, type of needle to use, and what to do when the pesky fabric wants to roll.

And now, we sew!

1. Lay down your back piece, right side up, and lay the front piece on top of it, right side down (this is what we call right sides together, or RST).

2. Sew the shoulder seams, I will be showing all serged seams, the instructions show a zig zag stitch.  You can also use a long straight stitch.
Tips:
• Sew slowly  if you are learning knits, do not pull the fabric, just let the feed dogs feed it naturally under the foot. 
• When you start sewing, start 1/2 inch in, and back stitch a few stitches, then sew forward again.
• If you are serging, lift the foot and place your fabric under it so that it will feed evenly.

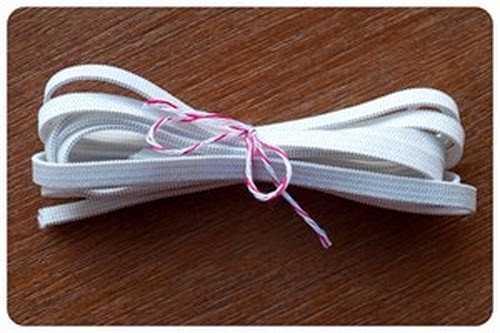
3. Ready for another trick.... get out your clear elastic (aka Mobilon).  All kits came with 2 yards of Mobilon.
• Cut two pieces the length of the shoulder seams.
• As you fold the seam allowance to the back side, slide your elastic between the seam allowance and the main fabric.
• Top top stitch the seam in place through the clear elastic - this acts as a stabilizer for the shoulder so that you will not pop stitches as your child puts the garment on and off over time.

4. So your front and back are attached at the shoulder, we will now attach the sleeve. Setting a sleeve in Flat (which means setting it in before you sew the side seams together), is perhaps the easiest way to sew in a sleeve, and just another way that knits are going to win you over.

5. Mark the center of the sleeve cap (this is the rounded top part of the sleeve).

6. Match the center with the shoulder seam and pin in place, RST.

7. Pin the sleeve to match the arm hole working from the center out, you will stretch the sleeve cap as needed to fit the arm hole.

8. Sew the sleeve into place.

9. Press your seam allowance towards the body of the garment and top stitch - once again this is great for adding strength to the garment (no clear elastic this time!)

10. Repeat on the other side.


Optional Pockets and Belt Loops
Pockets: I love pockets, but they certainly add more time to the construction of the garment - so you do not have to include them, but if you want to, follow along and I'll make it easy as.... well not 'pie', 'cause pies aren't easy ;o)
1. Take your pocket pieces, you should have 2 pairs.

2. Take one pair and lay them side by side both right side down.

3. Match the pocket pieces to the front and back matching the top and bottom of the piece to the markings on your fabric. 

4. Pin in place.

5. Lay a piece of clear elastic on top of the pocket edge.

6. Sew in place through the elastic.

7. Repeat for the other side of the garment both front and back.

8. Now that all the pockets are sewn on, press them out so that they look like wings.

Belt Loops: You only need belt loops if you are doing the version with the belt. Your belt loops can match the main fabric or be contrasting, your choice.
1. Fold the piece in half RST so it looks like a long skinny rectangle.

2. Sew the long edge.

3. To turn such a tiny tube right side out, take a safety pin and pin it through one layer of fabric at the opening, turn it into the tube and push it through and out the other end.

4. Press the rectangle well.

5. Cut in half so you have two equal pieces.

6. Fold the loop as pictured on page 13, and baste in place at the marking on your fabric.

7. Repeat for the other side.


Side Seam

1. It is now time to turn this awkward thing into a dress! 

2. Lay out your garment RST with the sleeves and side seams matching up. 

3. If you have pockets, make sure they are still sticking out like wings. 

4. If you have belt loops, make sure they are facing in towards the center of the garment and not out like wings.

5. Pin the garment at the sleeve, the armscye, the top of the pocket, the bottom of the pocket, and the hem.

6. Sew together, make sure at the pocket that you follow the edge of the pocket.

7. Finish the seam with a serger or zig zag stitch.

8. Repeat for the other side.

9. Press your side seam and pocket opening well.

That is it for today - tomorrow we will finish the neck and hem the bottom and sleeves. 

* If you would like to enter the prize drawing, please make sure you submit a picture of your completed lesson one to the Facebook Album by 12:00 noon CT, Friday, January 30th.  Also, if you have any questions the Facebook Group is a great place to ask.

See you on the flip side!  
Suzanne

Monday, January 26, 2015

Sew-Along #21 - Dress No.17 & Leggings No.8 - Lesson #1

The Dress No.17 and Leggings No.8 by E+M Patterns

Welcome to the Dress No.17 & Leggings No.8 sew-along.  Our wonderful instructor is Suzanne Winter of Winter Wear Designs.  We have been fortunate enough to have Suzanne teach a few of our past sew-alongs. You can read more about Suzanne and her precious family here and here.  Suzanne also blogs at Winter Wonderings and over at Pattern Revolution. She is a VERY busy lady and I'm super grateful to have her here with us this week.  :)
NOTE: Please make sure you read over the E+M Patterns Dress and Legging Tutorials prior to starting this lesson.  You should keep these tutorials open and where you can read them as you go through this lesson.
If you have any questions, suggestions, or tips to share; please make sure to post them on our Facebook group.  Also, if you would like to see any of the images larger that are posted in this blog, just click on them to enlarge. 

Printing 
Ok - so let's start by printing your patterns - yep print both the dress and leggings!

1. Make sure you have saved the pattern to your computer and that you are printing from the Adobe program and not an Adobe app.  

2. This pattern prints in B&W, so make sure to set your printer to the grey scale or B&W setting to save on ink.  If you are doing the cowl neck, you may want to print the dress pieces in color color as the cowl cutting lines print in dark blue instead of black. 

3. Hit 'scaling none' or 100% for printing - DO NOT select 'fit to page'


Pattern Assembly: 

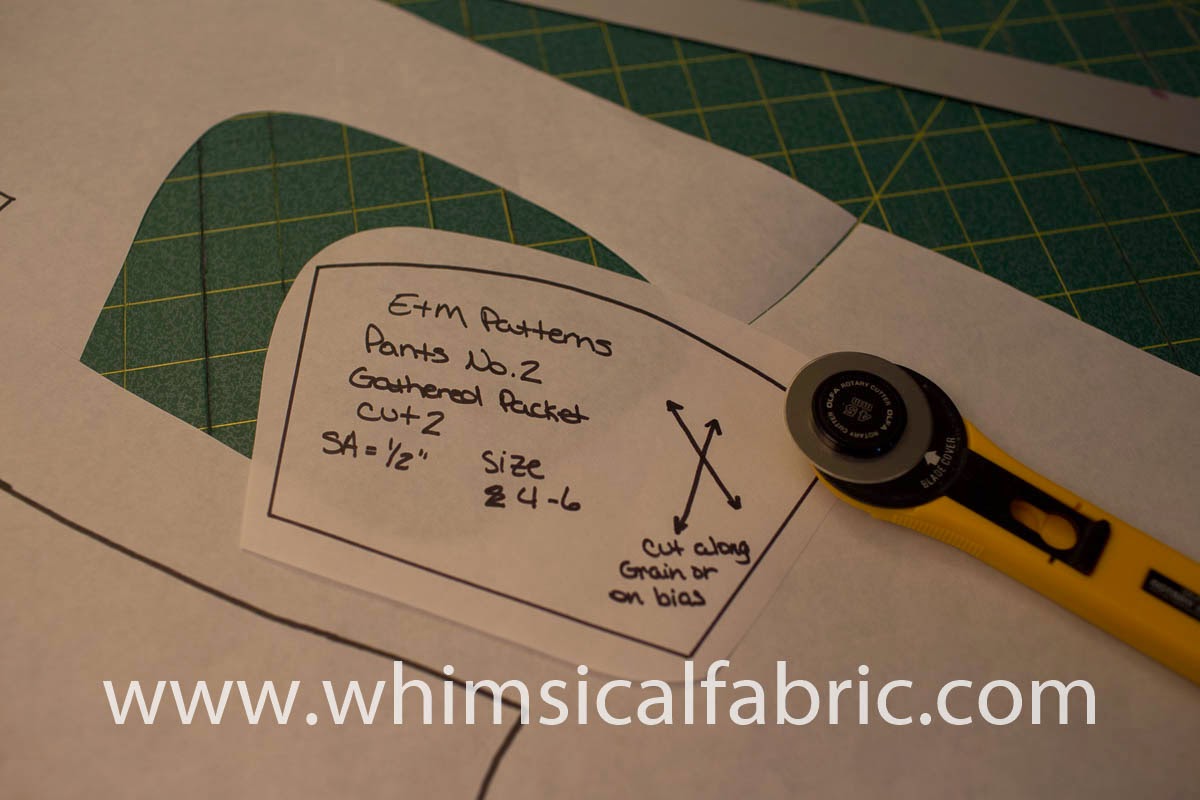
1. Now that you have all of the pages printed, begin to assemble your pattern.  I trim off the leading edge of each page for the top row.  Then, the top edge and leading edge of each page there after.  I find it easiest to use my quilting ruler and a spare (for paper only) rotary cutter, but you can just use scissors if you prefer.  DO NOT cut off the grey lines.  You want to cut just right up to the grey line, trimming off all the white.
 

2. Next, you are going to  match up the page numbers to create a grid.  *Note this pattern has a cute prompt to tell you when to start a new row!

3. Do not overlap the grey lines.  The grey lines need to butt up against each other.  Continue to tape all of your pages together. 


4. Once all your pieces are taped together, you can either cut out your needed size (this is what I love about PDF pattern, tape and cut and go) OR you can trace out the size you need on freezer paper or tracing paper. *Tip:  To make cutting/tracing easier - trace your size with a highlighter, marker, or crayon to make visually following your line even easier.


Tracing Your Pattern Pieces (Optional)

1.  Pull out your freezer paper and lay out one of your pattern pieces. Note: These pictures were taken when tracing a different pattern

2. Tear off a length of freezer paper and lay it on top of your pattern piece.  I like to use pattern weights to help hold it in place. 
 

3. Using a Sharpie, trace around the pattern lines.  If the lines are hard to see you can darken them on the original pattern with your sharpie.  For straight lines it might help to use a ruler. 
 

4. Make sure to transfer all your markings and pattern information.
 

5. Continue to trace all of your pattern pieces onto the freezer paper.
 

6. When you have finished tracing your pattern pieces fussy cut around each one.

7. Stack your pattern pieces together with all the Pants patterns in one pile and all the Dress pattern pieces in another. (I like to keep my paper pattern pieces stacked with my fabric so that nothing gets mixed up)


Cutting Your Fabric 

Dress: Lay your pattern on the fabric so that you are following the same fabric direction with all pieces - you don't want part of your dress to be upside down!
*Freezer paper trick: If you are new to cutting knits, I highly recommend using the freezer paper method.  To use your freezer paper pattern pieces you simply lay the paper, shiny side down onto your fabric.  Take your iron and iron over the pattern piece.  DO NOT touch the iron to the glossy side of your freezer paper! It will melt and make a mess of your iron. The freezer paper will temporarily stick to your fabric making it super easy to cut your pieces out.
 1. Cut out your Pieces (note that the back and front are both cut on the fold).

2. You need 2 of the sleeves cut on the fold, and 2 sets of pockets.

3. Make sure to transfer all the notches from your paper pattern to the fabric (you can use a fabric marker, chalk, pins, or cut in notches to transfer the markings).

4.  Place all you pieces for the Dress together and set to the side (if you ordered a kit from Whimsical Fabric, you can place everything in your handy-dandy drawstring bag).


Leggings:  

The initial notes are for standard cutting. I will have some notes for cutting full length leggings at the end! 
 1. Cut out all of the pieces from your main fabric. If you are using a stripe, chevron, or plaid, make sure that you cut both pieces so that everything will match up.

2. Make sure to transfer all the notches from your paper pattern to the fabric (you can use a fabric marker, chalk, pins, or cut in notches to transfer the markings).

3. Pile all your pieces together and set aside in a safe place.
Full Length Leggings: It is so awesome to get to work with a FREE pattern - particularly one so well made, but you might be disappointed when you see that these are capris.  Well turn that frown upside down, because I am going to show you haw to very easily make these full length leggings.
1. Measure your child from the top of the inseam to the floor. Write down this measurement.

 2.  Lay your pattern out on your cutting table.

3. Measure the pattern from top of the inseam to the bottom of the pattern. Write this number under your first measurement.

4. Subtract the second number from the first.

5.  This is the number of inches you need to add to the bottom of your pattern to get full length leggings.

6. Lay your pattern on your fabric, and measure the number of inches you need to add down form the bottom of the pattern on both sides and make marks.  

7. Then connect the marks with a fabric marker, chalk, or a Frixion pen up to the pattern so you know where to cut. 
8. Slide the pattern down to the markings and trace the curved hem.
9. Cut out your new full length legging.

10. One of my favorite things about this legging pattern is the higher cutting line for diaper coverage!!!  My daughter is 2 but wears a size 5....so she obviously still needs extra room for diaper coverage.  I simply followed the curve of the cut line for the 2 up at my 5 size line.  If you like extra coverage in the rear, consider using this trick.
* If you would like to enter the prize drawing, please make sure you submit a picture of your completed lesson one to the Facebook Album by 12:00 noon CT, Thursday, January 29th.  Also, if you have any questions the Facebook Group is a great place to ask.

Make sure to come back tomorrow for Lesson 2.
Suzanne 

Wednesday, January 21, 2015

Sew-Along #21 - Dress No.17 & Leggings No.8 - Preparations

The Dress No.17 and Leggings No.8 by E+M Patterns

Before we begin the sew-along on Monday, January 26th, you'll want to gather a few items and do a few things to prepare.


Items to Collect
  1. You must have the the patterns to complete the dress and leggings.  If you have not yet purchased these, please do so here. The leggings No.8 are a free pattern and are packaged with the Dress No.17.
    http://www.whimsicaldesignsclothing.com/index.php?main_page=product_info&cPath=99_367_478&products_id=6713

  2. If you do not have fabric for the project you will want to purchase that also.  At the time of this writing we do have a fabric kits available.  We also have lots of fun fabric selections on our website. 
    http://www.whimsicaldesignsclothing.com/index.php?main_page=index&cPath=99_367_478

  3. The pattern is a PDF pattern.  You will need a printer, paper, and tape to print and put together your pattern pieces.  We will go over how to piece your pattern together in the first sew-along lesson.
  4. The leggings require ¾" wide elastic for the waistband.  If you purchased a kit, you will have received the elastic you need.  If not, please make sure to have some on hand.
  5. The dress comes with the option of shirring the waist, using ¼" elastic to gather the waist, adding a belt, or leaving the waist free.  If you plan on shirring the waist you will need elastic thread.
    http://ecx.images-amazon.com/images/I/41z0A1JW24L.jpg
    If you desire to add ¼" elastic to the waist and ordered a kit, you will have received enough elastic to accomplish this.  If you didn't purchase a kit from us we do stock the elastic on our site here
    http://www.whimsicaldesignsclothing.com/index.php?main_page=product_info&cPath=72_100&products_id=1919
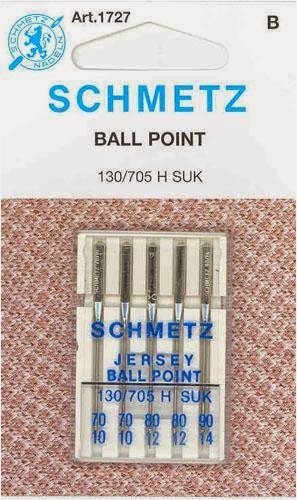
  6.  It is best to sew knit fabric with a ballpoint needle.  This keeps the fibers in the knit from being cut and unraveling as the needle is pushed through the fabric.  You can purchase ballpoint needles at almost any store that carries sewing supplies.
    http://www.amazon.com/gp/product/B000WMGK9G/ref=as_li_qf_sp_asin_il_tl?ie=UTF8&camp=1789&creative=9325&creativeASIN=B000WMGK9G&linkCode=as2&tag=whimsfabri-20&linkId=YTC3JRU7DYTOXKWG
  7. You will need coordinating thread to complete this project.  The project kits did not come with thread, so please make sure you have some. 
  8. And finally, you will need pins, a sewing machine, a good iron (a steam iron is preferable for sewing), a pair of fabric shears or a rotary cutter and mat (a rotary cutter and mat is a lifesaver!), a ruler, and a fabric pen or chalk. 

Optional Items to Collect - The following items are totally optional. 

  1. During the sew-along we will be showing how to trace the pattern pieces onto freezer paper.  Freezer paper make cutting out knit fabric super simple and I highly recommend it.  If you desire to make freezer paper pattern pieces make sure to have some freezer paper on hand.  You can find freezer paper at most grocery stores where the wax paper and aluminum foil. 
  2. A sharpie or other permanent marker for tracing your pattern pieces onto the freezer paper is helpful if you choose to do this step.  I recommend a black sharpie as the colored ones, though more fun, can tend to transfer onto your fabrics when you iron over them.
  3. It is helpful to stabilize knits in some areas during garment construction, such as shoulder seams, pockets, etc. to keep the knit from stretching out of shape over time. My preferred product for stabilizing knit seams is Mobilon, which is premium clear elastic.  All project kits for this sew-along came with Mobilon.  So, if you purchased a kit from us you received some.  If you did not purchase a kit you can still order Mobilon from our site here.
    http://www.whimsicaldesignsclothing.com/index.php?main_page=product_info&cPath=72_100&products_id=6584
  4. A lot of people like to sew knit with a double or twin needle.  A double needle will allow for your threads to have some stretch and give you a very professional looking finish.  A double needle can be purchased at most places that sell sewing needles.
    http://www.amazon.com/gp/product/B003IPJNES/ref=as_li_qf_sp_asin_il_tl?ie=UTF8&camp=1789&creative=9325&creativeASIN=B003IPJNES&linkCode=as2&tag=whimsfabri-20&linkId=ETMVCOHR3EBDCCFV
  5. I highly recommend ½" hem tape.  This product will give you a nice, smooth, super easy to sew hem with your knit fabric.  You can purchase hem tape at most sewing supply stores.
      http://www.amazon.com/gp/product/B001689TRK/ref=as_li_qf_sp_asin_il_tl?ie=UTF8&camp=1789&creative=9325&creativeASIN=B001689TRK&linkCode=as2&tag=whimsfabri-20&linkId=BDFM3FB7NDYSYK3W
  6. Lastly, if you have a walking foot for your sewing machine you might want to pull it out.  A walking foot helps to feed the knit fabric through your machine without stretching it, which is important.  If you don't have a walking foot, don't worry, I've sewn knits many times without the aid of a walking foot.

Things to Do
  1. Make sure to prewash and preshrink all of your fabrics.  I wash my fabrics on warm or hot and then I dry my fabrics in the dryer with no softeners.  I always preshrink in this way when I am using fabric for clothing construction. Knit tends to shrink a lot, so it's very important to prewash it. I would hate to work hard on something only to have it shrink and not fit when I was done.
  2. Make sure to download the pattern and tutorial onto your computer, tablet, or smart phone. Your pattern will be located in your order history on our site.  Log into your account, then click on the My Account at the very top right hand side of our site.  You will then see a list of your orders.  Click on the correct order and a download link will be available. 
  3. Don't forget to join our Facebook Sew-Along Group so you can post your progress pictures. Everyone who posts completed lesson pictures, on time, to the Facebook Group, will be entered into drawings to win some awesome prizes!
Happy Sewing,
Danielle Storm
www.whimsicalfabric.com
#navbar-iframe{ display:none !important;}