Tuesday, September 30, 2014

Sew-Along #17 - Children's Pants Pattern No.2 - Lesson #2

The Children's Pants Pattern No.2 by E+M Patterns

Welcome to day two of the Children's Pants Pattern No.2 sew-along.  I want to remind everyone that I am not a "professional" seamstress, nor was I formally taught.  I'm just a girl who loves fabric, sewing, and pretty much everything related to those two things.  If you have any questions, suggestions, or tips to share; please make sure to post them on our Facebook group.

Please read the Children's Pants Pattern No.2 Tutorial all the way through before you begin.  It's probably a good idea to read through this lesson once before you begin also.

If you would like to see any of the images posted in this blog larger, just click on them.  It might be helpful in some steps.  Let's start, shall we?

A. Creating The Back Pockets
 
Gathered Pockets  
Note: If you are making the gathered back pockets follow along.  If you are making the pleated back pockets skip down to that section.  
1. Pull out your two gathered pocket pieces.

2. Using your longest stitch length, stitch two lines of gathering threads on the top arched edge.  Make sure the gathering threads are within the ½" seam allowance.

3. Pull up your gathering threads to gather your pocket.

4. With right sides together pin the pocket band to the top of the pocket.  Spread out the gathers evenly to make the two edges the same length. 

5. Stitch together using a ½" seam allowance.

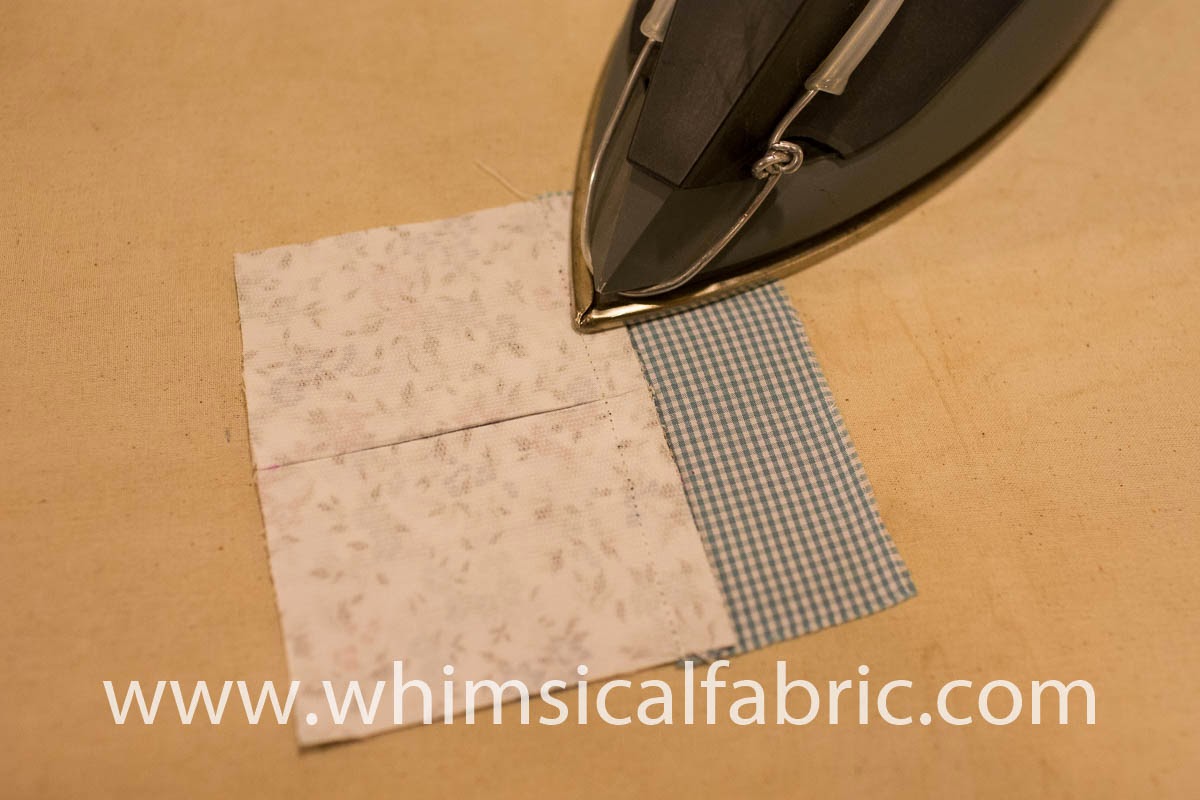
6. Press the seam up towards the pocket band.

7. Top stitch the pocket band.  Remember to lengthen your stitches for a more professional look.  I like to lengthen from a 2.5 to a 3.5 stitch length.

8. With right sides together pin the pocket and the pocket lining together.

9. Stitch on the pocket side using a ½" seam allowance.  Make sure to leave an opening at the bottom of the pocket for turning.  Trim seam allowances.

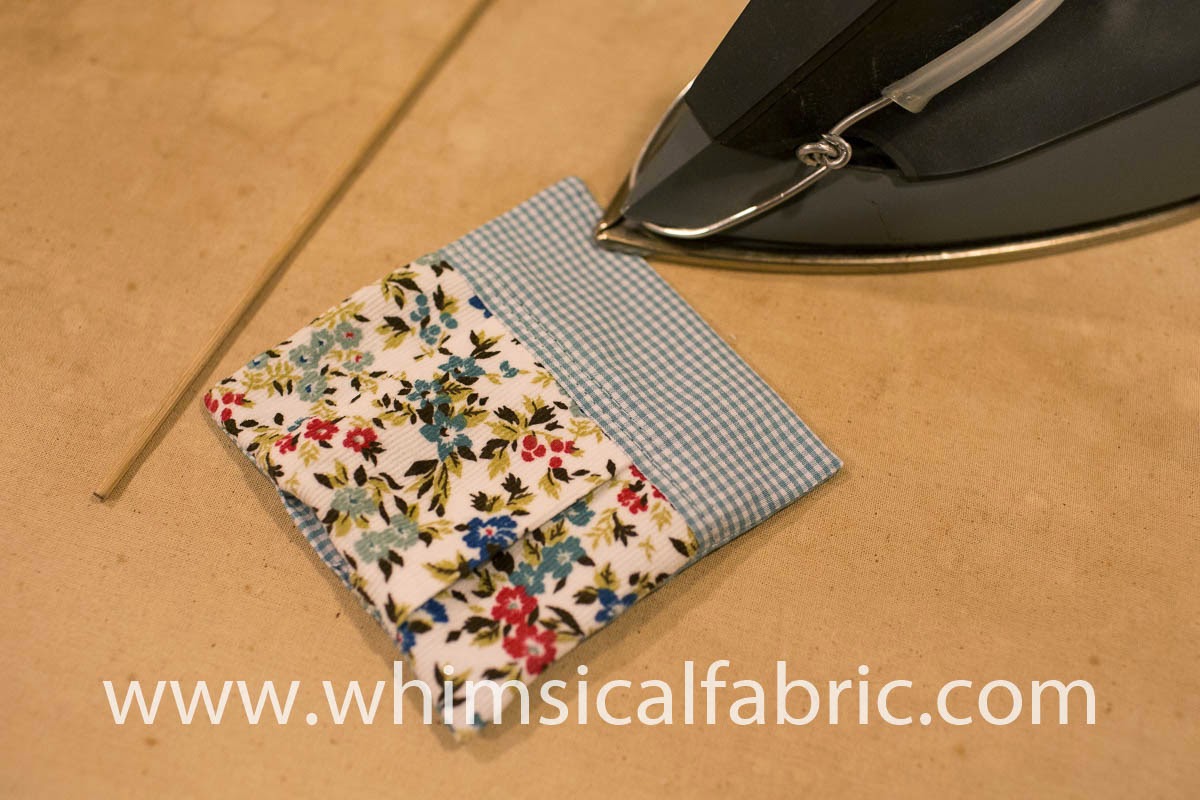
10. Turn your pocket right side out.  Press your pocket well.  I like to use a chop stick to poke out the corners.

11. Repeat with the second back pocket.  Set aside.

  
Pleated Pocket

1. Grab one of your pleated pocket pieces.

2. With right sides together fold your pocket piece in half.  Iron to create a crease down the center.

3. Using a ruler and a fabric pen or chalk, mark two inches on either side of the center fold on the wrong side of the fabric.  Mark within the seam allowance on both the top and the bottom of each pocket piece.

4. Now, fold your pocket in on both sides matching up your marks with the center crease.

5. Iron these folds in place.  If using corduroy remember to iron on the backside of your fabric only.

6. With right sides together, pin the pocket band on top of your pocket.  Stitch using a ½" seam allowance.

7. Press the seam up towards the pocket band. 

8. Top stitch the pocket band.  Remember to lengthen your stitches for a more professional look.  I like to lengthen from a 2.5 to a 3.5 stitch length.

9. With right sides together pin the pocket and the pocket lining together.

10.  Stitch using a ½" seam allowance.  Make sure to leave an opening at the bottom of the pocket for turning.  Trim seam allowances.

11. Turn the pocket right side out.  Press your pocket well.  I like to use a chop stick to poke out the corners.

12. Repeat with the second back pocket.  Set aside.


B. Creating the Hip Pocket Ruffles

1. With wrong sides together fold the hip pocket ruffles in half lengthwise.  Press well.

2. Using your longest stitch length, stitch two lines of gathering threads on the raw edge of each hip ruffle.  Make sure the gathering threads are within the ½" seam allowance.

3. Pull up the gathering threads.

4. Grab your front leg pieces.

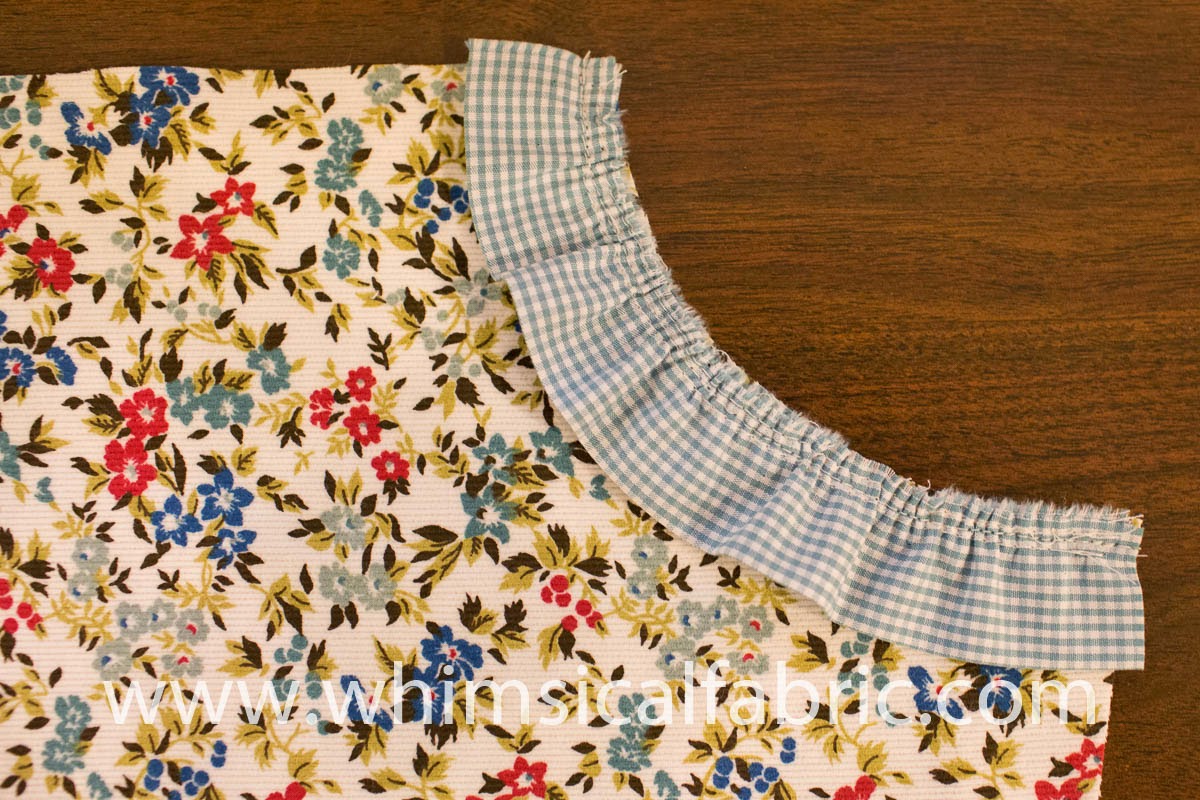
5. Pin your hip ruffles onto the curve of the hip pocket on each front leg piece.  Make sure to evenly spread out the gathers.
 

6. Stitch in place using a ½" seam allowance.

C. Creating the Hip Pockets 

1. Grab both your Hip Pocket A and Hip Pocket B pieces.

2. With wrong sides together layer the A piece on top of the B piece.

3. Using a ¼" seam allowance (note the change in seam allowance width) stitch the long side and bottom of Pocket A to Pocket B.

4. Trim seam allowances to half their width and notch the corner.  If you own pinking shears you can easily do both in one step.
 
5. Turn pocket so the right sides are together.  I like to press the seams well at this point.

6. Stitch again using a ¼" seam allowance. 

7. Repeat to create the second hip pocket.
   
That is all for today's lesson.  You did great!  Come back tomorrow for Lesson #3. 

* If you would like to enter the prize drawing, please make sure you submit a picture of your completed lesson one to the Facebook Album by 12:00 noon CT, Thursday, October 2nd.  Also, if you have any questions the Facebook Group is a great place to ask.

Thanks for sewing with me,
Danielle Storm
www.whimsicalfabric.com

Monday, September 29, 2014

Sew-Along #17 - Children's Pants Pattern No.2 - Lesson #1

The Children's Pants Pattern No.2 by E+M Patterns

Welcome to the Children's Pants Pattern No.2 sew-along.  I want to remind everyone that I am not a "professional" seamstress, nor was I formally taught.  I'm just a girl who loves fabric, sewing, and pretty much everything related to those two things.  If you have any questions, suggestions, or tips to share; please make sure to post them on our Facebook group.

Please read the Children's Pants Pattern No.2 Tutorial all the way through before you begin.  It's probably a good idea to read through this lesson once before you begin also.

I also want to remind everyone that if you would like to see any of the images posted in this blog larger, just click on them.  It might be helpful in some steps.  Let's begin now.

A. Printing and Assembling Your Pattern Pieces

1. Before you print the entire pattern, print just page 1 and check to make sure the test square is 1"x1".  You will need to measure on the outer edges of the grey lines that form the test box.
Note: When printing make sure you have checked "Actual Size" or "Custom Scale: 100%".

2. Once you know you are printing at the correct scale, print out the rest of your pattern pieces.  You might want to refer to the pattern layout grid located on page 8 of the tutorial as some sizes do not need all of the pages printed.

3. Now that you have all of the pages printed, begin to assemble your pattern.  I trim off the leading edge of each page for the top row.  Then, the top edge and leading edge of each page there after.  I find it easiest to use my quilting ruler and a spare (for paper only) rotary cutter.  DO NOT cut off the grey lines.  You want to cut just right up to the grey line, trimming off all the white.


4. Next you will tape all of these pages together to create your pattern sheet.  


5. Do not overlap the grey lines.  The grey lines need to butt up against each other.  Continue to tape all of your pages together.  When you are finished you can either leave them as one large sheet or fussy cut around each piece.


B. Tracing Your Pattern Pieces
  
1. Pull out your freezer paper and lay out one of your pattern pieces. 

2. Tear off a length of freezer paper and lay it on top of your pattern piece.  I like to use pattern weights to help hold it in place.

3. Using a Sharpie, trace around the pattern lines.  If the lines are hard to see you can darken them on the original pattern with your sharpie.  For straight lines it might help to use a ruler.

4. Make sure to transfer all your markings and pattern information.

5. Continue to trace all of your pattern pieces onto the freezer paper.

6. When you have finished tracing your pattern pieces fussy cut around each one.

C. Cutting Your Fabric

1. Turn to page 9 of the tutorial and begin to cut our the pieces you need for your pants according to the chart.  You will need to cut the following pieces.  I have indicated which fabric I used for each piece, but you don't have to do it exactly like I have.
a.) Waistband Pieces - cut 2    {Main Fabric}
b.)
Interfacing - cut 1

c.)
Hip Pocket Ruffle (optional) - cut 2
    {Coordinate}
d.)
Back Pocket Band - cut 2
    {Coordinate}
e.)
Back Pocket Lining - cut 2
    {Coordinate to reduce bulk.}
f.)
Either the Pleated or Gathered Pocket - cut 2
    {Main Fabric}
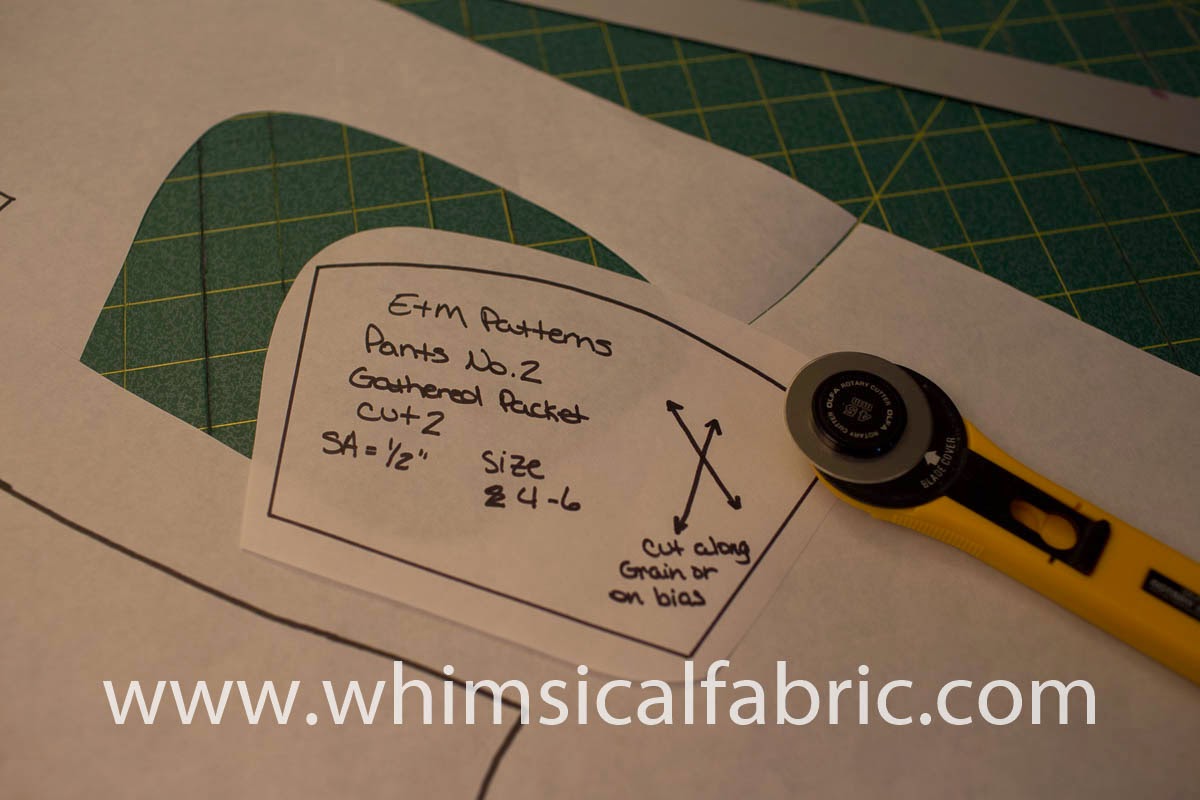
* If you are doing the gathered pocket read below for directions on using your freezer paper pattern pieces.
Note: If you are using a one way print or corduroy you will want to make sure your pattern pieces are laid out in the correct orientation. Pick your fabric direction and mark the top of your fabric.  You can use a pin or a fabric marker to do this.  Make sure that every single pattern piece that you cut has the top of the grain line facing the top of your fabric.  If you are using corduroy, you have picked a fabric with nap.  Nap essentially means that your fabric will look different depending on which direction you hold it.  Rub your hand along your corduroy.  You will notice that the pile wants to go in one direction and your hand will move smoothly along it.  When you go the other direction it will have resistance against your hand and will look like the pile is being pushed 'up'.  You want your fabric to go with the smooth pile going down, so you would run your hand smoothly from the top of the pants to the hem.  You will notice that the little "cords" are running from the top of your pants to the bottom.
    Back Pocket Bands

    2. To use your freezer paper pattern pieces you simply lay the paper, shiny side down onto your fabric.  Take your iron and iron over the pattern piece.  DO NOT touch the iron to the glossy side of your freezer paper! It will melt and make a mess of your iron. The freezer paper will temporarily stick to your fabric making it super easy to cut your pieces out.

    3. If you are making your pants out of corduroy, twill, denim, or any thick fabric, you will want your Hip Pocket A piece to be cut from a lighter weight fabric such as quilting cotton.  You can see here that I am using my coordinate fabric.
     

    4. Another note regarding corduroy, it is best not to iron on the top side of corduroy fabric as it can cause the corduroy to become shiny.  You also don't want to stick the freezer paper to the top of the corduroy either.  Instead, flip your cord over and iron the pattern piece onto the backside. 
     

    5. Once you have ironed on your pattern pieces onto your fabric go ahead and carefully cut them out.  

    6. Now, you can either peel off the freezer pattern pieces or leave them on until tomorrow, when we sew.  The beautify of the freezer patterns is that you can use them over and over.  Next time you are ready to make another pair of these adorable E+M Pants just pull out your pattern pieces, iron them on your fabric, cut, and go!  How awesome is that?  Don't you just love it?
     That's it for today.  Come back here tomorrow for Lesson #2.


    * If you would like to enter the prize drawing, please make sure you submit a picture of your completed lesson one to the Facebook Album by 12:00 noon CT, Wednesday, October 1st.  Also, if you have any questions the Facebook Group is a great place to ask.

    Thanks for sewing with me,
    Danielle Storm
    www.whimsicalfabric.com

    Saturday, September 27, 2014

    Sew-Along #17 - Children's Pants Pattern No.2 - Preparations

    The Children's Pants Pattern No.2 by E+M Patterns

    Before we begin the sew-along on Monday, September 29th, you'll want to gather a few items and do a few things to prepare.

    Items to Collect
    1. You must have the Children's Pants Pattern No.2 to complete this project.  This is a instant downloadable PDF pattern you print out at home.  If you have not yet purchased this, please do so here
    2. If you do not have fabric for the project you will want to purchase that also.  At the time of this writing we do have a some fabric kits available.  We also have lots of fun fabric selections on our website.  
    3. Half inch wide elastic is needed to complete your project.  All kits come with ½" elastic.  If you are not purchasing a kit, please make sure you have some.  We do sell elastic on our site here.
    4. You will also need some fusible interfacing for the waist of your pants.  All kits come with the fusible interfacing.  Again, if you are not purchasing a kit, please make sure you have some on hand.
    5. You will need coordinating thread to complete this project.  The project kits did not come with thread, so please make sure you have some. 
    6. And finally, you will need, a printer and paper (or have a printing service print your pattern for you), scotch tape to paper your pattern together, pins, a sewing machine, a good iron (a steam iron is preferable for sewing), a pair of fabric shears or a rotary cutter and mat, a ruler, and a fabric pen or chalk. 

    Optional Items to Collect - The following items are totally optional.

    1. I will be tracing the pattern pieces onto freezer paper.  I highly recommend this method.  In addition to keeping your original pattern pieces intact, it also makes cutting out your fabric super simple. You can find freezer paper at most grocery stores where the wax paper and aluminum foil. 
    2. A sharpie or other permanent marker for tracing your pattern pieces onto the freezer paper is helpful.  I recommend a black sharpie as the colored ones, though more fun, can tend to transfer onto your fabrics when you iron over them.  Ack!  Had that happen recently and I was so sad.

    Things to Do
    1. Make sure to prewash and preshrink all of your fabrics.  I wash my fabrics on warm/hot and then I dry my fabrics in the dryer with no softeners.  I always preshrink this way when I am using fabric for clothing construction.  I would hate to work hard on something only to have it shrink and not fit when I was done.
      Note: If washing small cuts of fabric you might want to use a lingerie bag so your fabrics do not unravel as much.
    2. Prewash your fusible interfacing to preshrink it.  This will prevent any wrinkles or waves that might arise when you iron or launder your garment.  To prewash your interfacing simply soak it in a sink for about 5 minutes in very warm water.  You don't want the water too hot to avoid removing the iron-on finish, but you do want it warm enough to shrink the interfacing.  After soaking, just pat it with a clean towel and hang it to dry.
    3. Press all of your fabrics well.  I try to do this straight out of the dryer so that the wrinkles come out easier.  
    4. Make sure to download the pattern and tutorial onto your computer, tablet, or smart phone. Your pattern will be located in your order history on our site.  Log into your account, then click on the My Account at the very top right hand side of our site.  You will then see a list of your orders.  Click on the correct order and a download link will be available. 
    5. Don't forget to join our Facebook Sew-Along Group so you can post your progress pictures. Everyone who posts completed lesson pictures, on time, to the Facebook Group, will be entered into drawings to win some awesome prizes!
    Happy Sewing,
    Danielle Storm
    www.whimsicalfabric.com
    #navbar-iframe{ display:none !important;}